Artikel ini belum diterjemahkan. Isi berikut berbahasa Inggris. Buka versi asli bahasa Inggris.
Adekabang — Tukang Ngoprek
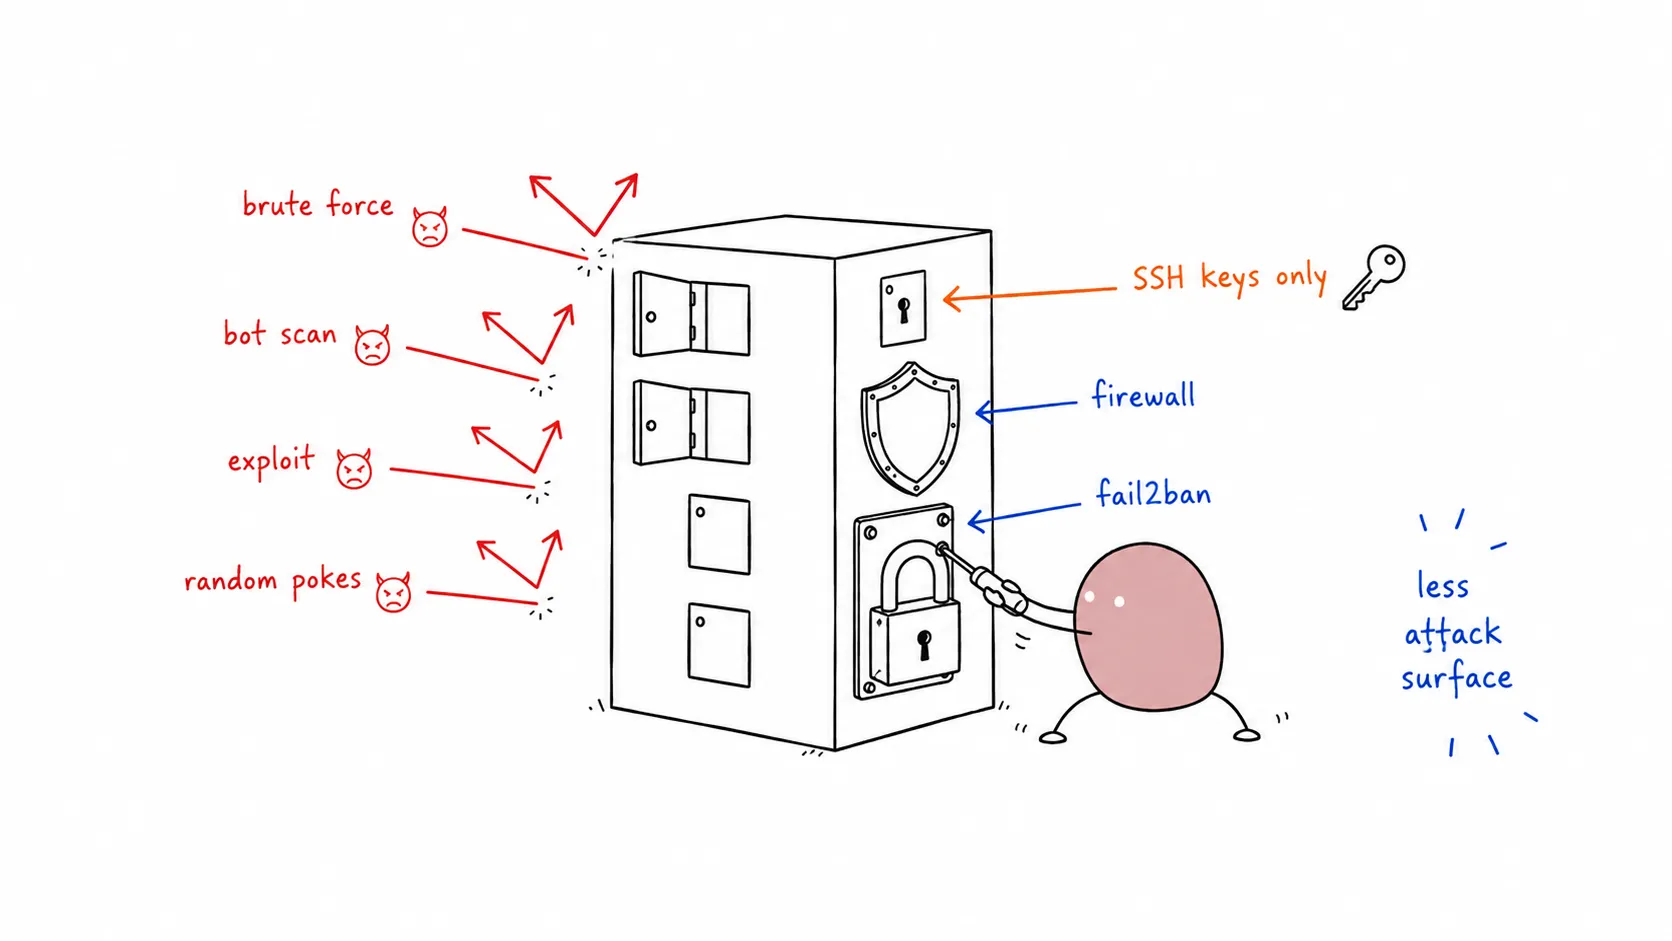
Securing your Ubuntu server is essential whether you’re running a production web server, a homelab service, or a cloud instance. This guide covers the essential steps to harden your Ubuntu Server 22.04/24.04 LTS installation, following security best practices and CIS benchmarks.
Prerequisites
- Ubuntu Server 22.04 LTS or 24.04 LTS (fresh installation preferred)
- Root or sudo access
- SSH access to the server
- Backup of critical data (always backup before making system changes)
Phase 1: Initial System Updates
Update System Packages
Start with a fully updated system to patch known vulnerabilities:
sudo apt update && sudo apt upgrade -y
sudo apt autoremove -y
sudo apt autoclean
Configure Automatic Security Updates
Enable unattended-upgrades for automatic security patches:
sudo apt install -y unattended-upgrades
sudo dpkg-reconfigure -plow unattended-upgrades
Verify the configuration:
cat /etc/apt/apt.conf.d/50unattended-upgrades | grep -A5 "Unattended-Upgrade::Allowed-Origins"Phase 2: Secure SSH Access
Change Default SSH Port (Optional but Recommended)
Changing from port 22 reduces automated attack attempts:
sudo nano /etc/ssh/sshd_configFind and modify:
Port 2222Disable Root Login
Prevent direct root access via SSH:
sudo nano /etc/ssh/sshd_configSet:
PermitRootLogin noDisable Password Authentication (Use SSH Keys Only)
⚠️ WARNING: Ensure you have SSH key access configured before disabling passwords!
sudo nano /etc/ssh/sshd_configSet:
PasswordAuthentication no
PubkeyAuthentication yes
Restrict SSH to Specific Users
Allow only specific users or groups:
sudo nano /etc/ssh/sshd_configAdd:
AllowUsers yourusername
# OR
AllowGroups ssh-users
Apply SSH Changes
Restart SSH service:
sudo systemctl restart sshd⚠️ IMPORTANT: Keep your current SSH session open and test a new connection before closing!
Phase 3: Firewall Configuration (UFW)
Install and Enable UFW
sudo apt install -y ufw
sudo ufw default deny incoming
sudo ufw default allow outgoing
Configure Firewall Rules
Allow your custom SSH port (if changed):
sudo ufw allow 2222/tcp comment 'SSH custom port'Or if using default SSH:
sudo ufw allow 22/tcp comment 'SSH'Allow common services (adjust as needed):
# HTTP/HTTPS (for web servers)
sudo ufw allow 80/tcp comment 'HTTP'
sudo ufw allow 443/tcp comment 'HTTPS'

# WireGuard VPN
sudo ufw allow 51820/udp comment 'WireGuard'

# DNS
sudo ufw allow 53/tcp comment 'DNS'
sudo ufw allow 53/udp comment 'DNS'
Enable UFW
sudo ufw enable
sudo ufw status verbose
Phase 4: Install and Configure Fail2ban
Fail2ban protects against brute-force attacks by banning IPs with suspicious activity.
Installation
sudo apt install -y fail2banCreate Custom Configuration
Create a local configuration file:
sudo nano /etc/fail2ban/jail.localAdd the following configuration:
[DEFAULT]
# Ban IP for 1 hour after 3 failed attempts within 10 minutes
bantime = 3600
findtime = 600
maxretry = 3
backend = systemd

# Enable email notifications (optional)
# destemail = your-email@example.com
# sender = fail2ban@your-server
# action = %(action_mwl)s

[sshd]
enabled = true
port = 2222,22
filter = sshd
logpath = /var/log/auth.log
maxretry = 3
bantime = 3600

# Protect additional services
[nginx-http-auth]
enabled = false

[nginx-noscript]
enabled = false

[nginx-botsearch]
enabled = false

[php-url-fopen]
enabled = false
Start Fail2ban
sudo systemctl enable --now fail2ban
sudo fail2ban-client status
sudo fail2ban-client status sshd
Phase 5: User and Permission Management
Create a Non-Root User (If Not Done)
sudo adduser yourusername
sudo usermod -aG sudo yourusername
Configure Password Policies
Install password quality checking:
sudo apt install -y libpam-pwquality
sudo nano /etc/security/pwquality.conf
Set strong password requirements:
minlen = 12
minclass = 3
maxrepeat = 2
dcredit = -1
ucredit = -1
ocredit = -1
lcredit = -1
Lock Unused Accounts
# List all users
awk -F: '$3 >= 1000 && $1 != "nobody" {print $1}' /etc/passwd

# Lock unused accounts
sudo passwd -l username
Phase 6: Disable Unnecessary Services
List Running Services
sudo systemctl list-units --type=service --state=runningDisable Common Unused Services
# Disable unnecessary services (adjust based on your needs)
sudo systemctl disable --now cups    # Printing (if not needed)
sudo systemctl disable --now avahi-daemon  # mDNS (if not needed)
Phase 7: File Permissions and Security
Secure Sensitive Files
# Secure SSH keys
sudo chmod 600 /etc/ssh/ssh_host_*_key
sudo chmod 644 /etc/ssh/ssh_host_*_key.pub

# Secure shadow file
sudo chmod 640 /etc/shadow

# Secure sudo configuration
sudo chmod 440 /etc/sudoers
Check for SUID/SGID Files
Find files with special permissions:
sudo find / -perm -4000 -type f 2>/dev/null
sudo find / -perm -2000 -type f 2>/dev/null
Phase 8: Network Security
Disable IPv6 (If Not Needed)
sudo nano /etc/sysctl.confAdd:
net.ipv6.conf.all.disable_ipv6 = 1
net.ipv6.conf.default.disable_ipv6 = 1
net.ipv6.conf.lo.disable_ipv6 = 1
Apply:
sudo sysctl -pConfigure Kernel Parameters
sudo nano /etc/sysctl.confAdd security hardening:
# IP Spoofing protection
net.ipv4.conf.all.rp_filter = 1
net.ipv4.conf.default.rp_filter = 1

# Ignore ICMP broadcast requests
net.ipv4.icmp_echo_ignore_broadcasts = 1

# Disable source packet routing
net.ipv4.conf.all.accept_source_route = 0
net.ipv4.conf.default.accept_source_route = 0

# Ignore send redirects
net.ipv4.conf.all.accept_redirects = 0
net.ipv4.conf.default.accept_redirects = 0
net.ipv4.conf.all.secure_redirects = 0
net.ipv4.conf.default.secure_redirects = 0

# Disable ICMP redirects
net.ipv4.conf.all.send_redirects = 0
net.ipv4.conf.default.send_redirects = 0

# Disable log martians
net.ipv4.conf.all.log_martians = 1

# Disable IPv6 router solicitations
net.ipv6.conf.all.accept_ra = 0
net.ipv6.conf.default.accept_ra = 0
Apply:
sudo sysctl -pPhase 9: Install Security Tools
Install and Configure AIDE (Intrusion Detection)
sudo apt install -y aide
sudo aideinit
sudo cp /var/lib/aide/aide.db.new /var/lib/aide/aide.db
Install Lynis (Security Auditing)
sudo apt install -y lynis
sudo lynis audit system
Install Rootkit Detectors
sudo apt install -y rkhunter chkrootbot
sudo rkhunter --update
sudo rkhunter --check
Install Log Monitoring
sudo apt install -y logwatchPhase 10: Backup and Recovery
Configure Automated Backups
Create a backup script:
sudo nano /usr/local/bin/system-backup.sh#!/bin/bash
# System backup script
DATE=$(date +%Y%m%d_%H%M%S)
BACKUP_DIR="/backup/system"
mkdir -p $BACKUP_DIR
# Backup critical configuration
tar czf $BACKUP_DIR/config_backup_$DATE.tar.gz /etc /home /var/spool/cron /var/lib/dpkg
# Keep only last 7 backups
ls -t $BACKUP_DIR/*.tar.gz | tail -n +8 | xargs -r rm
echo "Backup completed: $DATE"Make executable:
sudo chmod +x /usr/local/bin/system-backup.shAdd to Cron
sudo crontab -eAdd daily backup at 2 AM:
0 2 * * * /usr/local/bin/system-backup.sh >> /var/log/system-backup.log 2>&1Phase 11: Ongoing Monitoring
Install and Configure Auditd
sudo apt install -y auditd audispd-plugins
sudo systemctl enable --now auditd
Monitor Failed Login Attempts
grep "Failed password" /var/log/auth.log
grep "Accepted password" /var/log/auth.log
Review UFW Logs
sudo tail -f /var/log/ufw.logPhase 12: Secure Shared Memory
Shared memory is a common attack vector. While it’s efficient for process communication, it can be exploited for privilege escalation or arbitrary code execution.
Harden /run/shm
Add the following to /etc/fstab to mount shared memory with restrictive options:
echo "tmpfs /run/shm tmpfs defaults,noexec,nosuid,nodev 0 0" | sudo tee -a /etc/fstabExplanation:
noexec— Prevents execution of binariesnosuid— Ignores set-user-identifier bitsnodev— Prevents interpretation of device files
Apply changes:
sudo mount -o remount /run/shm
# Or reboot:
sudo reboot
Verify the mount:
mount | grep shm
# Should show: tmpfs on /run/shm type tmpfs (rw,nosuid,nodev,noexec,relatime)
Quick Security Checklist
Use this checklist to verify your hardening:
- System fully updated with automatic security updates enabled
- SSH root login disabled
- SSH password authentication disabled (keys only)
- SSH port changed from default (optional)
- UFW firewall enabled with minimal allowed ports
- Fail2ban installed and running
- Non-root user created for administration
- Password policies configured
- Unnecessary services disabled
- Shared memory secured (
noexec,nosuid,nodev) - Automatic backups configured
- Security auditing tools installed
Security Audit Cheatsheet
Quick commands to audit your server’s security:
User & Permission Auditing
# Find users with UID 0 (should only be root)
awk -F: '($3 == 0) {print}' /etc/passwd

# List all user accounts
awk -F: '{print $1}' /etc/passwd

# Find users without passwords (empty password field)
awk -F: '($2 == "") {print $1}' /etc/shadow

# Check for users with sudo access
getent group sudo

# Find SUID/SGID files (potential privilege escalation)
find / -perm -4000 -type f 2>/dev/null
find / -perm -2000 -type f 2>/dev/null
Network & Connection Auditing
# Check listening ports
ss -tulnp

# Check established connections
ss -tu np state established

# Review firewall status
sudo ufw status verbose

# Check for open ports from outside
# (Run from another machine)
nmap -sV your-server-ip
Log & Activity Auditing
# Recent login attempts
last -a | head -20

# Failed SSH login attempts
grep "Failed password" /var/log/auth.log | tail -20

# Successful SSH logins
grep "Accepted" /var/log/auth.log | tail -20

# Fail2ban status
sudo fail2ban-client status sshd

# UFW blocked attempts
sudo grep UFW /var/log/ufw.log | tail -20
System & File Auditing
# Disk usage
df -h

# Check for world-writable directories
find / -type d -perm -002 ! -path "/proc/*" ! -path "/sys/*" 2>/dev/null

# List recently modified files (last 24 hours)
find /etc /var -mtime -1 -type f 2>/dev/null

# Check AIDE database (if installed)
sudo aide --check

# Run Lynis audit
sudo lynis audit system --quick
One-Click Hardening Script
For quick deployment or automation, here’s a comprehensive hardening script. Review before running!
#!/bin/bash
# Ubuntu Server Hardening Script
# WARNING: Review before running. Test in non-production first!

set -e

# Colors for output
RED='\033[0;31m'
GREEN='\033[0;32m'
YELLOW='\033[1;33m'
NC='\033[0m' # No Color

echo -e "${YELLOW}=== Ubuntu Server Hardening Script ===${NC}"
echo -e "${RED}WARNING: Review this script before running!${NC}"
echo ""

# 1. System Updates
echo -e "${GREEN}[1/8] Updating system packages...${NC}"
apt update && apt upgrade -y
apt autoremove -y
apt autoclean

# 2. Install security tools
echo -e "${GREEN}[2/8] Installing security tools...${NC}"
apt install -y ufw fail2ban unattended-upgrades libpam-pwquality

# 3. Configure automatic updates
echo -e "${GREEN}[3/8] Configuring automatic security updates...${NC}"
dpkg-reconfigure -plow unattended-upgrades

# 4. UFW Firewall
echo -e "${GREEN}[4/8] Configuring UFW firewall...${NC}"
ufw default deny incoming
ufw default allow outgoing
ufw allow 22/tcp comment 'SSH'
ufw --force enable

# 5. SSH Hardening (preserves current session)
echo -e "${GREEN}[5/8] Hardening SSH configuration...${NC}"
cp /etc/ssh/sshd_config /etc/ssh/sshd_config.backup.$(date +%Y%m%d)

# Disable root login
sed -i 's/^#\?PermitRootLogin.*/PermitRootLogin no/' /etc/ssh/sshd_config

# Disable password authentication
sed -i 's/^#\?PasswordAuthentication.*/PasswordAuthentication no/' /etc/ssh/sshd_config
sed -i 's/^#\?PubkeyAuthentication.*/PubkeyAuthentication yes/' /etc/ssh/sshd_config

# Restart SSH (non-disruptive)
systemctl reload sshd || systemctl restart sshd

# 6. Fail2ban
echo -e "${GREEN}[6/8] Configuring Fail2ban...${NC}"
cat > /etc/fail2ban/jail.local <<EOF
[DEFAULT]
bantime = 3600
findtime = 600
maxretry = 3

[sshd]
enabled = true
port = ssh
filter = sshd
logpath = /var/log/auth.log
EOF

systemctl enable fail2ban
systemctl restart fail2ban

# 7. Secure Shared Memory
echo -e "${GREEN}[7/8] Securing shared memory...${NC}"
if ! grep -q "/run/shm" /etc/fstab; then
    echo "tmpfs /run/shm tmpfs defaults,noexec,nosuid,nodev 0 0" >> /etc/fstab
    mount -o remount /run/shm
fi

# 8. Kernel Security Parameters
echo -e "${GREEN}[8/8] Applying kernel security parameters...${NC}"
cat >> /etc/sysctl.conf <<EOF

# Security hardening
net.ipv4.conf.all.rp_filter = 1
net.ipv4.conf.default.rp_filter = 1
net.ipv4.icmp_echo_ignore_broadcasts = 1
net.ipv4.conf.all.accept_source_route = 0
net.ipv4.conf.default.accept_source_route = 0
net.ipv4.conf.all.accept_redirects = 0
net.ipv4.conf.default.accept_redirects = 0
net.ipv4.conf.all.send_redirects = 0
net.ipv4.conf.default.send_redirects = 0
EOF

sysctl -p

echo ""
echo -e "${GREEN}=== Hardening Complete! ===${NC}"
echo "Backup SSH config: /etc/ssh/sshd_config.backup.*"
echo ""
echo -e "${YELLOW}IMPORTANT:${NC}"
echo "1. Keep your current SSH session open"
echo "2. Test new SSH connection in another terminal"
echo "3. If locked out, restore from backup:"
echo "   cp /etc/ssh/sshd_config.backup.* /etc/ssh/sshd_config"
echo "   systemctl restart sshd"
echo ""
echo "Run 'lynis audit system' to verify hardening."
Save and run:
# Download and review
wget https://your-domain.com/harden.sh -O ubuntu-harden.sh
nano ubuntu-harden.sh  # Review before running!

# Make executable and run
chmod +x ubuntu-harden.sh
sudo ./ubuntu-harden.sh
Testing Your Security
After hardening, test your configuration:
- Verify SSH access: Try connecting with your key (not password)
- Test Fail2ban: Attempt failed logins and check ban status
- Check firewall: Use
nmapfrom another machine to scan open ports - Run Lynis audit: Review the hardening index score
# From another machine, scan your server
nmap -sV -O your-server-ip
Conclusion
This guide provides a solid security baseline for Ubuntu servers. Remember that security is an ongoing process:
- Monitor logs regularly for suspicious activity
- Keep system updated with security patches
- Review firewall rules periodically
- Audit user accounts and remove unused ones
- Test backups to ensure they work
⚠️ IMPORTANT: Always test changes in a non-production environment first. Keep a backup of working configurations before making changes.
Additional Resources
References
Security is a journey, not a destination. Stay vigilant!