Skip to content
Client Panel

Blog

Ubuntu Server Hardening - A Comprehensive Security Guide
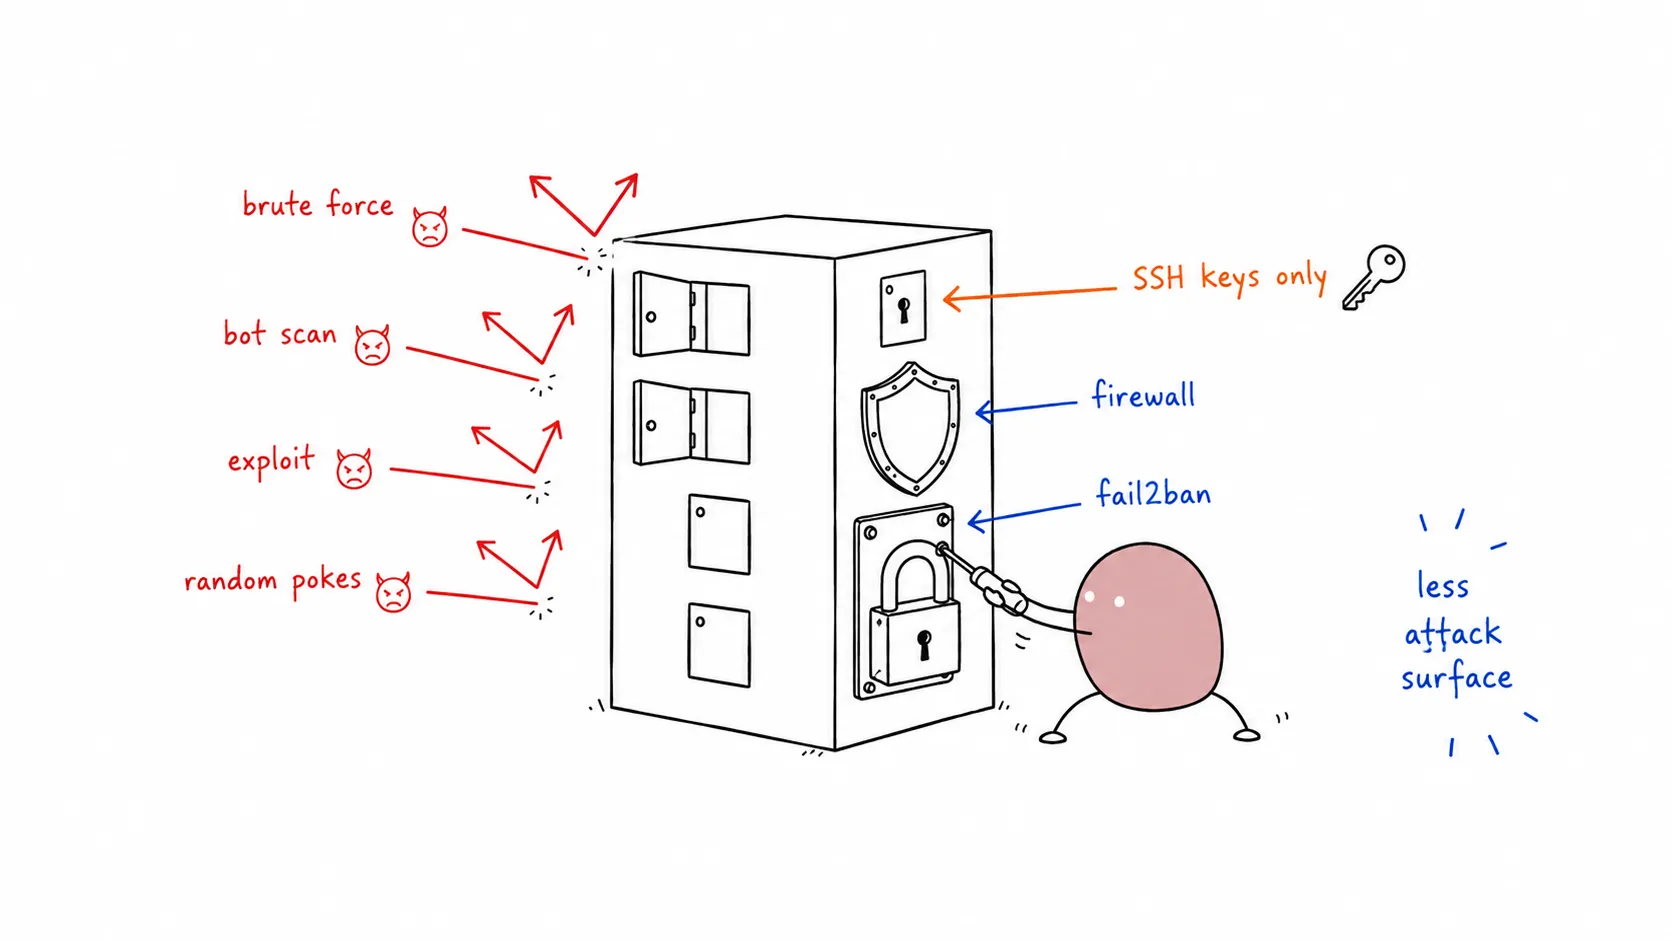
Tomochi bolting padlocks and shields onto a server box, sealing open doors

Securing your Ubuntu server is essential whether you’re running a production web server, a homelab service, or a cloud instance. This guide covers the essential steps to harden your Ubuntu Server 22.04/24.04 LTS installation, following security best practices and CIS benchmarks.

  • Ubuntu Server 22.04 LTS or 24.04 LTS (fresh installation preferred)
  • Root or sudo access
  • SSH access to the server
  • Backup of critical data (always backup before making system changes)

Start with a fully updated system to patch known vulnerabilities:

Terminal window
sudo apt update && sudo apt upgrade -y
sudo apt autoremove -y
sudo apt autoclean

Enable unattended-upgrades for automatic security patches:

Terminal window
sudo apt install -y unattended-upgrades
sudo dpkg-reconfigure -plow unattended-upgrades

Verify the configuration:

Terminal window
cat /etc/apt/apt.conf.d/50unattended-upgrades | grep -A5 "Unattended-Upgrade::Allowed-Origins"
Section titled “Change Default SSH Port (Optional but Recommended)”

Changing from port 22 reduces automated attack attempts:

Terminal window
sudo nano /etc/ssh/sshd_config

Find and modify:

Port 2222

Prevent direct root access via SSH:

Terminal window
sudo nano /etc/ssh/sshd_config

Set:

PermitRootLogin no

Disable Password Authentication (Use SSH Keys Only)

Section titled “Disable Password Authentication (Use SSH Keys Only)”

⚠️ WARNING: Ensure you have SSH key access configured before disabling passwords!

Terminal window
sudo nano /etc/ssh/sshd_config

Set:

PasswordAuthentication no
PubkeyAuthentication yes

Allow only specific users or groups:

Terminal window
sudo nano /etc/ssh/sshd_config

Add:

AllowUsers yourusername
# OR
AllowGroups ssh-users

Restart SSH service:

Terminal window
sudo systemctl restart sshd

⚠️ IMPORTANT: Keep your current SSH session open and test a new connection before closing!

Terminal window
sudo apt install -y ufw
sudo ufw default deny incoming
sudo ufw default allow outgoing

Allow your custom SSH port (if changed):

Terminal window
sudo ufw allow 2222/tcp comment 'SSH custom port'

Or if using default SSH:

Terminal window
sudo ufw allow 22/tcp comment 'SSH'

Allow common services (adjust as needed):

Terminal window
# HTTP/HTTPS (for web servers)
sudo ufw allow 80/tcp comment 'HTTP'
sudo ufw allow 443/tcp comment 'HTTPS'
# WireGuard VPN
sudo ufw allow 51820/udp comment 'WireGuard'
# DNS
sudo ufw allow 53/tcp comment 'DNS'
sudo ufw allow 53/udp comment 'DNS'
Terminal window
sudo ufw enable
sudo ufw status verbose

Fail2ban protects against brute-force attacks by banning IPs with suspicious activity.

Terminal window
sudo apt install -y fail2ban

Create a local configuration file:

Terminal window
sudo nano /etc/fail2ban/jail.local

Add the following configuration:

[DEFAULT]
# Ban IP for 1 hour after 3 failed attempts within 10 minutes
bantime = 3600
findtime = 600
maxretry = 3
backend = systemd
# Enable email notifications (optional)
# destemail = your-email@example.com
# sender = fail2ban@your-server
# action = %(action_mwl)s
[sshd]
enabled = true
port = 2222,22
filter = sshd
logpath = /var/log/auth.log
maxretry = 3
bantime = 3600
# Protect additional services
[nginx-http-auth]
enabled = false
[nginx-noscript]
enabled = false
[nginx-botsearch]
enabled = false
[php-url-fopen]
enabled = false
Terminal window
sudo systemctl enable --now fail2ban
sudo fail2ban-client status
sudo fail2ban-client status sshd
Terminal window
sudo adduser yourusername
sudo usermod -aG sudo yourusername

Install password quality checking:

Terminal window
sudo apt install -y libpam-pwquality
sudo nano /etc/security/pwquality.conf

Set strong password requirements:

minlen = 12
minclass = 3
maxrepeat = 2
dcredit = -1
ucredit = -1
ocredit = -1
lcredit = -1
Terminal window
# List all users
awk -F: '$3 >= 1000 && $1 != "nobody" {print $1}' /etc/passwd
# Lock unused accounts
sudo passwd -l username
Terminal window
sudo systemctl list-units --type=service --state=running
Terminal window
# Disable unnecessary services (adjust based on your needs)
sudo systemctl disable --now cups # Printing (if not needed)
sudo systemctl disable --now avahi-daemon # mDNS (if not needed)
Terminal window
# Secure SSH keys
sudo chmod 600 /etc/ssh/ssh_host_*_key
sudo chmod 644 /etc/ssh/ssh_host_*_key.pub
# Secure shadow file
sudo chmod 640 /etc/shadow
# Secure sudo configuration
sudo chmod 440 /etc/sudoers

Find files with special permissions:

Terminal window
sudo find / -perm -4000 -type f 2>/dev/null
sudo find / -perm -2000 -type f 2>/dev/null
Terminal window
sudo nano /etc/sysctl.conf

Add:

net.ipv6.conf.all.disable_ipv6 = 1
net.ipv6.conf.default.disable_ipv6 = 1
net.ipv6.conf.lo.disable_ipv6 = 1

Apply:

Terminal window
sudo sysctl -p
Terminal window
sudo nano /etc/sysctl.conf

Add security hardening:

# IP Spoofing protection
net.ipv4.conf.all.rp_filter = 1
net.ipv4.conf.default.rp_filter = 1
# Ignore ICMP broadcast requests
net.ipv4.icmp_echo_ignore_broadcasts = 1
# Disable source packet routing
net.ipv4.conf.all.accept_source_route = 0
net.ipv4.conf.default.accept_source_route = 0
# Ignore send redirects
net.ipv4.conf.all.accept_redirects = 0
net.ipv4.conf.default.accept_redirects = 0
net.ipv4.conf.all.secure_redirects = 0
net.ipv4.conf.default.secure_redirects = 0
# Disable ICMP redirects
net.ipv4.conf.all.send_redirects = 0
net.ipv4.conf.default.send_redirects = 0
# Disable log martians
net.ipv4.conf.all.log_martians = 1
# Disable IPv6 router solicitations
net.ipv6.conf.all.accept_ra = 0
net.ipv6.conf.default.accept_ra = 0

Apply:

Terminal window
sudo sysctl -p

Install and Configure AIDE (Intrusion Detection)

Section titled “Install and Configure AIDE (Intrusion Detection)”
Terminal window
sudo apt install -y aide
sudo aideinit
sudo cp /var/lib/aide/aide.db.new /var/lib/aide/aide.db
Terminal window
sudo apt install -y lynis
sudo lynis audit system
Terminal window
sudo apt install -y rkhunter chkrootbot
sudo rkhunter --update
sudo rkhunter --check
Terminal window
sudo apt install -y logwatch

Create a backup script:

Terminal window
sudo nano /usr/local/bin/system-backup.sh
#!/bin/bash
# System backup script
DATE=$(date +%Y%m%d_%H%M%S)
BACKUP_DIR="/backup/system"
mkdir -p $BACKUP_DIR
# Backup critical configuration
tar czf $BACKUP_DIR/config_backup_$DATE.tar.gz /etc /home /var/spool/cron /var/lib/dpkg
# Keep only last 7 backups
ls -t $BACKUP_DIR/*.tar.gz | tail -n +8 | xargs -r rm
echo "Backup completed: $DATE"

Make executable:

Terminal window
sudo chmod +x /usr/local/bin/system-backup.sh
Terminal window
sudo crontab -e

Add daily backup at 2 AM:

0 2 * * * /usr/local/bin/system-backup.sh >> /var/log/system-backup.log 2>&1
Terminal window
sudo apt install -y auditd audispd-plugins
sudo systemctl enable --now auditd
Terminal window
grep "Failed password" /var/log/auth.log
grep "Accepted password" /var/log/auth.log
Terminal window
sudo tail -f /var/log/ufw.log

Shared memory is a common attack vector. While it’s efficient for process communication, it can be exploited for privilege escalation or arbitrary code execution.

Add the following to /etc/fstab to mount shared memory with restrictive options:

Terminal window
echo "tmpfs /run/shm tmpfs defaults,noexec,nosuid,nodev 0 0" | sudo tee -a /etc/fstab

Explanation:

  • noexec — Prevents execution of binaries
  • nosuid — Ignores set-user-identifier bits
  • nodev — Prevents interpretation of device files

Apply changes:

Terminal window
sudo mount -o remount /run/shm
# Or reboot:
sudo reboot

Verify the mount:

Terminal window
mount | grep shm
# Should show: tmpfs on /run/shm type tmpfs (rw,nosuid,nodev,noexec,relatime)

Use this checklist to verify your hardening:

  • System fully updated with automatic security updates enabled
  • SSH root login disabled
  • SSH password authentication disabled (keys only)
  • SSH port changed from default (optional)
  • UFW firewall enabled with minimal allowed ports
  • Fail2ban installed and running
  • Non-root user created for administration
  • Password policies configured
  • Unnecessary services disabled
  • Shared memory secured (noexec,nosuid,nodev)
  • Automatic backups configured
  • Security auditing tools installed

Quick commands to audit your server’s security:

Terminal window
# Find users with UID 0 (should only be root)
awk -F: '($3 == 0) {print}' /etc/passwd
# List all user accounts
awk -F: '{print $1}' /etc/passwd
# Find users without passwords (empty password field)
awk -F: '($2 == "") {print $1}' /etc/shadow
# Check for users with sudo access
getent group sudo
# Find SUID/SGID files (potential privilege escalation)
find / -perm -4000 -type f 2>/dev/null
find / -perm -2000 -type f 2>/dev/null
Terminal window
# Check listening ports
ss -tulnp
# Check established connections
ss -tu np state established
# Review firewall status
sudo ufw status verbose
# Check for open ports from outside
# (Run from another machine)
nmap -sV your-server-ip
Terminal window
# Recent login attempts
last -a | head -20
# Failed SSH login attempts
grep "Failed password" /var/log/auth.log | tail -20
# Successful SSH logins
grep "Accepted" /var/log/auth.log | tail -20
# Fail2ban status
sudo fail2ban-client status sshd
# UFW blocked attempts
sudo grep UFW /var/log/ufw.log | tail -20
Terminal window
# Disk usage
df -h
# Check for world-writable directories
find / -type d -perm -002 ! -path "/proc/*" ! -path "/sys/*" 2>/dev/null
# List recently modified files (last 24 hours)
find /etc /var -mtime -1 -type f 2>/dev/null
# Check AIDE database (if installed)
sudo aide --check
# Run Lynis audit
sudo lynis audit system --quick

For quick deployment or automation, here’s a comprehensive hardening script. Review before running!

#!/bin/bash
# Ubuntu Server Hardening Script
# WARNING: Review before running. Test in non-production first!
set -e
# Colors for output
RED='\033[0;31m'
GREEN='\033[0;32m'
YELLOW='\033[1;33m'
NC='\033[0m' # No Color
echo -e "${YELLOW}=== Ubuntu Server Hardening Script ===${NC}"
echo -e "${RED}WARNING: Review this script before running!${NC}"
echo ""
# 1. System Updates
echo -e "${GREEN}[1/8] Updating system packages...${NC}"
apt update && apt upgrade -y
apt autoremove -y
apt autoclean
# 2. Install security tools
echo -e "${GREEN}[2/8] Installing security tools...${NC}"
apt install -y ufw fail2ban unattended-upgrades libpam-pwquality
# 3. Configure automatic updates
echo -e "${GREEN}[3/8] Configuring automatic security updates...${NC}"
dpkg-reconfigure -plow unattended-upgrades
# 4. UFW Firewall
echo -e "${GREEN}[4/8] Configuring UFW firewall...${NC}"
ufw default deny incoming
ufw default allow outgoing
ufw allow 22/tcp comment 'SSH'
ufw --force enable
# 5. SSH Hardening (preserves current session)
echo -e "${GREEN}[5/8] Hardening SSH configuration...${NC}"
cp /etc/ssh/sshd_config /etc/ssh/sshd_config.backup.$(date +%Y%m%d)
# Disable root login
sed -i 's/^#\?PermitRootLogin.*/PermitRootLogin no/' /etc/ssh/sshd_config
# Disable password authentication
sed -i 's/^#\?PasswordAuthentication.*/PasswordAuthentication no/' /etc/ssh/sshd_config
sed -i 's/^#\?PubkeyAuthentication.*/PubkeyAuthentication yes/' /etc/ssh/sshd_config
# Restart SSH (non-disruptive)
systemctl reload sshd || systemctl restart sshd
# 6. Fail2ban
echo -e "${GREEN}[6/8] Configuring Fail2ban...${NC}"
cat > /etc/fail2ban/jail.local <<EOF
[DEFAULT]
bantime = 3600
findtime = 600
maxretry = 3
[sshd]
enabled = true
port = ssh
filter = sshd
logpath = /var/log/auth.log
EOF
systemctl enable fail2ban
systemctl restart fail2ban
# 7. Secure Shared Memory
echo -e "${GREEN}[7/8] Securing shared memory...${NC}"
if ! grep -q "/run/shm" /etc/fstab; then
echo "tmpfs /run/shm tmpfs defaults,noexec,nosuid,nodev 0 0" >> /etc/fstab
mount -o remount /run/shm
fi
# 8. Kernel Security Parameters
echo -e "${GREEN}[8/8] Applying kernel security parameters...${NC}"
cat >> /etc/sysctl.conf <<EOF
# Security hardening
net.ipv4.conf.all.rp_filter = 1
net.ipv4.conf.default.rp_filter = 1
net.ipv4.icmp_echo_ignore_broadcasts = 1
net.ipv4.conf.all.accept_source_route = 0
net.ipv4.conf.default.accept_source_route = 0
net.ipv4.conf.all.accept_redirects = 0
net.ipv4.conf.default.accept_redirects = 0
net.ipv4.conf.all.send_redirects = 0
net.ipv4.conf.default.send_redirects = 0
EOF
sysctl -p
echo ""
echo -e "${GREEN}=== Hardening Complete! ===${NC}"
echo "Backup SSH config: /etc/ssh/sshd_config.backup.*"
echo ""
echo -e "${YELLOW}IMPORTANT:${NC}"
echo "1. Keep your current SSH session open"
echo "2. Test new SSH connection in another terminal"
echo "3. If locked out, restore from backup:"
echo " cp /etc/ssh/sshd_config.backup.* /etc/ssh/sshd_config"
echo " systemctl restart sshd"
echo ""
echo "Run 'lynis audit system' to verify hardening."

Save and run:

Terminal window
# Download and review
wget https://your-domain.com/harden.sh -O ubuntu-harden.sh
nano ubuntu-harden.sh # Review before running!
# Make executable and run
chmod +x ubuntu-harden.sh
sudo ./ubuntu-harden.sh

After hardening, test your configuration:

  1. Verify SSH access: Try connecting with your key (not password)
  2. Test Fail2ban: Attempt failed logins and check ban status
  3. Check firewall: Use nmap from another machine to scan open ports
  4. Run Lynis audit: Review the hardening index score
Terminal window
# From another machine, scan your server
nmap -sV -O your-server-ip

This guide provides a solid security baseline for Ubuntu servers. Remember that security is an ongoing process:

  • Monitor logs regularly for suspicious activity
  • Keep system updated with security patches
  • Review firewall rules periodically
  • Audit user accounts and remove unused ones
  • Test backups to ensure they work

⚠️ IMPORTANT: Always test changes in a non-production environment first. Keep a backup of working configurations before making changes.


Security is a journey, not a destination. Stay vigilant!
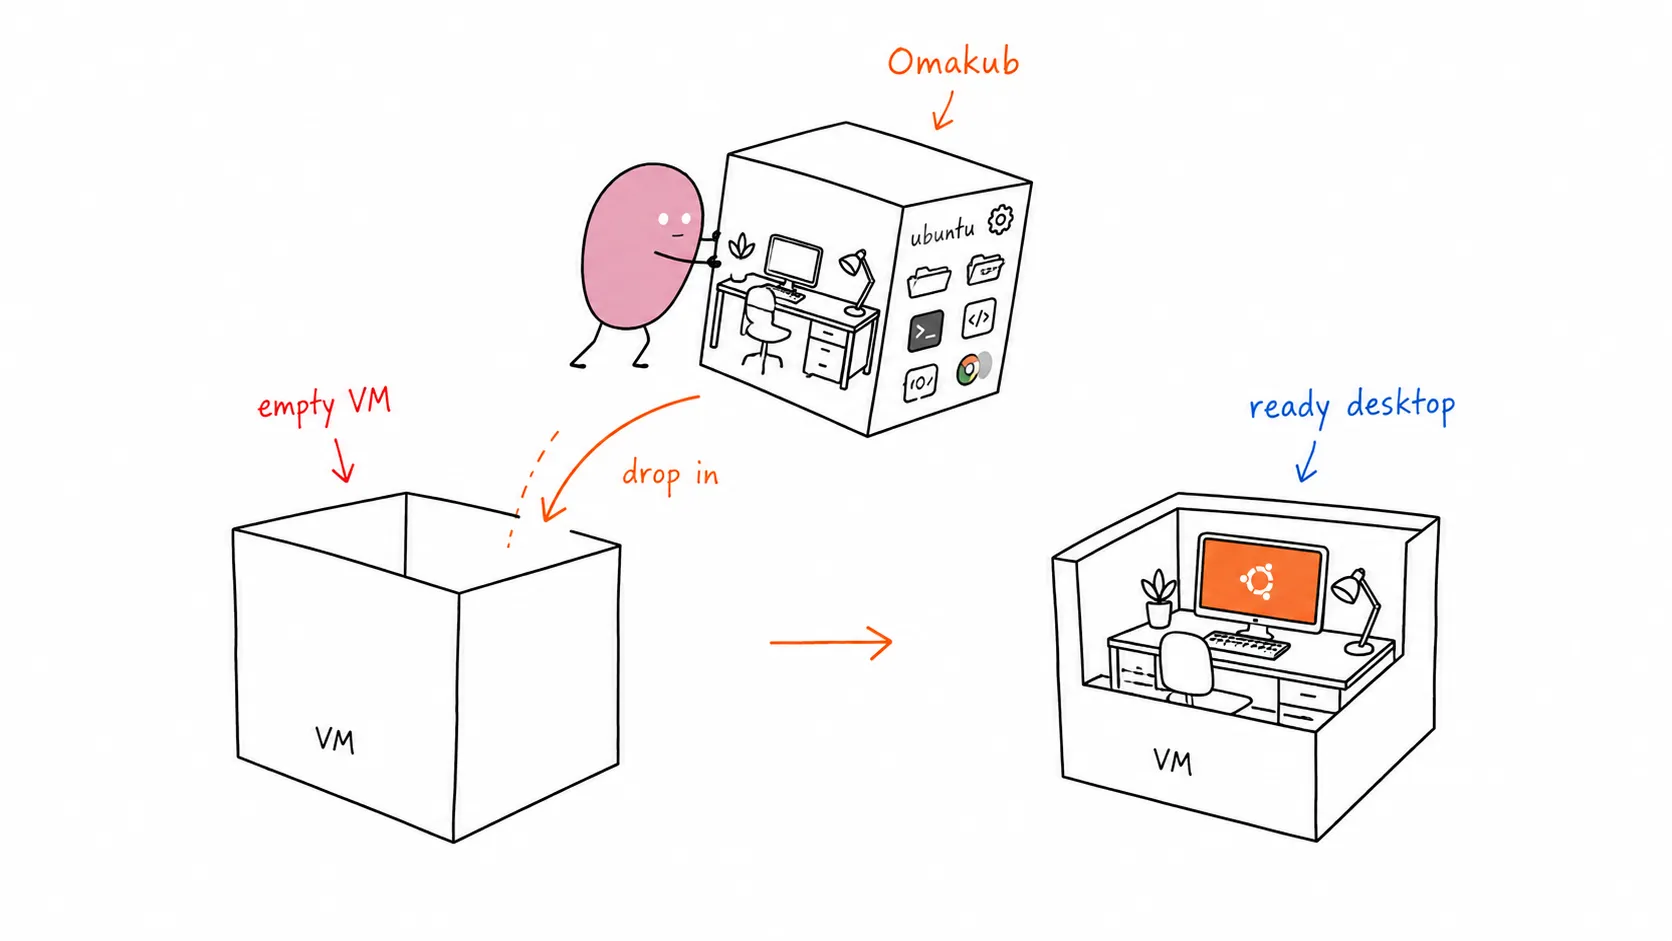
Installing Omakub on a Proxmox Virtual Machine

Tomochi dropping a pre-furnished desktop into an empty VM box

I recently found myself in a common homelab dilemma: I needed a dedicated machine for a jumphost and remote development environment, but all my spare hardware was already tied up with my Proxmox server running other services. So, I decided to leverage my existing Proxmox setup and install Omakub inside a virtual machine.

Omakub, based on Ubuntu, provides a clean and efficient workspace, perfect for keeping my main PC clutter-free while still having a powerful Linux environment at my fingertips. This guide will walk you through setting up a fresh Ubuntu 24.04 VM in Proxmox and then installing Omakub.

For this setup, I allocated the following resources to my Proxmox VM:

  • VCPU: 8
  • RAM: 16 GB
  • Storage: 512 GB SSD

Step by Step: Ubuntu 24.04 Installation (Proxmox VM)

Section titled “Step by Step: Ubuntu 24.04 Installation (Proxmox VM)”
  1. Download Ubuntu 24.04 ISO: First, grab the official Ubuntu 24.04 Desktop ISO from the Ubuntu website. https://releases.ubuntu.com/24.04/

  2. Create a New VM in Proxmox: Follow the standard Proxmox procedure to create a new virtual machine.

    • Mount the downloaded Ubuntu ISO as a CD/DVD drive.
    • Configure the VM with the specifications mentioned above (8 VCPU, 16 GB RAM, 512 GB SSD).
    • Ensure you select “Qemu Agent” in the VM options for better integration.
  3. Install Ubuntu 24.04: Boot the VM and proceed with a fresh installation of Ubuntu 24.04 Desktop. Follow the on-screen prompts to set up your user, timezone, etc.

Once Ubuntu is installed and you’ve rebooted into your fresh desktop, perform these crucial steps before installing Omakub:

  1. Update all repositories:

    Terminal window
    sudo apt update && sudo apt upgrade -y

    If a reboot is requested after the update, go ahead and reboot your VM.

  2. Install essential tools:

    Terminal window
    sudo apt install -y vim qemu-guest-agent openssh-server
  3. Enable and start services:

    Terminal window
    sudo systemctl enable --now qemu-guest-agent
    sudo systemctl enable --now ssh

After ensuring your system is updated and services are running, you can enable Remote Desktop for easier access.

  1. Open Settings > System > Remote Desktop.
  2. Toggle Remote Desktop to ON.
  3. For Remote Login, you can choose to set a specific port (the default RDP port is 3389).
  4. Set your desired username and password for remote access.

Now, you can test connecting to your Ubuntu VM using an RDP client. I use Microsoft Remote Desktop on my Mac.

Once you have successfully connected to your Ubuntu VM via RDP, you can proceed with the Omakub installation using their convenient one-line script.

Open a terminal in your Ubuntu VM and run:

Terminal window
wget -qO- https://omakub.org/install | bash

Follow the on-screen prompts to select your preferred options. The installation will take some time and will eventually request a reboot.

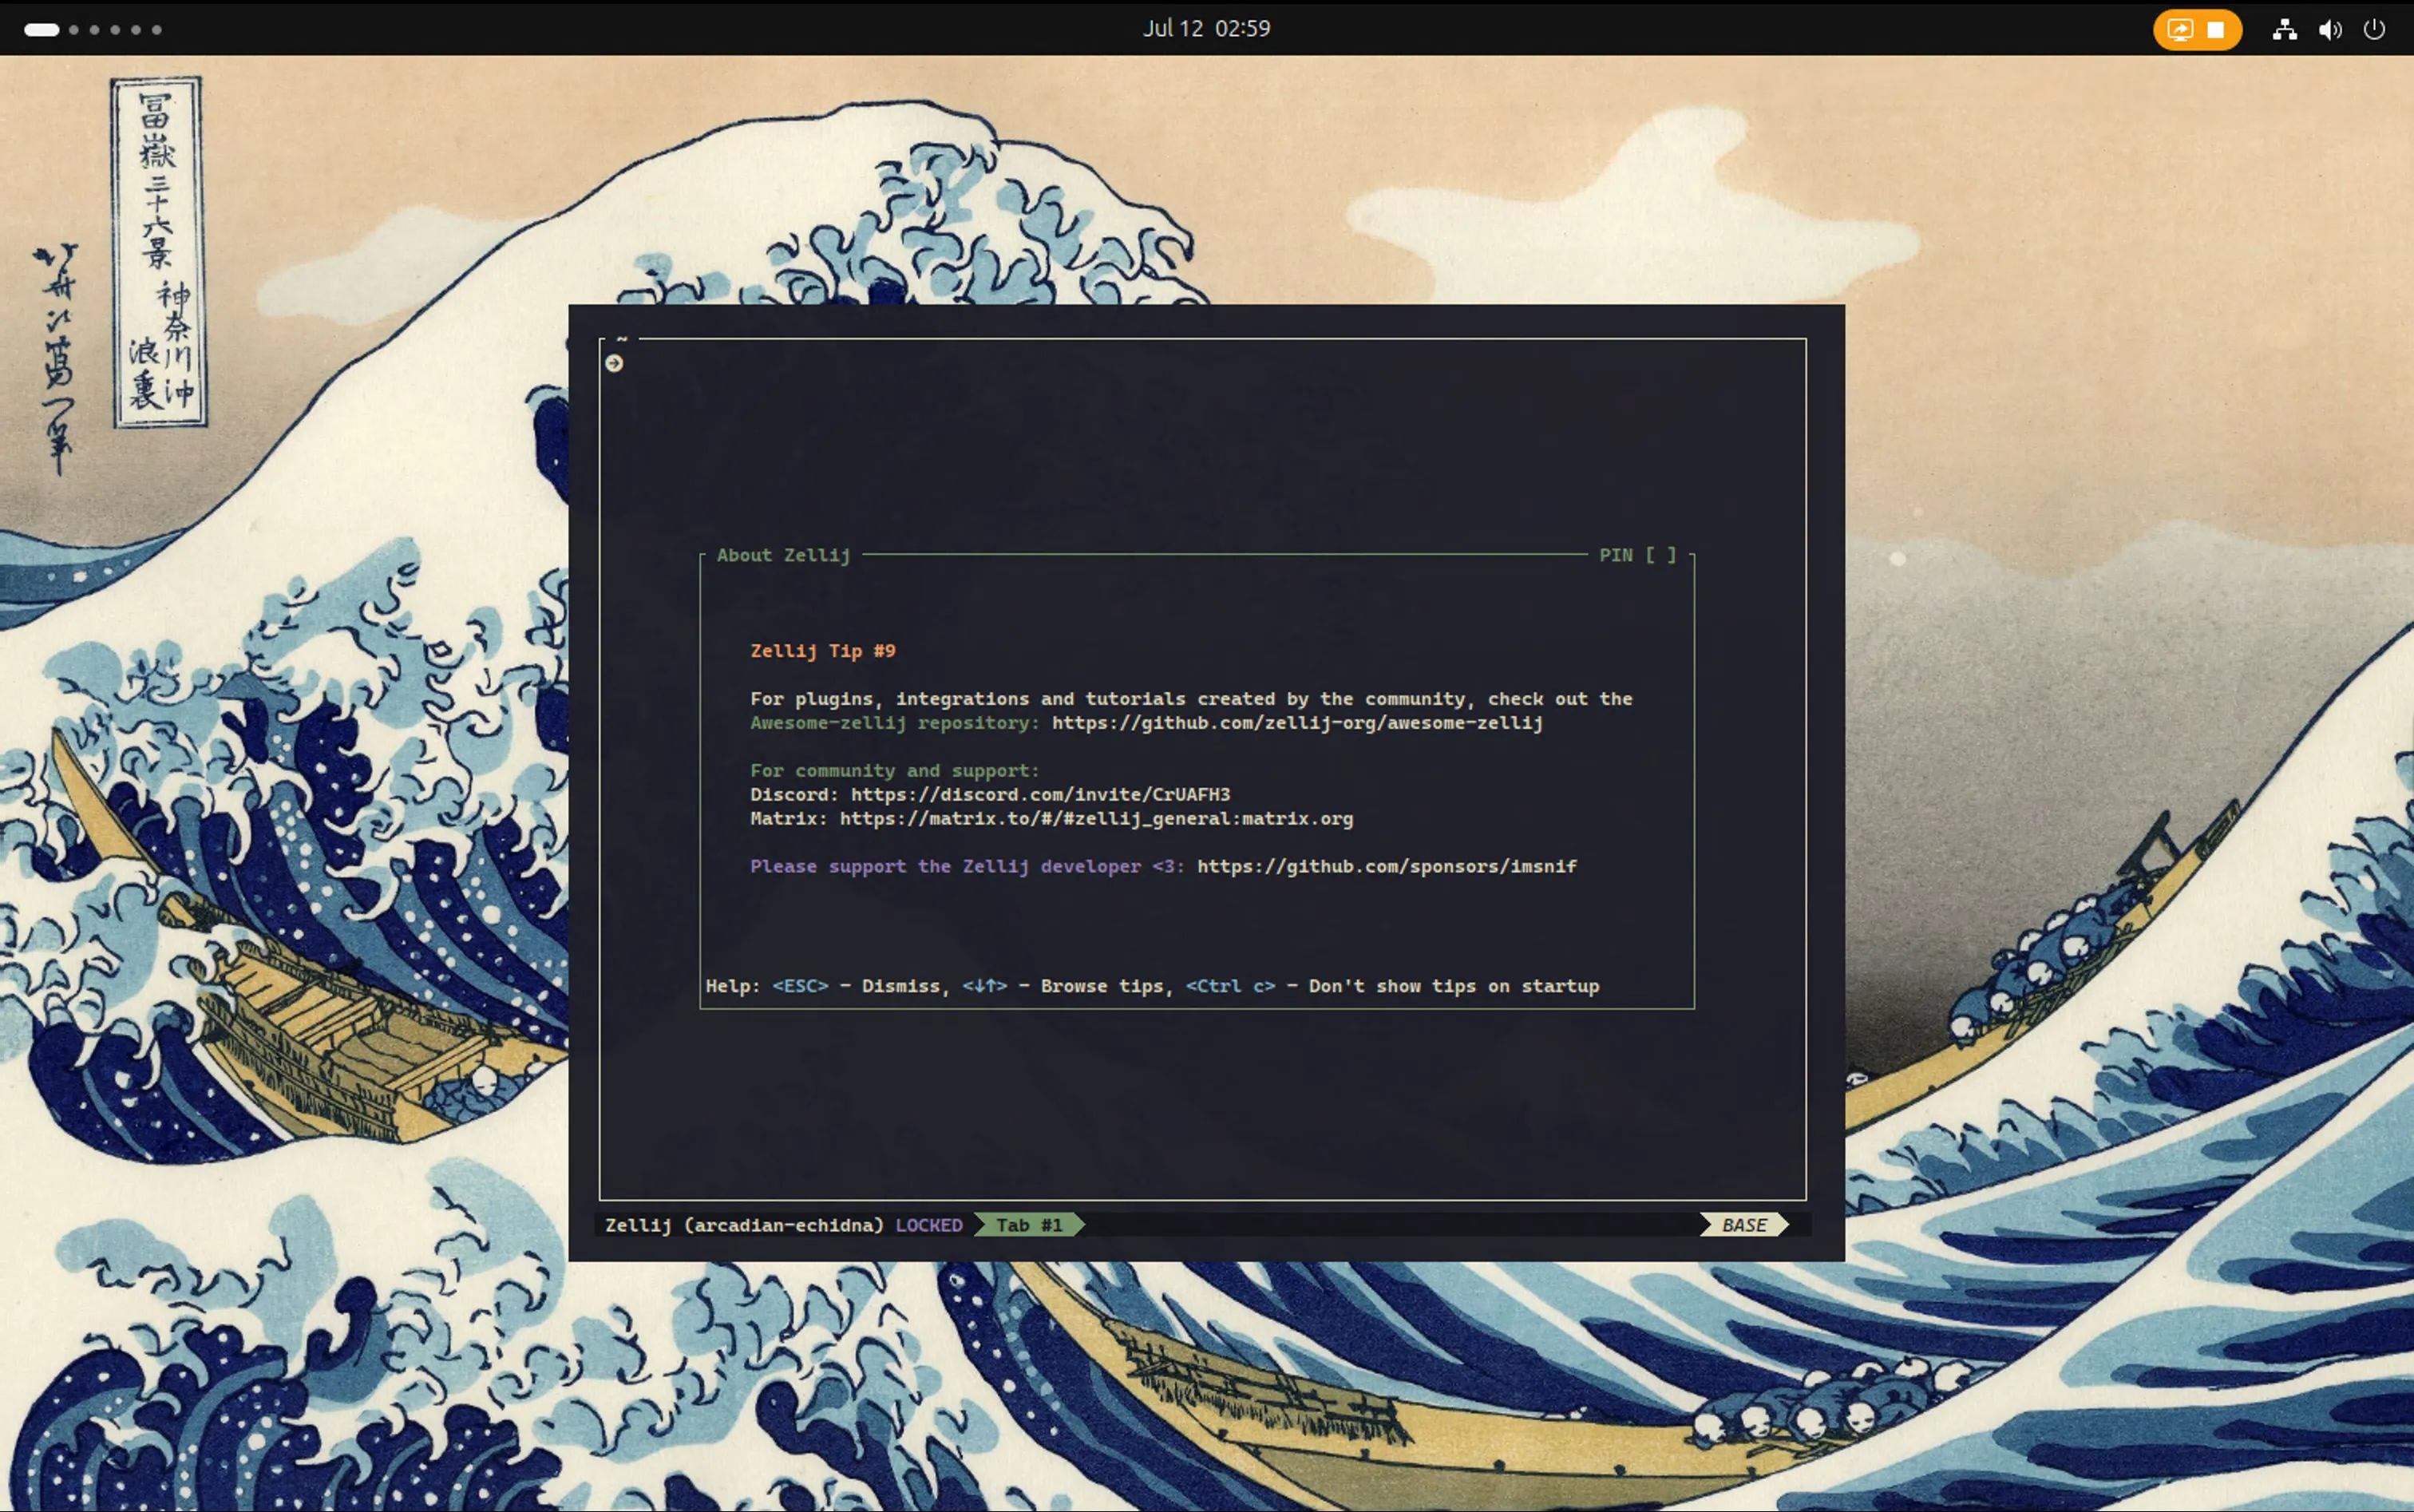
Terminal Landing Page

Post-Omakub Installation & Troubleshooting

Section titled “Post-Omakub Installation & Troubleshooting”

After Omakub is installed and your VM has rebooted, try to connect again via RDP.

  • Xorg Session: Omakub uses Xorg. If you experience lagging or a black screen upon login, ensure you select “Ubuntu on Xorg” after entering your username and before typing your password. Look for a small gear icon (or similar) in the bottom right corner of the login screen to choose the session type.

  • RDP Black Screen Troubleshooting (macOS Microsoft Remote Desktop): If you encounter a black screen specifically when using Microsoft Remote Desktop on macOS, you might need to adjust the RDP connection file:

    1. Right-click on your existing connection in Microsoft Remote Desktop.
    2. Select “Export” to save the connection settings as an .rdp file.
    3. Open the saved .rdp file with a text editor.
    4. Locate the line:
      use redirection server name:i:0
    5. Change it to:
      use redirection server name:i:1
    6. Save the modified file.
    7. Import the edited file as a new connection in Microsoft Remote Desktop.

    For more details, you can refer to this Reddit thread: https://www.reddit.com/r/Ubuntu/comments/1csoi05/2404_cannot_connect_via_rdp/?utm_source=share&utm_medium=web3x&utm_name=web3xcss&utm_term=1&utm_content=share_button

Troubleshooting Keyboard Shortcuts (Super Key Conflicts)

Section titled “Troubleshooting Keyboard Shortcuts (Super Key Conflicts)”

A common issue when using Remote Desktop from macOS to a Linux VM (especially with Omakub) is that macOS’s system-level shortcuts can conflict with the VM’s shortcuts, particularly those involving the Super key (Cmd key on Mac). For example, Super+Space often triggers Spotlight on macOS instead of Omakub’s application launcher.

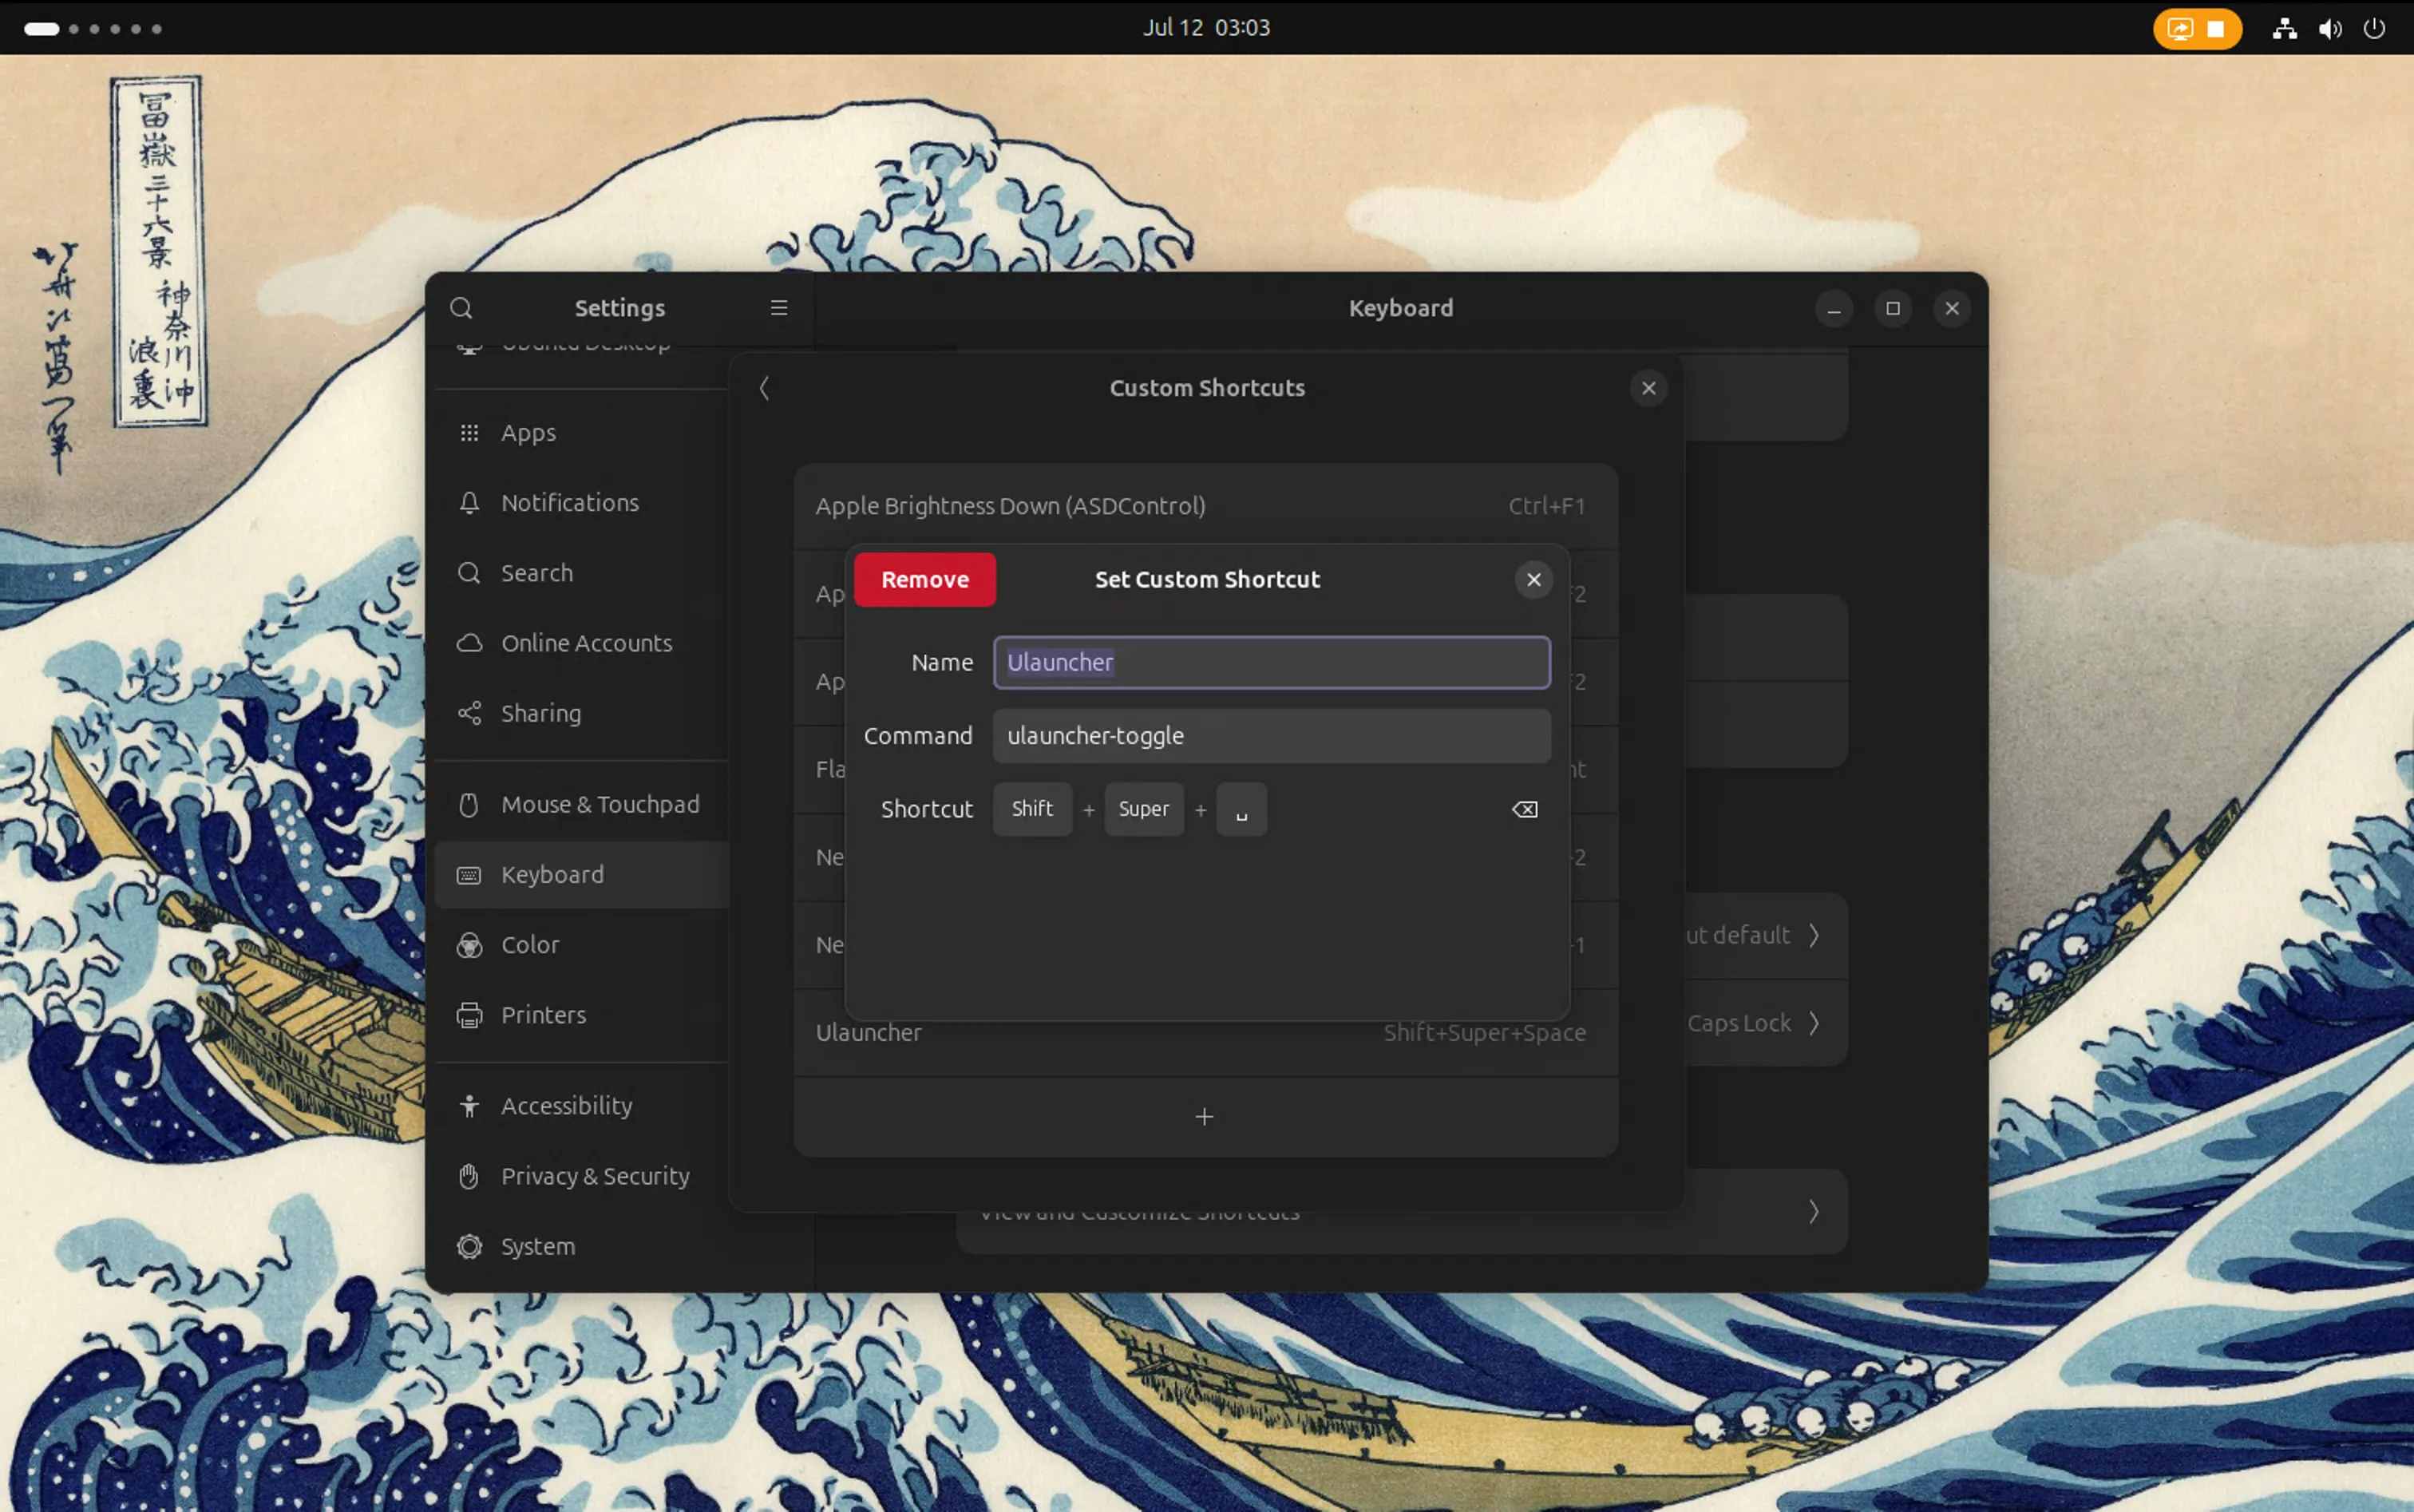
Shortcut Settings

To resolve this, you can adjust the hotkeys within Omakub to avoid conflicts:

  • Ulauncher (“Type app to launch”):

    • Original: Super + Space
    • New: Shift + Super + Space
    • You can find and modify this shortcut within Omakub’s settings, often under “Keyboard” or “Custom Shortcuts,” specifically looking for Ulauncher.
  • “See all apps” (System):

    • Original: Super + A
    • New: Shift + Super + A
  • “Close app” (Windows):

    • Original: Super + W
    • New: Shift + Super + W

By changing these keybindings in Omakub, you allow macOS to retain its system-level shortcuts while still having access to Omakub’s features with non-conflicting combinations.

You’ve now successfully installed Omakub on an Ubuntu 24.04 virtual machine within Proxmox! This setup provides a powerful and isolated environment for your jumphost and remote development needs, all while leveraging your existing homelab infrastructure. Enjoy your clean main PC and your new Omakub workspace!

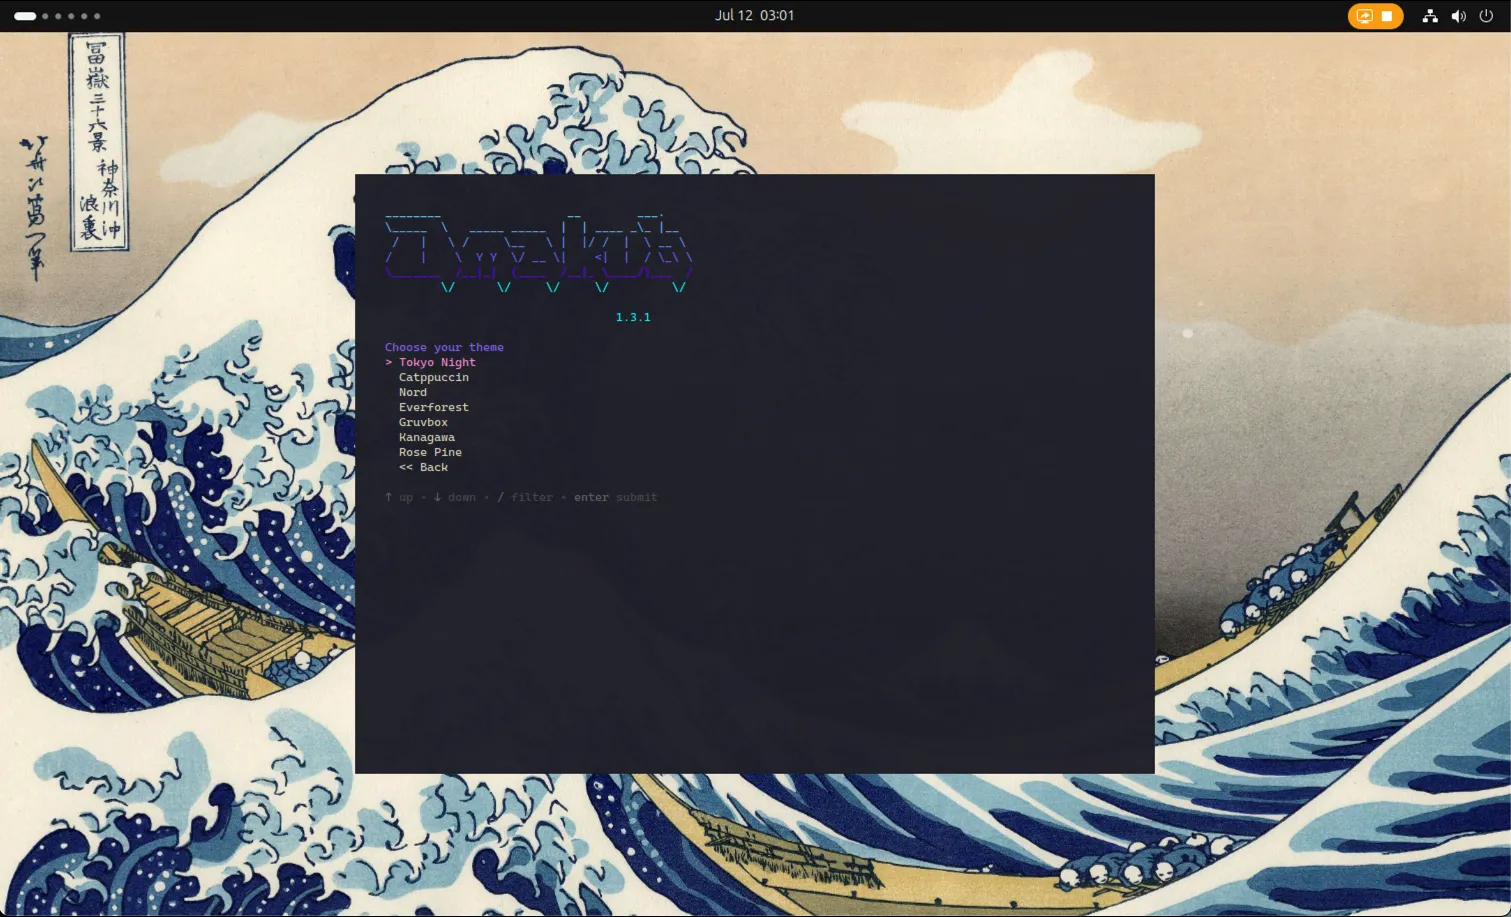
Omakub Theme

Qemu and Virt-manager in macOS (Intel-based)

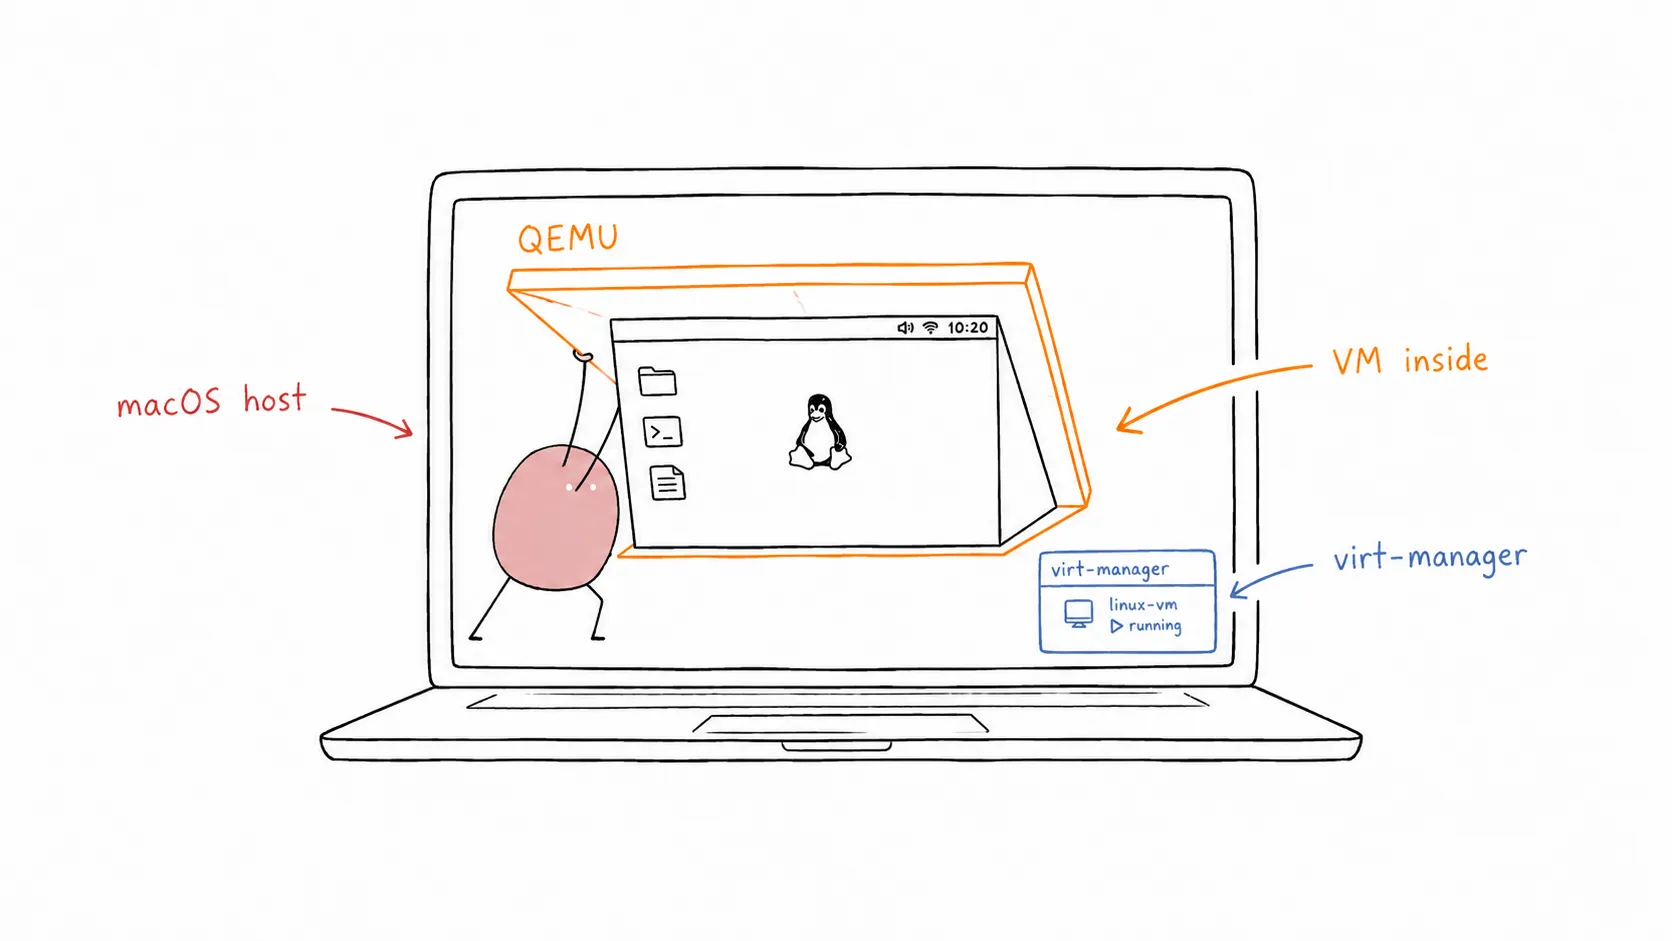
Tomochi propping open a nested Linux VM window inside a macOS laptop

So, I found this old iMac (Retina 5K, 27-inch, 2017) lying around with pretty decent specs. I’m thinking of turning it into my dedicated x86 playground since my main machine is an M1 MacBook. First thing’s first: getting Qemu and Virt-manager up and running for some virtual machine action. Yeah, I know there are other VM solutions like VMware or VirtualBox, but I want to stay familiar with what’s common in enterprise environments (even if nobody’s running macOS in production, haha!).

iMac (Retina 5K, 27-inch, 2017)

  • Processor: 4.2 GHz Quad-Core Intel Core i7
  • Memory: 16 GB 2400 MHz DDR4
  • OS Version: Ventura 13.7.4 (22H420)
  1. First, we need Homebrew to install everything.

    Get it here: https://brew.sh/

    Terminal window
    /bin/bash -c "$(curl -fsSL <https://raw.githubusercontent.com/Homebrew/install/HEAD/install.sh>)"
  2. Now, let’s install Qemu itself.

    Check it out here: https://formulae.brew.sh/formula/qemu

    Terminal window
    brew install qemu
  3. Verify the installation by checking the Qemu version.

    Terminal window
    qemu-system-x86_64 --version

    Check qemu version

  4. Let’s get Ubuntu running with Qemu.

    1. Before we dive in, grab the Ubuntu ISO. I’m going with the desktop version from here: https://releases.ubuntu.com/24.04/. I’ll use the desktop version (https://releases.ubuntu.com/24.04/ubuntu-24.04.2-desktop-amd64.iso).

    2. Create a disk image using qemu-img. I’m making a 20GB image in the qcow2 format.

      Terminal window
      qemu-img create -f qcow2 ubuntu-24.04.2-desktop-amd64.qcow2 20G
    3. Fire up the VM, booting from the ISO we just downloaded (mounted as a CD drive) and attaching the virtual disk we created.

      Terminal window
      qemu-system-x86_64 \\
      -machine type=q35,accel=hvf \\
      -smp 2 \\
      -hda ubuntu-24.04.2-desktop-amd64.qcow2 \\
      -cdrom ./ubuntu-24.04.2-desktop-amd64.iso \\
      -m 4G \\
      -vga virtio \\
      -usb \\
      -device usb-tablet \\
      -display default,show-cursor=on

      Here’s a breakdown of what those flags actually mean:

      • qemu-system-x86_64: Tells QEMU we want to emulate a 64-bit Intel/AMD system.
      • machine type=q35,accel=hvf
        • type=q35: Sets the machine chipset to Q35, emulating a modern PC with PCI Express.
        • accel=hvf: Uses the Hypervisor Framework (HVF) for hardware acceleration on macOS. This makes things much faster!
      • smp 2: Gives the VM 2 CPU cores.
      • hda ubuntu-24.04.2-desktop-amd64.qcow2: Specifies the QCOW2 disk image as the primary hard drive.
      • cdrom ./ubuntu-24.04.2-desktop-amd64.iso: Mounts the ISO as a virtual CD-ROM for booting/installing.
      • m 4G: Allocates 4GB of RAM to the VM.
      • vga virtio: Uses a Virtio-based video card for better performance.
      • usb: Enables USB support.
      • device usb-tablet: Adds a virtual USB tablet for smoother mouse input.
      • display default,show-cursor=on: Makes sure the mouse cursor is visible.
    4. The VM should boot up from the ISO. Go ahead and install the OS to the virtual disk we created earlier.

    5. Once the installation is done, you can boot the VM without the ISO.

      Terminal window
      qemu-system-x86_64 \\
      -machine type=q35,accel=hvf \\
      -smp 2 \\
      -hda ubuntu-24.04.2-desktop-amd64.qcow2 \\
      -m 4G \\
      -vga virtio \\
      -usb \\
      -device usb-tablet \\
      -display default,show-cursor=on

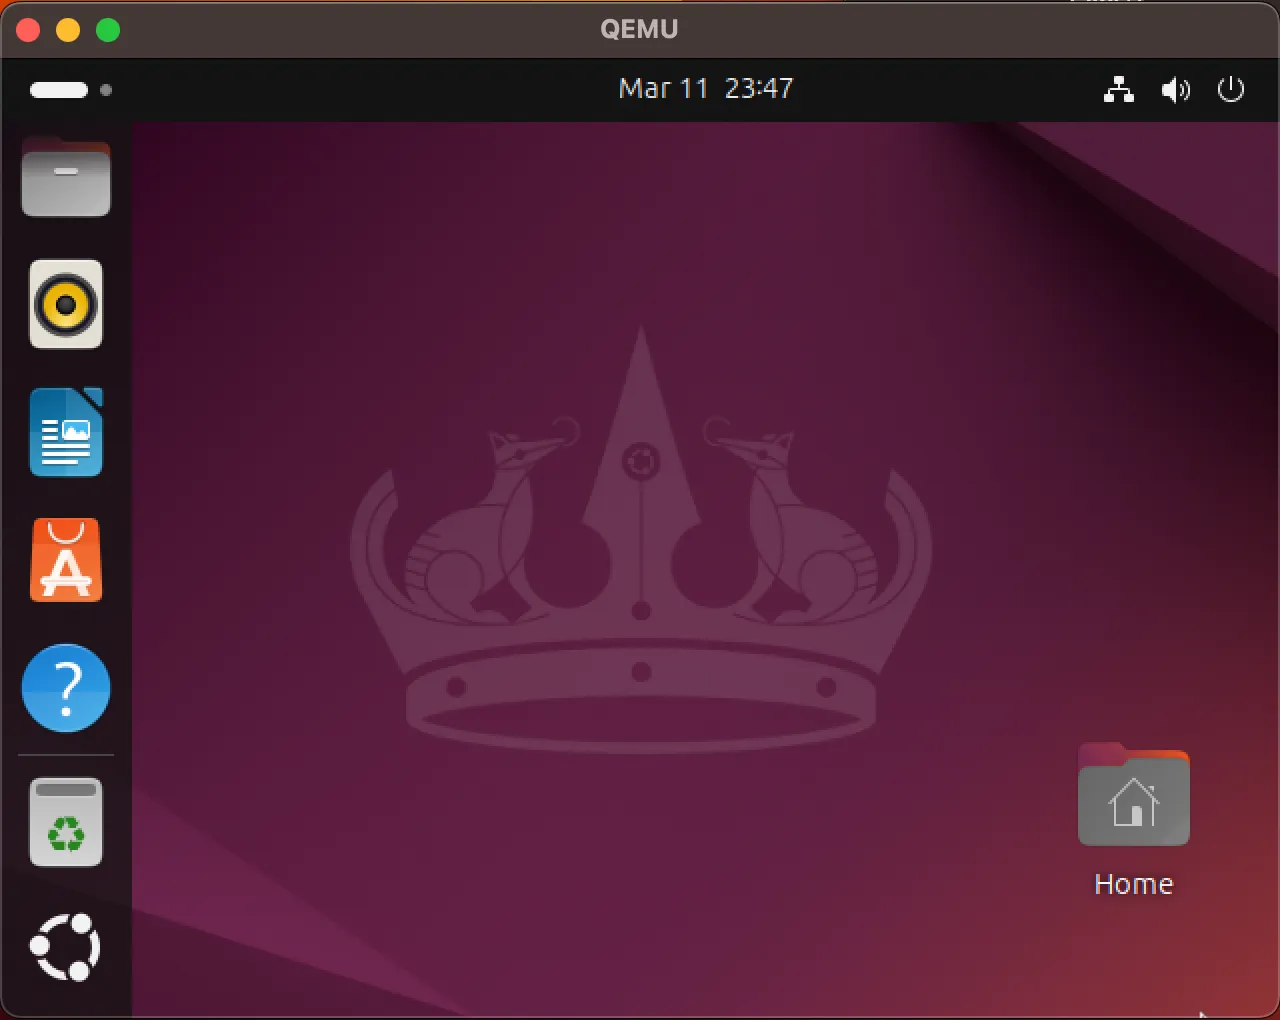
      Ubuntu Desktop VM in qemu

    6. To shut down the VM, do it cleanly from within the OS, or, if you’re feeling lazy, just hit Ctrl+C in the terminal (but I wouldn’t recommend it!).

  1. Install libvirt.

    libvirt is a toolkit for managing virtualization platforms like Qemu, KVM, Xen, etc.

    Check it out here: https://formulae.brew.sh/formula/libvirt

    Terminal window
    brew install libvirt
  2. Start the libvirt service.

    Terminal window
    brew services start libvirt
  3. Install virt-manager. To make managing VMs easier, we’ll use virt-manager as a GUI.

    Check it out here: https://formulae.brew.sh/formula/virt-manager

    Terminal window
    brew install virt-manager
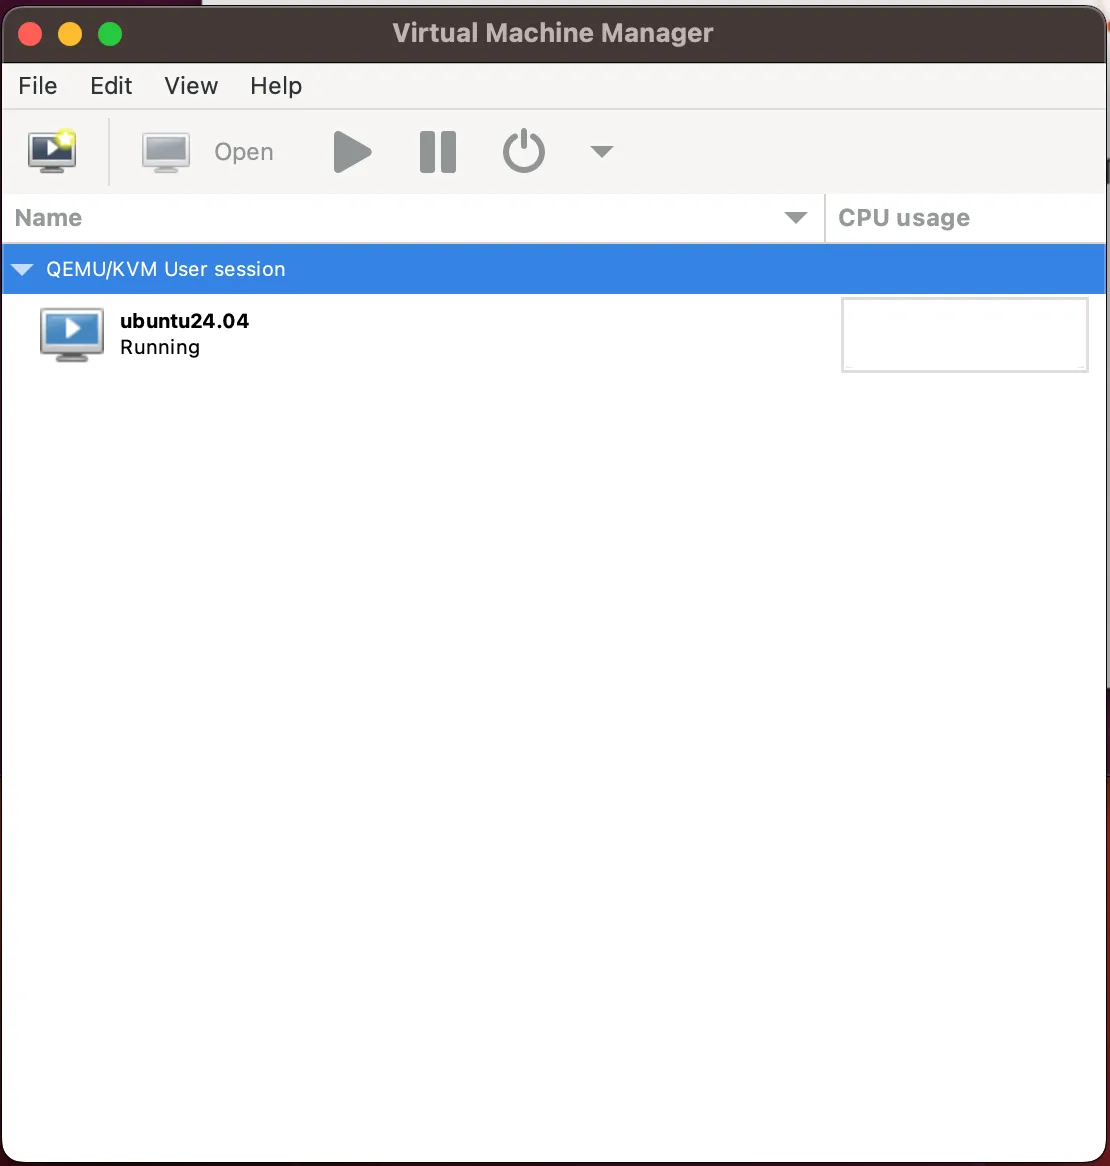
  4. Start a virt-manager session.

    Terminal window
    virt-manager -c "qemu:///session" --no-fork
  5. Once the window pops up, you can install Ubuntu VMs and mess around.

    virt-manager window

So there you have it! Qemu, libvirt, and virt-manager all set up on macOS. It wasn’t too bad, right? Now you can spin up VMs to your heart’s content. This setup is pretty handy for testing different operating systems, playing around with software, or just generally tinkering without messing up your main system. Plus, getting familiar with these tools can be a real boost if you ever find yourself working with virtualization in a more “serious” environment. Happy virtualizing!

https://www.arthurkoziel.com/qemu-ubuntu-20-04/

https://www.arthurkoziel.com/running-virt-manager-and-libvirt-on-macos/

Setup Non HA Kubernetes using K3S

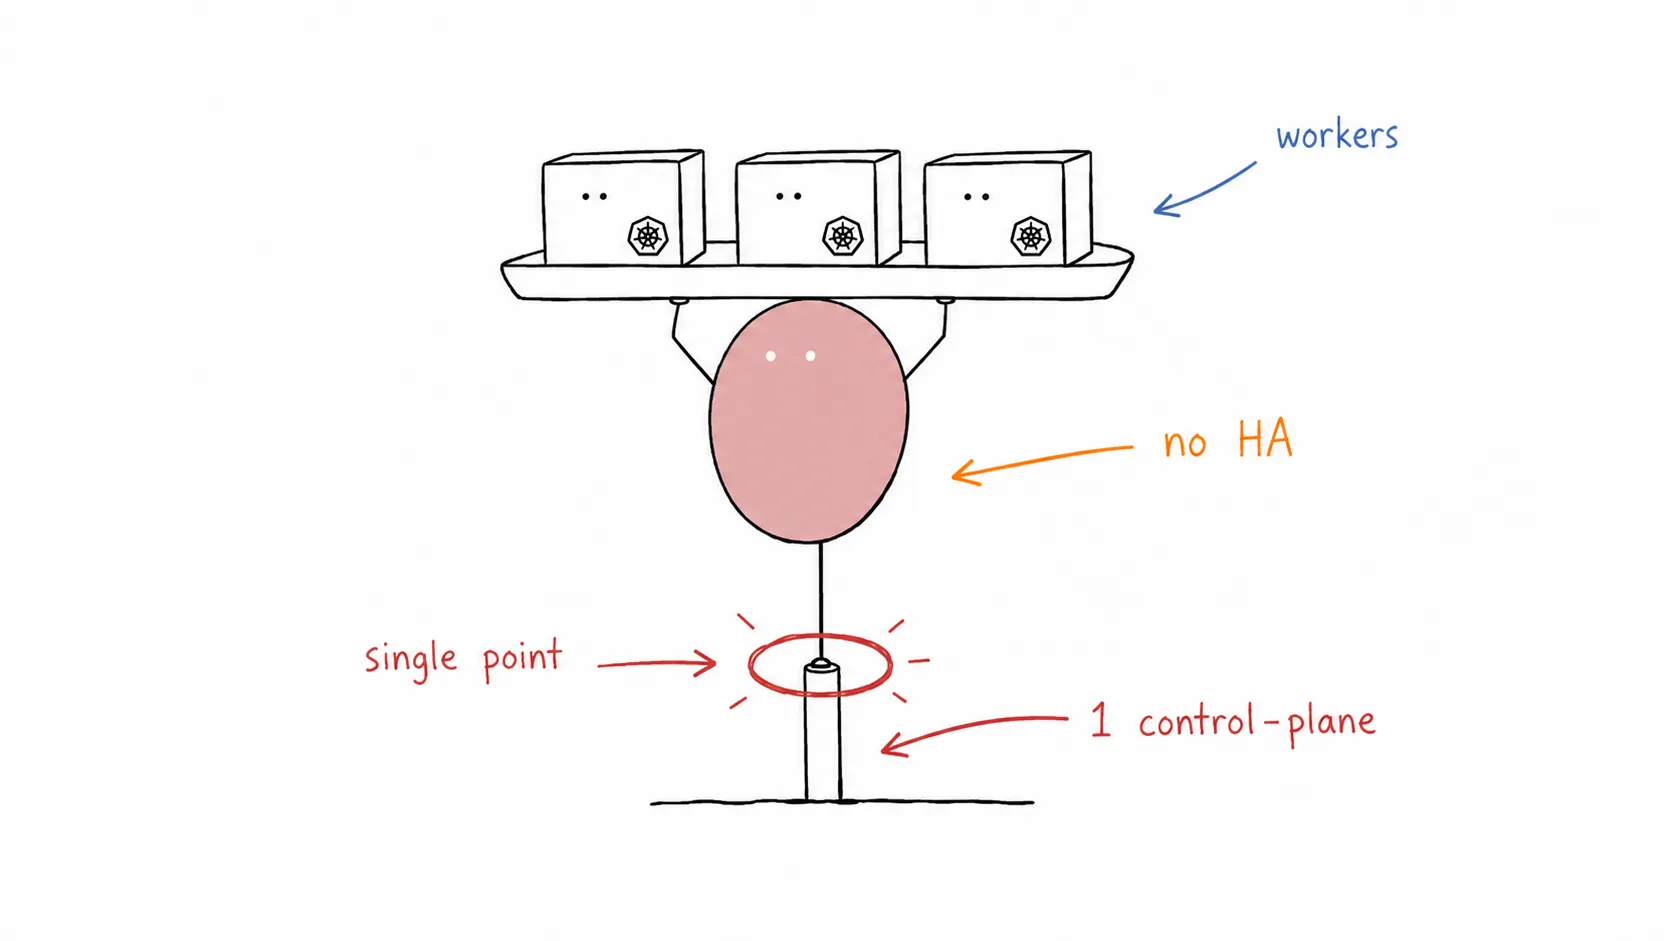
Tomochi balancing a tray of worker nodes on a single control-plane leg

Last Update: 25 February 2025

Non-HA Control Plan Setup and Configuration

Section titled “Non-HA Control Plan Setup and Configuration”

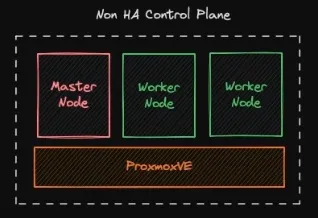
Non HA Control Plane Kubernetes

The implementation Scenario will be configured:

  • 1 Master Node
  • 2 Worker Node

These three nodes will be deployed in Proxmox VE, with each specification of node:

  • 4 vCPU
  • 16 GB of memory
  • 50 GB of storage
  • Ubuntu 20.04
  1. Update and upgrade the package repository to the newest version.

    Terminal window
    sudo apt update -y
    sudo apt upgrade -y
  2. (optional) rename and set /etc/host for each node became:

    1. Master node → kube-master-1
    2. Worker node → kube-worker-1, kube-worker-2
    Terminal window
    #edit /etc/hosts and add this at the end of file (adjust ip address)
    10.0.2.200 kube-master-1
    10.0.2.199 kube-worker-1
    10.0.2.198 kube-worker-2
  3. Reboot to finalize the upgrade and apply the hostname.

  4. Install docker with this script (Docker: Install using the conveniencescript)

    Terminal window
    curl -fsSL https://get.docker.com -o get-docker.sh
    sudo sh get-docker.sh
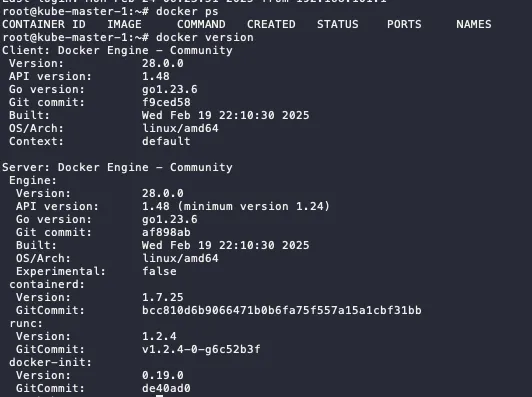
  5. Check docker command and version

    Terminal window
    docker ps
    docker version

    Check Docker Version

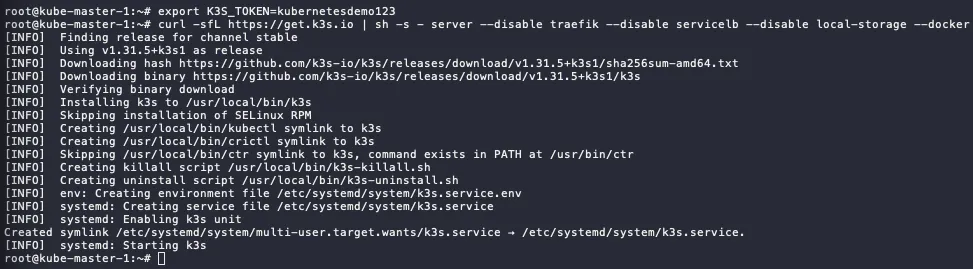
  1. Defined the K3s token. Save this token and make sure this token is the same for all nodes

    Terminal window
    export K3S_TOKEN=kubernetesdemo123
  2. The installation of master node, using this script:

    1. install the server as master node
    2. disable Traefik for ingress → will use Nginx ingress
    3. disable Servicelb → will use MetalLB
    4. disable local-storage → will use Ceph CSI
    5. declare to use docker
    Terminal window
    curl -sfL https://get.k3s.io | sh -s - server --disable traefik --disable servicelb --disable local-storage --docker

    K3S Installation

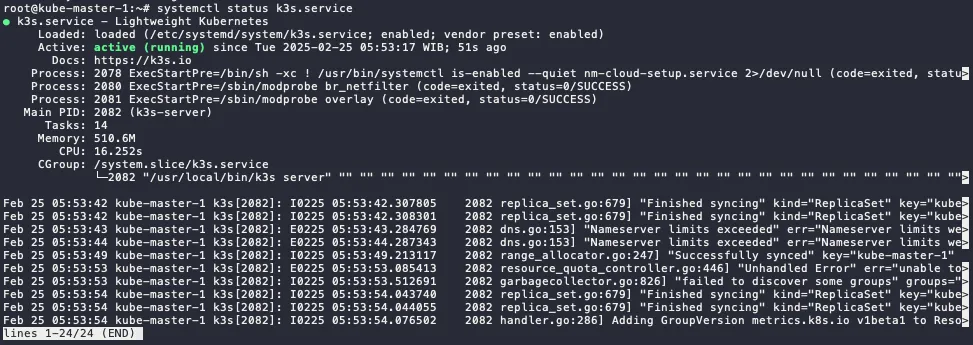
  3. Check the service status, make sure it is active

    Terminal window
    systemctl status k3s.service

    K3S Master Node Status

  4. Check kubectl command. It will display 1 node only (which is the master node).

    Terminal window
    kubectl get node

    Get Node Information using kubectl

    ⚠️ if the get error unable to read /etc/rancher/k3s/k3s.yml , you can fix with this step.

    Terminal window
    mkdir .kube
    sudo cp /etc/rancher/k3s/k3s.yaml .kube/config.yaml
    sudo chown $USER:$GROUP .kube/config.yaml
    export KUBECONFIG=~/.kube/config.yaml

    or if you have not start the installation, you can add --write-config 644 in the end of the script, like this:

    Terminal window
    curl -sfL https://get.k3s.io | sh -s - server --disable traefik --disable servicelb --disable local-storage --docker --write-config 644

Do this step for all the worker node, in this scenario will be kube-worker-1 and kube-worker-2.

  1. Defined the K3s token. Use the same token as defined in master node.

    Terminal window
    export K3S_TOKEN=kubernetesdemo123

    ⚠️ If you forget the token on the master node, you can check and on the master node on this file. Copy all the string.

    Terminal window
    cat /var/lib/rancher/k3s/server/node-token
  2. The installation of worker nodes, using this script:

    1. install the server as worker node (agent)
    2. declare to use docker
    3. define the server endpoint to master node ip or domain
    Terminal window
    curl -sfL https://get.k3s.io | sh -s - agent --docker --server https://kube-master-1:6443
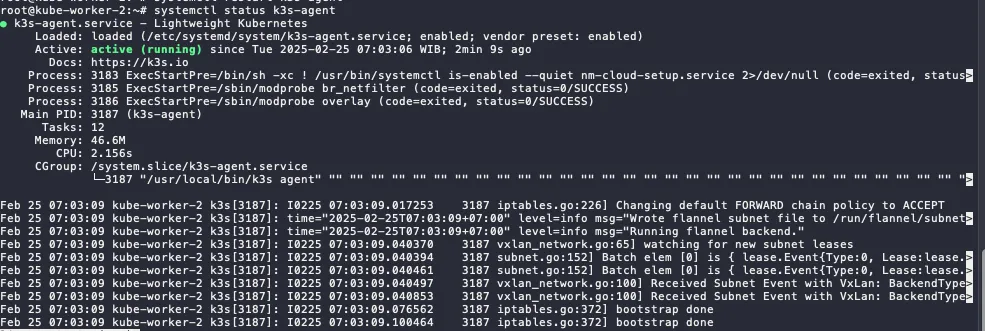
  3. Check the service in the worker nodes

    Terminal window
    systemctl status k3s-agent.service

    K3S Worker Node Status

  4. Check kubectl command in master node. Now, it will display more than 1 node (which is the includes all the installed worker nodes).

    Terminal window
    kubectl get node

    Get Nodes Information using kubectl

⚠️ If you stuck in when starting k3s-agent. Make sure worker node and master node can be connecting. it could be firewall, proxy server, or incorrect/mismatched MTU. Script below can be use for check the connectivity.

Terminal window
curl -ks https://ipaddress:6443/ping

Install and Configure services in the Master Node

Section titled “Install and Configure services in the Master Node”

Because we disable some service in the master node. Now we are going to install it the replacement services.

  1. Install Helm using script below (the latest script can be seen on the Helm docs):

    Terminal window
    curl https://baltocdn.com/helm/signing.asc | gpg --dearmor | sudo tee /usr/share/keyrings/helm.gpg > /dev/null
    sudo apt-get install apt-transport-https --yes
    echo "deb [arch=$(dpkg --print-architecture) signed-by=/usr/share/keyrings/helm.gpg] https://baltocdn.com/helm/stable/debian/ all main" | sudo tee /etc/apt/sources.list.d/helm-stable-debian.list
    sudo apt-get update
    sudo apt-get install helm
  2. Check the version

    Terminal window
    helm version

    Check Helm Version

MetalLB - Load Balancer Installation and Configuration

Section titled “MetalLB - Load Balancer Installation and Configuration”

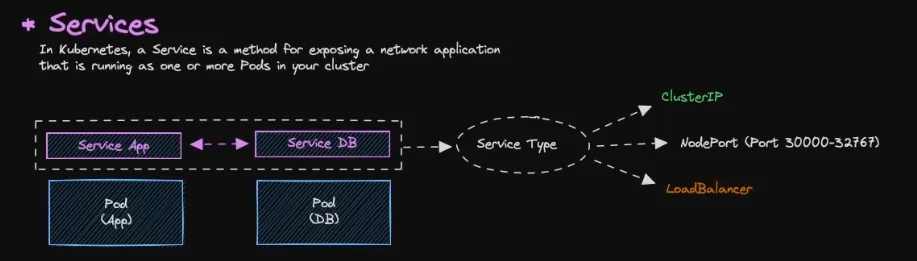
Load Balancer Diagram

  • As default, all resources in Kubernetes are isolated, specifically pods.
  • Pods are isolated by default. To enable communication between pods or with the external network, you need to configure Services.
  • There are several type of service:
    • ClusterIP → Default services, ClusterIP services provide an internal IP address within the cluster that other pods can use to communicate. They are not directly accessible from outside the cluster.
    • NodePort (Port 30000-32767) → NodePort services expose a port on each node in the cluster, allowing external access. The port range 30000-32767 is the default range.
    • LoadBalancer → LoadBalancer services provision an external load balancer that distributes traffic to multiple pods.
  1. Add metallb repository to helm

    Terminal window
    helm repo add metallb https://metallb.github.io/metallb
  2. Check the repo list

    Terminal window
    helm repo ls
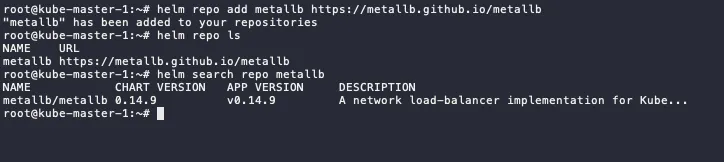
  3. Search the metallb

    Terminal window
    helm search repo metallb

    Search MetalLB in Helm

  4. Pull the metallb from the repository, it will download tgz file.

    Terminal window
    # run this in the home dir or other directory
    helm pull metallb/metallb
    # extract the tgz
    tar xvf metallb-*
  5. Change directory to metallb and if there any configuration changes, you can edit values.yaml

    Terminal window
    cd metallb
    #optional
    vim values.yaml
  6. Install metallb using helm

    • Set the chart name to metallb
    • Define the file to values.yaml
    • Put the namespace to metallb-system
    • Enable debug mode
    • Create metallb-system namespace
    Terminal window
    helm install metallb -f values.yaml . -n metallb-system --debug --create-namespace
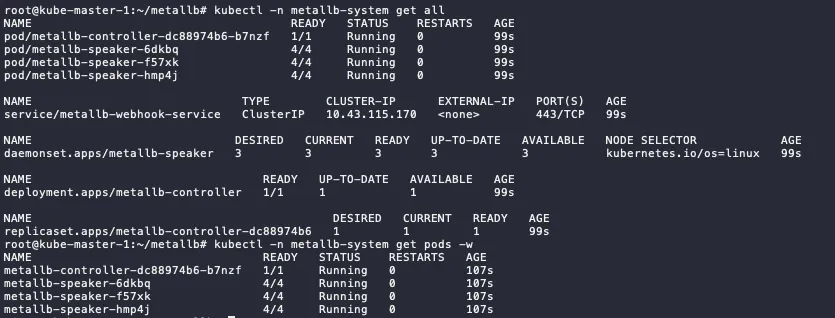
  7. Check the status, if the status still init, wait until running.

    Terminal window
    kubectl -n metallb-system get all
    kubectl -n metallb-system get pod -w

    Get All using kubectl

  1. First, define the address pool on ipaddresspool.yaml

    apiVersion: metallb.io/v1beta1
    kind: IPAddressPool
    metadata:
    name: default-pool
    namespace: metallb-system
    spec:
    addresses:
    - 10.0.2.11-10.0.2.100 #adjust this range
  2. Apply the configuration

    Terminal window
    kubectl apply -f ipaddresspool.yaml

    Apply IP Address Pool using kubectl

  3. Then, we define the L2 Advertisement config on l2advertisement.yaml

    apiVersion: metallb.io/v1beta1
    kind: L2Advertisement
    metadata:
    name: default
    namespace: metallb-system
    spec:
    ipAddressPools:
    - default-pool
  4. Apply the configuration

    Terminal window
    kubectl apply -f l2advertisement.yaml

    Apply L2 Advertisement using kubectl

  1. Run demo app for the testing, the demo app using nginx image.

    Terminal window
    kubectl run app-demo-1 --image=nginx --port=80
    #check the pod status, wait until running
    kubectl get pod
  2. Since by default pod cannot communicate to outside, we need to create the service to expose the pods.

    Terminal window
    kubectl expose pod app-demo-1 --type=LoadBalancer --target-port=80 --port=80 --name app-demo-1
    #check the pods and services
    kubectl get all

    Get All using kubectl

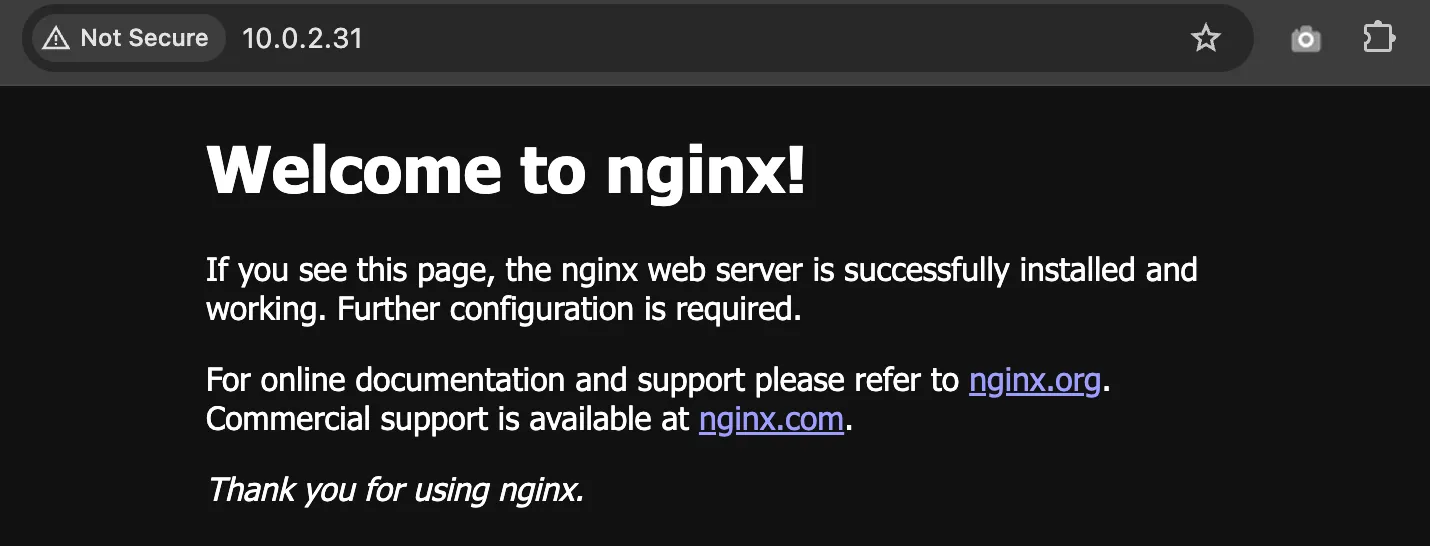
  3. You can access the app using EXTERNAL-IP of service/app-demo-1 and Nginx landing page will show up.

    Access External IP

Nginx - Ingress Controller Installation and Configuration

Section titled “Nginx - Ingress Controller Installation and Configuration”

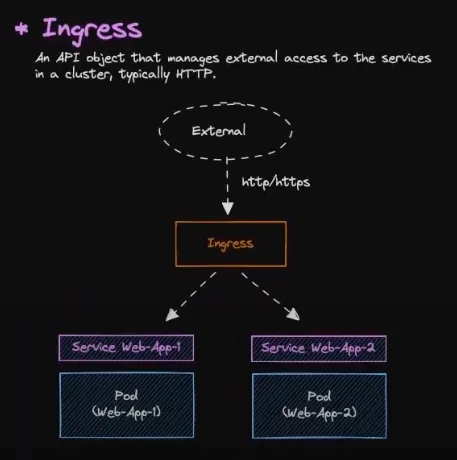
Ingress Diagram

  1. Add nginx repository to helm

    Terminal window
    helm repo add nginx-stable https://helm.nginx.com/stable
  2. Check the repo list

    Terminal window
    helm repo ls
  3. Search the nginx

    Terminal window
    helm search repo nginx
  4. Pull the nginx-ingress from the repository, it will download tgz file.

    Terminal window
    # run this in the home dir or other directory
    helm pull nginx-stable/nginx-ingress
    # extract the tgz
    tar xvf nginx-ingress-*
  5. Change directory to nginx-ingress and edit values.yaml file.

    Terminal window
    cd nginx-ingress
    # edit values.yaml
    vim values.yaml
    # locate ingressClass and change the variable below to true
    ...
    ingressClass:
    ...
    setAsDefaultIngress: true
    ...
  6. Install nginx-ingress using helm

    Terminal window
    helm -n ingress install nginx-ingress -f values.yaml . --debug --create-namespace
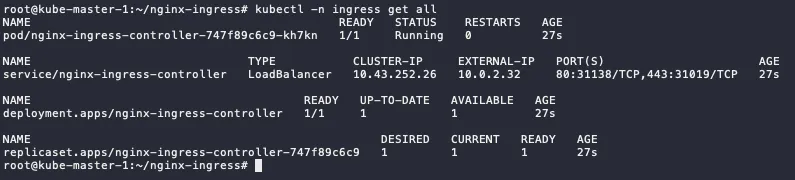
  7. Check the installation

    Terminal window
    kubectl -n ingress get all

    Get All Ingress using kubectl

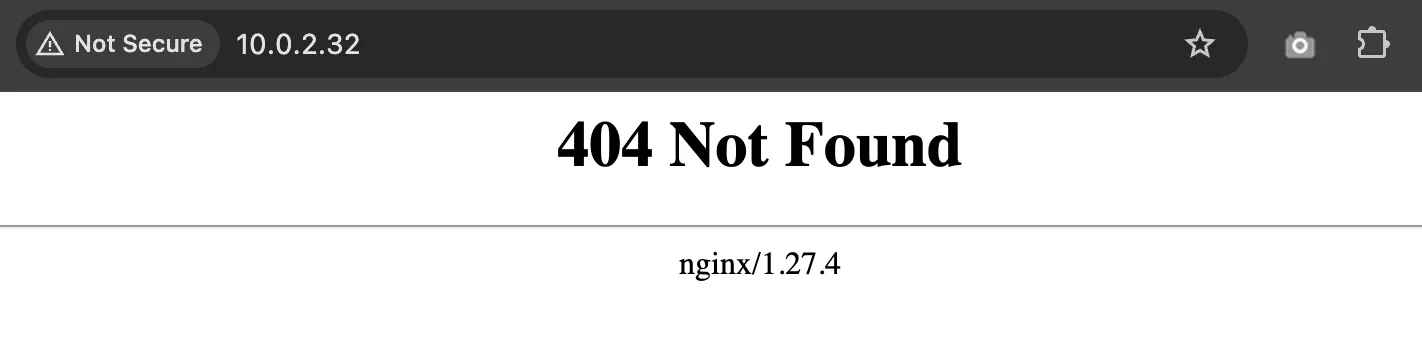
  8. The EXTERNAL-IP is available and reachable, but since no resources use it, it display 404

    Access External IP but Not Found

  1. Add bitname repository to helm

    Terminal window
    helm repo add bitnami https://charts.bitnami.com/bitnami
  2. Check the repo list

    Terminal window
    helm repo ls
  3. Search the nginx, we will use bitnami/nginx for the webserver nginx

    Terminal window
    helm search repo nginx
  4. Pull the nginx from the repository, it will download tgz file.

    Terminal window
    # run this in the home dir or other directory
    helm pull bitnami/nginx
    # extract the tgz
    tar xvf nginx-* #make sure the nginx not nginx-ingress
  5. Change directory to metallb and edit values.yaml file.

    Terminal window
    cd nginx
    # edit
    vim values.yaml
    #locate these variables
    ...
    ingress:
    enabled: true
    ...
    hostname: nginx.demo.local # make sure this FQDN is pointing to the ingress IP
    ...
    ingressClassName: "nginx" # check using `kubectl get ingressclass`
    ...
  6. Install metallb using helm

    Terminal window
    helm -n demo install demo-app -f values.yaml . --debug --create-namespace
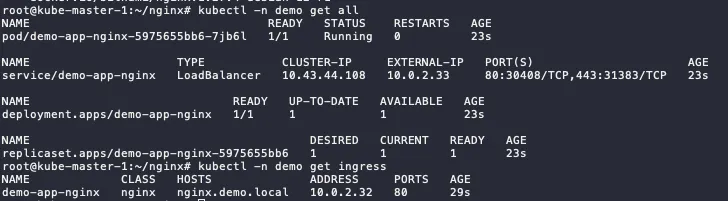
  7. Check the status, if the status still init, wait until running.

    Terminal window
    kubectl -n demo get all
    kubectl -n demo get ingress

    Get All and Ingress using kubectl

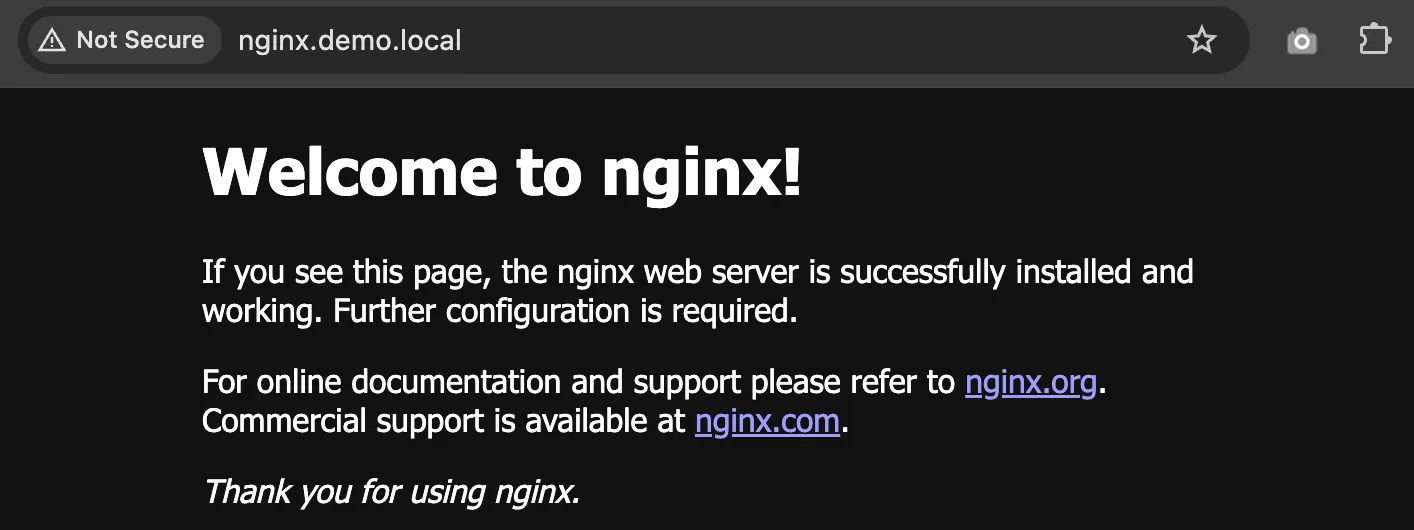
  8. If you configure the FQDN in DNS or /etc/hosts correctly to ingress IP address, it will show like this

    Access using FQDN

CEPH CSI - StorageClass Installation and Configuration

Section titled “CEPH CSI - StorageClass Installation and Configuration”

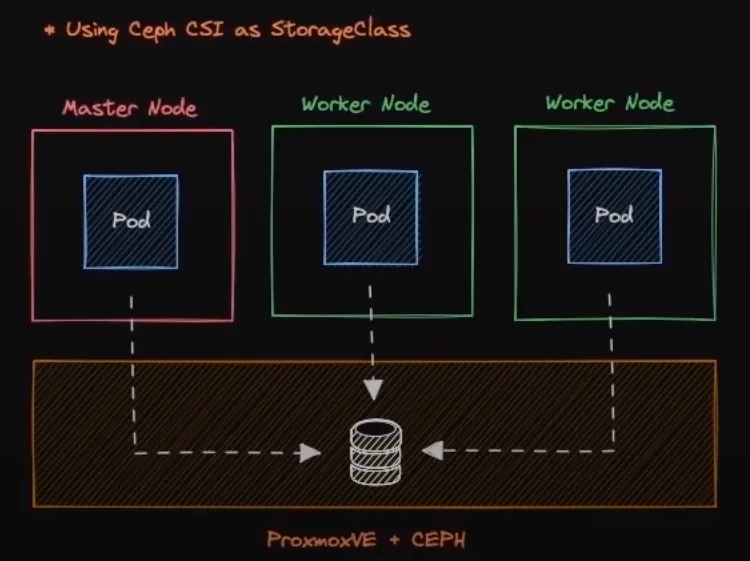
StorageClass Diagram

TODO - i don’t have CEPH cluster yet 🙈

Personal ASN and IPv6 Journey

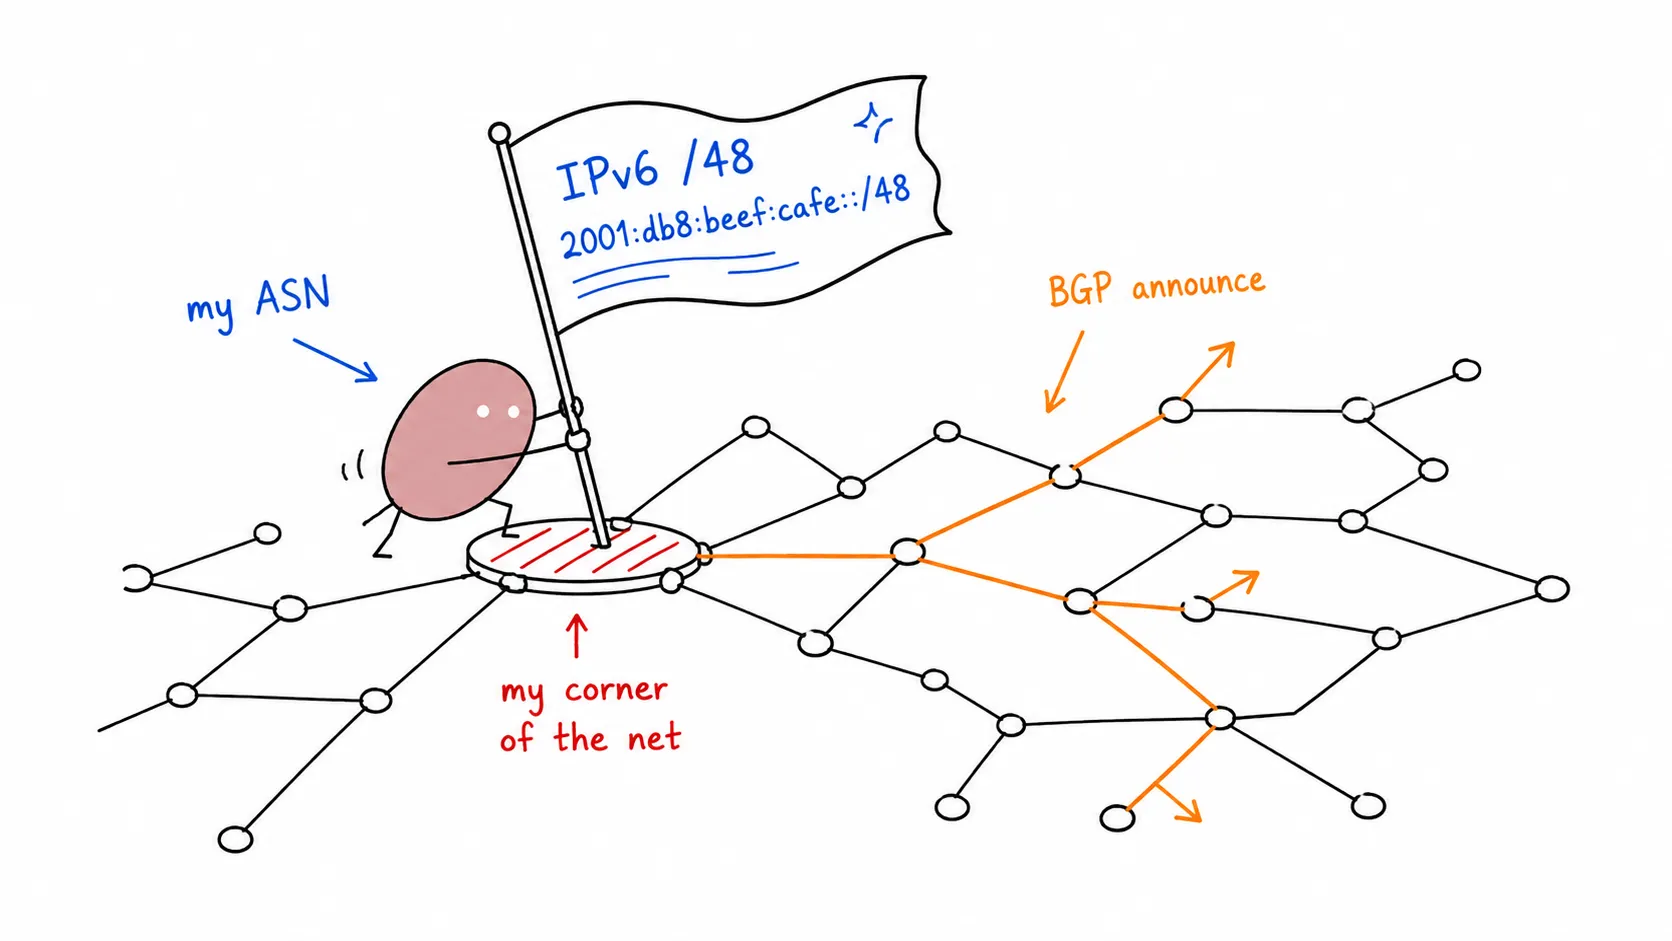
Tomochi planting an ASN flag on the internet map and announcing an IPv6 route

Last Update: 25 March 2024

⛔ Disclaimer: Tidak ada sponsor dari Lagrange cuman discount

Lagrange Website

Lagrange Banner

Pendaftaran ASN melalui Lagrange per tanggal 25 Maret 2024 ada discount 40% off dari £25 ke £15.

  1. Untuk memulai aplikasi ASN, bisa langsung “Try now” dan lakukan Register akun Lagrange.

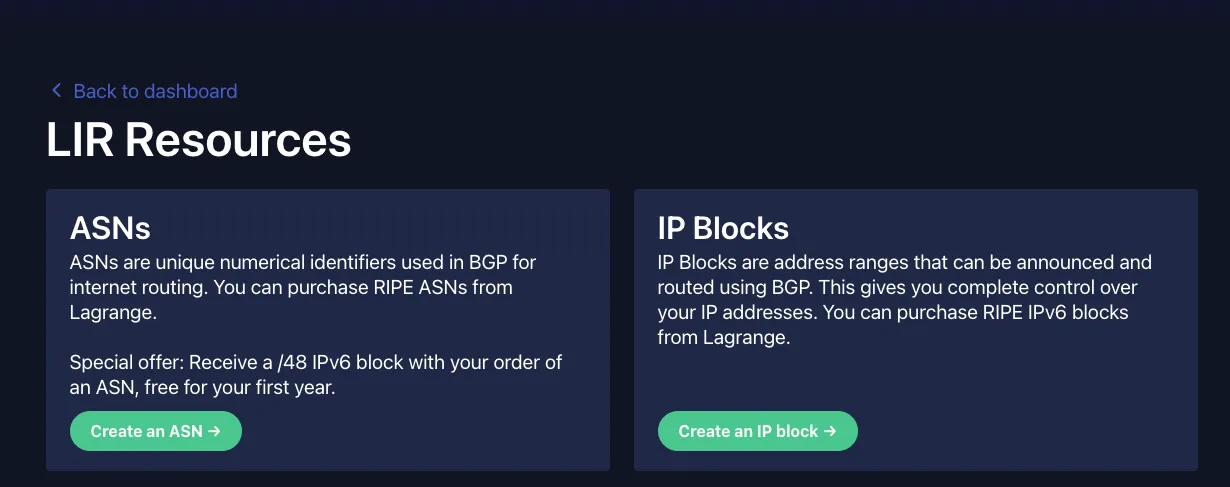
  2. Langsung aja “Create an ASN” di page LIR Services - Lagrange

    Lagrange LIR Service

  3. Ikutin proses purchasingnya.

  4. Setelah itu akan ada Applicationnya, pilih guided, nanti akan diarahkan untuk proses pembuatan akun dan pembuatan object di RIPE. kalau bingung apa yang di isi bisa juga mengacu ke video dibawah:

    1. Video pembuatan object di RIPE : Rifqi Arief in IPv6 Indonesia Telegram Group

    2. Pastikan utk mencatat beberapa informasi dibawah saat pembuatan:

      1. RIPE ADMIN-C: [Singkatan_Nama][Identifier]-RIPE (generate dari RIPE)
      2. RIPE MNT (mnt-by): bebas tapi unique
      3. Address: alamat personal
      4. abuse-c: ACR[Identifier]-RIPE(generate saat mengisi abuse-c melalui logo lonceng)
      5. mnt-ref: INFERNO-MNT (dari Lagrange) dan mnt-by (punya sendiri)
      6. Organisation: ORG-[Singkatan_Nama][IdentifierOrg]-RIPE (generate dari RIPE)
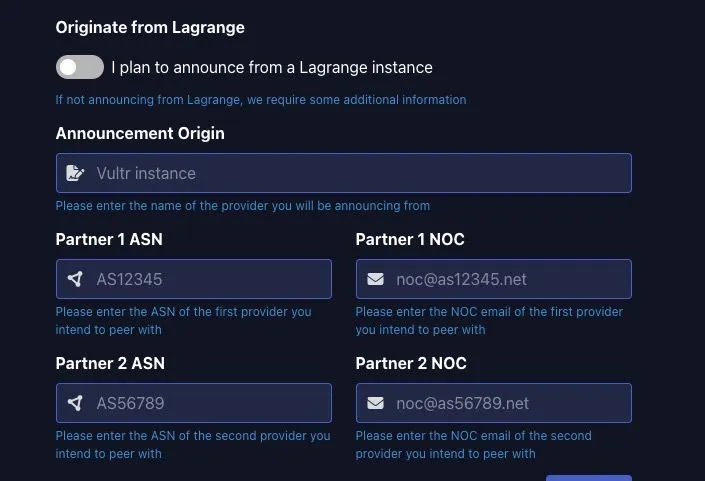
  5. Di proses ini akan ada beberapa submission di portal Lagrange yang membutuhkan informasi diatas

Lagrange ASN Form

Jika sudah sampai page ini, proses selanjutnya adalah pembelian VPS yang support BGP session.

⛔ Pastikan VPS yang disewa berada pada region EU, seperti Amsterdam, Frankfurt, UK

⛔ Disclaimer: Tidak ada sponsor dari iFog (cuman harga cukup terjangkau)

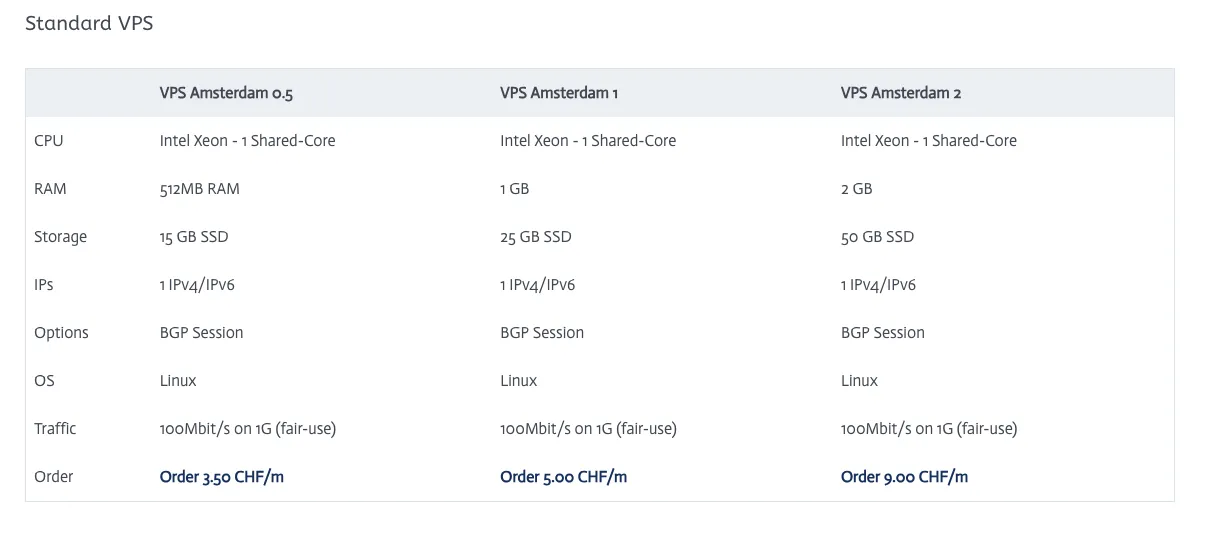
  1. Pilih VPS pada region EU (kasus saya pilih di Amsterdam 1) iFog Website

    iFog VPS Pricelist

  2. Ikutin proses purchasingnya (payment via CC atau Paypal)

  3. Beberapa catatan saat konfigurasi VPS:

    1. Hostname: FQDN [hostname].[domain].[tld]
    2. Password: optional
    3. BGP Session: ✅
    4. FogIXP Peering port: ✅
    5. Additional v6 BGP Transit via ASxxxx: optional
  4. Simpan Invoice untuk nanti di upload ke ticket Lagrange

  5. untuk pengisian Lagrange bisa menggunakan panduan berikut:

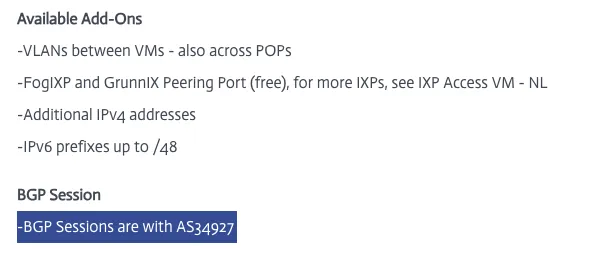
    1. Partner 1 ASN: ASN punya iFog atau VPS provider lainnya. iFog AMS VPS

      iFOg BGP Details

    2. Partner 1 NOC: email dari iFog atau VPS provider lainnya. iFog NOC Contact

      iFog Contact

    3. Partner 2 ASN dan Partner 2 NOC: bisa request sponsor ke grup telegram https://t.me/IPv6_Indonesia. Saya request sponsor ke om @malhuda (Thanks om bantuannya)

    4. Setelah submit, upload invoice dari iFog atau VPS provider lainnya di halaman ticket

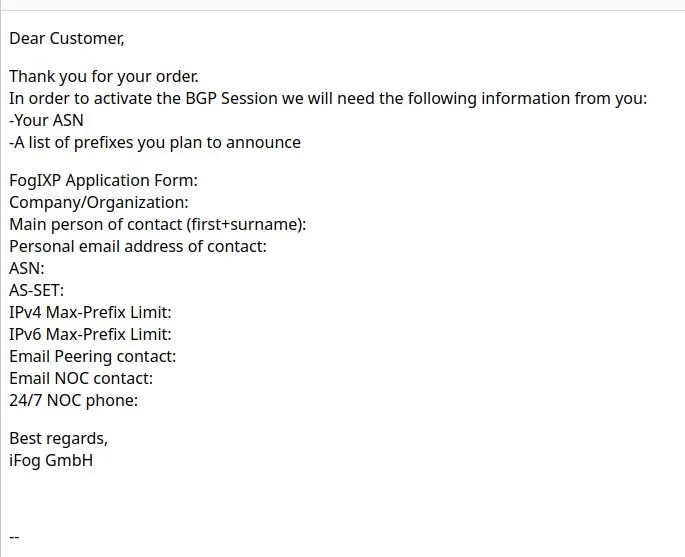
    5. Jika terima email seperti ini dari VPS provider bisa balas “My ASN is still in the process of application, I will contact you after it finished.”

      iFog Email

    6. Tunggu deh sampe di ASN diterbitkan.

Lagrange Process

Setelah ini akan ada beberapa proses approval yang dibutuhkan dari Lagrange:

  1. Document Agreement: Tanda tangan menggunakan DocuSign. Pastikan masukkan kode akses yang sesuai, ada pada tiket. Position pada kolom tanda tangan bisa di isi Individual.
  2. Upload ID: KTP/SIM/Paspor

  • Tapi kalau mau lepas VPS EU, wajib cari upstream ke EU, Ke netassist atau udn aja atau bgptunnel
  • my.bgptunnel.com pake ini om buat presence di EU kalo nanti lepas VPS EU

Setelah ASN terbit, akan ada permintaan utk pengisian Application From dari FogIXP (jika VPS di iFog):

FogIXP Application Form:

  • Company/Organization: Full Name
  • Main person of contact (first+surname): Full Name
  • Personal email address of contact: Email sendiri
  • ASN: ASxxxxxx
  • AS-SET: ASxxxxxx:AS-SET (buat object baru di RIPE-DB dan add ASN milik sendiri sebagai member, + button)
  • IPv4 Max-Prefix Limit: 0 atau sesuai yg ingin di announce
  • IPv6 Max-Prefix Limit: 2 atau sesuai yg ingin di announce
  • Email Peering contact: Email sendiri
  • Email NOC contact: Email sendiri
  • 24/7 NOC phone: No Telp Sendiri
  • A list of prefixes you plan to announce: Prefix yang didapat dari Lagrange atau sponsor
  • AS-SET full itu ada ASNnya didepan
    • Sudah gak bisa pakai AS-SET pendek
    • Karena yah ada drama sblmnya hahhaa
    • Tapi kalo penasaran, coba aja
  • AS-UPSTREAMS itu untuk upstream ya
    • JANGAN DIMASUKKAN KE AS-SET UTAMA
    • Pisah ya om
  • AS-SET khusus ASN sendiri dan downstream dan AS-SET khusus upstream
  • …Untuk ASXXXXXX:AS-UPSTREAMS itu ditaruh di whois ASN aja, buat import export…
    • Jangan dimasukkan / dikirimkan ke peeringdb maupun upstream, langsung digaplok, 100%
    • Yang dikirim ke peeringdb maupun upstream, yang ASXXXXXX:AS-SET
    • Nah, pengisiannya juga membernya hanya ASN itu, dan downstream
    • Selain itu jangan coba coba masukkin, nnti bisa bisa ditabok lagi
  1. Lakukan registrasi di PeeringDB.
  2. Masukkan email yang terdaftar di RIPE.
  3. Masukkan ASN dan Organization (Nama Lengkap) pada bagian Affiliate with Organization.

Setelah Affiliate sudah di approve, dapat melengkapi informasi di organization (full name, di menu dekat profile ) dan networks (ASN, ada di dalam organization)

Setelah mendapatkan alokasi IP, buat object baru di RIPE DB dengan type route6

mnt-by: mnt_sendiri dan yang memberi alokasi

route6: prefix IPv6 (xxxx:xxx::/48)

origin: AS_number

Jika saat membuat route6 gagal (kasus saya alokasi dari Lagrange dengan mnt INFERNO-MNT), dapat membuat tiket di portal Lagrange dengan menyertakan prefix dan mnt_sendiri.

Setelah mendapatkan block IP bisa request ke penyedia prefix untuk setup RPKI melalui open ticket.

Jika berlangganan di iFog, dapat melakukan instalasi VM secara manual setelah mendapatkan akses. rekomendasi OS adalah debian 12 dan disetup secara minimal (tanpa gui).

Untuk mempermudah dapat menambahkan konfigurasi dibawah pada file ~/.ssh/config.

Host bgp-server
HostName external_ip
User username
IdentityFile /path/to/private/key

dan dapat melakukan ssh dengan command dibawah:

ssh bgp-server
  1. Edit network interfaces & sesuaikan masing masing parameter < > (nama interface mungkin berbeda)

    Terminal window
    vim /etc/network/interfaces
    Terminal window
    # This file describes the network interfaces available on your system
    # and how to activate them. For more information, see interfaces(5).
    source /etc/network/interfaces.d/*
    # The loopback network interface
    auto lo
    iface lo inet loopback
    # The primary network interface
    allow-hotplug ens18
    iface ens18 inet static
    address <IPv4_Public>/<Subnet_mask>
    gateway <IPv4_Gateway>
    # dns-* options are implemented by the resolvconf package, if installed
    dns-nameservers 9.9.9.9
    dns-search <domain>
    # disable multicast
    up ip link set dev $IFACE mtu 1500
    up ip link set multicast off dev $IFACE
    iface ens18 inet6 static
    address <IPv6 Public>
    netmask <Subnet_mask>
    gateway <IPv6_Gateway>
    # dns-* options are implemented by the resolvconf package, if installed
    dns-nameservers 2620:fe::fe
    dns-search <domain>
    # disable multicast
    up ip link set dev $IFACE mtu 1500
    up ip link set multicast off dev $IFACE
    # The secondary network interface to FogIXP
    iface ens19 inet6 static
    address <IPv6 Public>
    netmask <Subnet_mask>
    gateway <IPv6_Gateway>
    # dns-* options are implemented by the resolvconf package, if installed
    dns-nameservers 2620:fe::fe
    dns-search <domain>
    # disable multicast
    up ip link set dev $IFACE mtu 1500
    up ip link set multicast off dev $IFACE
    Terminal window
    systemctl restart networking
  2. Edit sysctl.conf (backup default jika diperlukan)

    Terminal window
    # cp /etc/sysctl.conf{,.default}
    vim /etc/sysctl.conf
    Terminal window
    fs.file-max = 16777216
    fs.nr_open = 1073741824
    kernel.hung_task_timeout_secs = 0
    kernel.msgmax = 65536
    kernel.msgmnb = 65536
    net.core.default_qdisc = cake
    net.core.netdev_max_backlog = 30000
    net.core.rmem_default = 67108864
    net.core.rmem_max = 67108864
    net.core.somaxconn = 65536
    net.core.wmem_max = 67108864
    net.ipv4.conf.all.accept_redirects = 0
    net.ipv4.conf.all.accept_source_route = 0
    net.ipv4.conf.all.arp_announce = 1
    net.ipv4.conf.all.arp_filter = 1
    net.ipv4.conf.all.arp_ignore = 2
    net.ipv4.conf.all.forwarding = 1
    net.ipv4.conf.all.ignore_routes_with_linkdown = 1
    net.ipv4.conf.all.rp_filter = 0
    net.ipv4.conf.all.secure_redirects = 0
    net.ipv4.conf.all.send_redirects = 0
    net.ipv4.fib_multipath_use_neigh = 1
    net.ipv4.icmp_echo_ignore_broadcasts = 1
    net.ipv4.icmp_errors_use_inbound_ifaddr = 1
    net.ipv4.icmp_ignore_bogus_error_responses = 1
    net.ipv4.icmp_msgs_per_sec = 2500
    net.ipv4.icmp_ratelimit = 0
    net.ipv4.igmp_max_memberships = 100
    net.ipv4.ip_forward = 1
    net.ipv4.ip_local_port_range = 1024 65535
    net.ipv4.neigh.default.base_reachable_time_ms = 14400000
    net.ipv4.neigh.default.gc_thresh1 = 1024
    net.ipv4.neigh.default.gc_thresh2 = 2048
    net.ipv4.neigh.default.gc_thresh2 = 8192
    net.ipv4.neigh.default.gc_thresh3 = 4096
    net.ipv4.neigh.default.gc_thresh3 = 16384
    net.ipv4.route.max_size = 1073741824
    net.ipv4.tcp_congestion_control = bbr
    net.ipv4.tcp_dsack = 1
    net.ipv4.tcp_fin_timeout = 30
    net.ipv4.tcp_keepalive_time = 120
    net.ipv4.tcp_l3mdev_accept = 1
    net.ipv4.tcp_max_syn_backlog = 8192
    net.ipv4.tcp_mem = 4194304 16777216 67108864
    net.ipv4.tcp_no_metrics_save = 1
    net.ipv4.tcp_rmem = 4194304 16777216 67108864
    net.ipv4.tcp_sack = 1
    net.ipv4.tcp_syn_retries = 3
    net.ipv4.tcp_synack_retries = 3
    net.ipv4.tcp_syncookies = 1
    net.ipv4.tcp_timestamps = 1
    net.ipv4.tcp_window_scaling = 1
    net.ipv4.tcp_wmem = 4194304 16777216 67108864
    net.ipv6.conf.all.accept_ra_defrtr = 0
    net.ipv6.conf.all.accept_ra_pinfo = 0
    net.ipv6.conf.all.accept_ra_rtr_pref = 0
    net.ipv6.conf.all.accept_redirects = 0
    net.ipv6.conf.all.accept_source_route = 0
    net.ipv6.conf.all.autoconf = 0
    net.ipv6.conf.all.dad_transmits = 0
    net.ipv6.conf.all.forwarding = 1
    net.ipv6.conf.all.ignore_routes_with_linkdown = 1
    net.ipv6.conf.all.router_solicitations = -1
    net.ipv6.icmp.ratelimit = 0
    #net.ipv6.conf.all.send_redirects = 0
    net.ipv6.neigh.default.base_reachable_time_ms = 14400000
    net.ipv6.neigh.default.gc_thresh1 = 1024
    net.ipv6.neigh.default.gc_thresh2 = 2048
    net.ipv6.neigh.default.gc_thresh2 = 8192
    net.ipv6.neigh.default.gc_thresh3 = 4096
    net.ipv6.neigh.default.gc_thresh3 = 16384
    net.ipv6.route.max_size = 32768000
    vm.max_map_count = 1048575
    vm.swappiness = 100
    net.ipv6.conf.all.accept_ra = 0
    #net.ipv6.conf.all.proxy_ndp = 1
    #net.netfilter.nf_conntrack_acct = 1
    #net.netfilter.nf_conntrack_checksum = 0
    #net.netfilter.nf_conntrack_max = 65535
    #net.netfilter.nf_conntrack_tcp_timeout_established = 7440
    #net.netfilter.nf_conntrack_udp_timeout = 60
    #net.netfilter.nf_conntrack_udp_timeout_stream = 180
    #net.netfilter.nf_conntrack_helper = 1
    # net.ipv6.conf.all.disable_ipv6 = 1

    Config sesuai interface IXP yang dimiliki

    Terminal window
    ### Disable multicast FogIXP Interface ###
    net.ipv4.conf.<interface_name>.arp_announce = 1
    net.ipv4.conf.<interface_name>.arp_filter = 1
    net.ipv4.conf.<interface_name>.arp_ignore=2
    net.ipv4.conf.<interface_name>.arp_notify=1
    net.ipv4.conf.<interface_name>.proxy_arp = 0
    net.ipv4.conf.<interface_name>.rp_filter=0
    net.ipv4.neigh.default.gc_interval = 30
    net.ipv4.neigh.<interface_name>.base_reachable_time_ms = 14400000
    net.ipv4.neigh.<interface_name>.gc_stale_time = 60
    net.ipv6.conf.<interface_name>.accept_ra = 0
    net.ipv6.conf.<interface_name>.autoconf = 0
    net.ipv6.conf.<interface_name>.router_solicitations = -1
    net.ipv6.neigh.default.gc_interval = 30
    net.ipv6.neigh.<interface_name>.base_reachable_time_ms = 14400000
    net.ipv6.neigh.<interface_name>.gc_stale_time = 60
    Terminal window
    sysctl -p
    # or
    reboot
  3. Pre Setup (optional)

    Github: Xeoncross/lowendscript, scope:

    • update_timezone
    • remove_unneeded
    • update_upgrade
    • install_dash
    • install_vim
    • install_nano
    • install_htop
    • install_mc
    • install_iotop
    • install_iftop
    • install_syslogd
    • install_curl
    • apt_clean
    Terminal window
    wget --no-check-certificate https://raw.github.com/Xeoncross/lowendscript/master/setup-debian.sh
    chmod a+rx setup-debian.sh
    ./setup-debian.sh system
  4. Timezone and NTP

    Terminal window
    apt install ntp -y

    Edit NTP configuration

    Terminal window
    vim /etc/ntp.conf
    Terminal window
    server 0.debian.pool.ntp.org iburst
    server 1.debian.pool.ntp.org iburst
    server 2.debian.pool.ntp.org iburst
    server 3.debian.pool.ntp.org iburst
    Terminal window
    sudo systemctl restart ntp

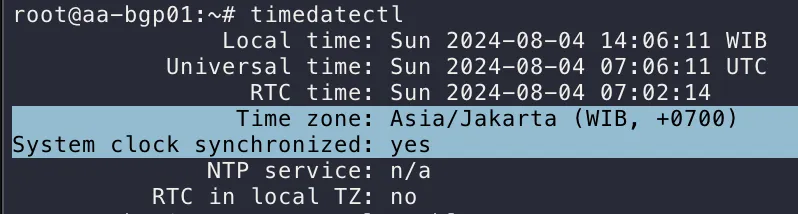
    Set Timezone and see status

    Terminal window
    timedatectl set-timezone Asia/Jakarta
    timedatectl

    timedatectl status

  1. Install Pathvector dan Bird2

    Terminal window
    curl https://repo.pathvector.io/pgp.asc > /usr/share/keyrings/pathvector.asc
    echo "deb [signed-by=/usr/share/keyrings/pathvector.asc] https://repo.pathvector.io/apt/ stable main" > /etc/apt/sources.list.d/pathvector.list
    apt update && apt install -y pathvector bird2
  2. Konfigurasi /etc/pathvector.yml

    Terminal window
    vim /etc/pathvector.yml

    first block

    asn: <your_asn>
    bgpq-args: "-S AFRINIC,APNIC,ARIN,LACNIC,RIPE"
    default-route: false
    irr-query-timeout: 30
    irr-server: "rr.ntt.net"
    merge-paths: true
    peeringdb-api-key: "<peeringdb_api_key>"
    peeringdb-query-timeout: 30
    prefixes:
    - "<prefix_plan_to_be_announce>"
    - "<prefix_plan_to_be_announce>"
    router-id: "<an_ipv4_address>"
    rtr-server: "172.65.0.2:8282"

    Catatan

    • Ubahlah your_asn menjadi ASN anda.
    • Lalu, IRR hanya valid untuk AFRINIC, APNIC, ARIN, LACNIC, RIPE
    • Tidak menerima rute default
    • IRR server menggunakan NTT
    • Ubah peeringdb_api_key dengan kunci milik anda sendiri. Hak akses pada PeeringDB gunakan hanya baca
    • Ubahlah prefix_plan_to_be_announce dengan prefix yang akan di gunakan.
    • Ubahlah router-id dengan IPv4 VPS anda (atau gunakan IP lokal jika memang tidak ada IP publiknya (karena hanya sebagai pengenal saja)).
    • rtr-server menggunakan Cloudflare

    Aktivasi kernel karena akan menggunakan full table

    kernel:
    learn: true
    # BGP Large Communities
    # <your_asn>:1:1 - Learned from upstream
    # <your_asn>:1:2 - Learned from route server
    # <your_asn>:1:3 - Learned from peer
    # <your_asn>:1:4 - Learned from downstream
    # <your_asn>:1:5 - Learned from iBGP

    Template (ganti your_asn dengan ASN yang dimiliki gunakan sesuai kebutuhan)

    templates:
    upstream:
    add-on-import:
    - <your_asn>:1:1
    allow-local-as: true
    announce:
    - <your_asn>:1:4
    local-pref: 100
    remove-all-communities: <your_asn>
    routeserver:
    add-on-import:
    - <your_asn>:1:2
    announce:
    - <your_asn>:1:4
    auto-import-limits: true
    enforce-first-as: false
    enforce-peer-nexthop: false
    filter-transit-asns: true
    local-pref: 200
    remove-all-communities: <your_asn>
    peer:
    add-on-import:
    - <your_asn>:1:3
    announce:
    - <your_asn>:1:4
    auto-as-set: true
    auto-import-limits: true
    filter-irr: true
    filter-transit-asns: true
    irr-accept-child-prefixes: true
    local-pref: 300
    remove-all-communities: <your_asn>
    downstream:
    add-on-import:
    - <your_asn>:1:4
    allow-blackhole-community: true
    announce:
    - <your_asn>:1:1
    - <your_asn>:1:2
    - <your_asn>:1:3
    auto-as-set: true
    auto-import-limits: true
    filter-irr: true
    filter-transit-asns: true
    irr-accept-child-prefixes: true
    local-pref: 400
    remove-all-communities: <your_asn>
    ibgp:
    allow-local-as: true
    asn: <your_asn>
    direct: true
    enforce-first-as: false
    enforce-peer-nexthop: false
    filter-irr: false
    filter-rpki: false
    next-hop-self: true
    remove-all-communities: <your_asn>

    Catatan:

    • Template upstream hanya digunakan untuk transit AS
    • Template routeserver hanya digunakan untuk peering ke routeserver
    • Template peer hanya digunakan untuk melakukan bilateral peering
    • Template downstream hanya boleh dipakai untuk melakukan downstream AS pihak lain
    • Template ibgp hanya digunakan untuk AS yang sama

    Template peers (gunakan sesuai kebutuhan)

    peers:
    ############
    # UPSTREAM #
    ############
    upstream_name:
    asn: neigh_asn
    disabled: false
    listen6: "<local_address>"
    local-pref: 100
    neighbors:
    - "<neigh_address>"
    template: upstream
    ###############
    # ROUTESERVER #
    ###############
    routeserver_name:
    asn: neigh_asn
    disabled: false
    listen4: "<local_address>"
    listen6: "<local_address>"
    local-pref: 200
    neighbors:
    - "<neigh_address>"
    - "<neigh_address>"
    template: routeserver
    ###########
    # PEERING #
    ###########
    peering_name:
    asn: neigh_asn
    disabled: false
    listen6: "<local_address>"
    local-pref: 300
    neighbors:
    - "<neigh_address>"
    template: peer
    ############
    # INTERNAL #
    ############
    ibgp_name:
    add-on-import:
    - <your_asn>:1:1
    announce:
    - <your_asn>:1:1
    disabled: false
    listen6: "<local_address>"
    local-port: 179
    local-pref: 150
    neighbor-port: 179
    neighbors:
    - "<neigh_address>"
    template: ibgp

    Generate bird config:

    pathvector generate

    Cek Routing sudah masuk atau blm

    ip -6 route

    Cek status BGP

    birdc show protocol
  3. Set cron untuk update IRR prefix lists dan PeeringDB prefix limits setiap 12 jam.

    Terminal window
    #crontab -e
    0 */12 * * * pathvector generate
  1. Buat dummy interface script

    Terminal window
    vim /usr/local/bin/setup-dummy-interface.sh
    #!/bin/bash
    ip link add dummy0 type dummy
    ip addr add <YOUR_IPV4_INTERFACE_IP>/24 dev dummy0
    ip addr add <YOUR_IPV6_INTERFACE_IP>/64 dev dummy0
    ip link set dummy0 up
    Terminal window
    chmod +x /usr/local/bin/setup-dummy-interface.sh
  2. Buat Systemd Service 

    Terminal window
    vim /etc/systemd/system/dummy-interface.service
    Terminal window
    [Unit]
    Description=Setup Dummy Interface
    After=network.target
    [Service]
    ExecStart=/usr/local/bin/setup-dummy-interface.sh
    RemainAfterExit=yes
    [Install]
    WantedBy=multi-user.target
    Terminal window
    systemctl enable dummy-interface.service
    systemctl start dummy-interface.service
  3. Test Koneksi

    1. Ping

      Terminal window
      ping -I <YOUR_IPV4_INTERFACE_IP> 8.8.8.8
      ping6 -I <YOUR_IPV6_INTERFACE_IP> 2001:4860:4860::8888
    2. Curl

      Terminal window
      curl --interface <YOUR_IPV4_INTERFACE_IP> -4 ifconfig.me
      curl --interface <YOUR_IPV6_INTERFACE_IP> -6 ifconfig.me
    3. mtr

      Terminal window
      mtr -I dummy0 google.com
  1. Install wireguard

    Terminal window
    apt update
    apt install wireguard
  2. Generate Wireguard Private dan Public key

    Terminal window
    wg genkey | tee /etc/wireguard/private.key
    chmod 600 /etc/wireguard/private.key
    cat /etc/wireguard/private.key | wg pubkey | tee /etc/wireguard/public.key
    # Baris Pertama Private Key
    # Baris Kedua Public Key -> simpan untuk konfigurasi client server
  3. Buat Konfigurasi Wireguard di /etc/wireguard/wg0.conf

    Terminal window
    [Interface]
    PrivateKey = <Your-Main-Server-Private-Key>
    Address = <Your-Main-Server-IPv6-Allocation>/64
    ListenPort = 51820
    Table = off
    [Peer]
    PublicKey = <Your-Client-Public-Key> #setelah digenerate
    AllowedIPs = <Your-Client-IPv6-Allocation>/128
  4. Enable dan Start Wireguard Setelah Public Key Client di generate

    Terminal window
    systemctl enable wg-quick@wg0
    systemctl start wg-quick@wg0
  5. Konfigurasi forwarding

    Terminal window
    # Port Forwarding for IPv4 - opsional jika announce IPv4
    net.ipv4.ip_forward=1
    # Port forwarding for IPv6
    net.ipv6.conf.all.forwarding=1
  6. Apply konfigurasi forwarding

    Terminal window
    sudo sysctl -p

Client Server (Home Server) - Debian/Ubuntu

Section titled “Client Server (Home Server) - Debian/Ubuntu”
  1. Install wireguard

    Terminal window
    apt update
    apt install wireguard
  2. Generate Wireguard Private dan Public key

    Terminal window
    wg genkey | tee /etc/wireguard/private.key
    chmod 600 /etc/wireguard/private.key
    cat /etc/wireguard/private.key | wg pubkey | tee /etc/wireguard/public.key
    # Baris Pertama Private Key
    # Baris Kedua Public Key -> Masukkan ke konfigurasi main server
  3. Buat Konfigurasi Wireguard di /etc/wireguard/wg0.conf

    Terminal window
    [Interface]
    PrivateKey = <Your-Client-Private-Key>
    Address = <Your-Client-IPv6-Allocation>/64
    DNS = 2606:4700:4700::1111
    DNS = 2606:4700:4700::1001
    [Peer]
    PublicKey = <Your-Main-Server-Public-Key>
    Endpoint = <Main-Server-Public-IPv6>:51820
    AllowedIPs = ::/0
    PersistentKeepalive = 25
  4. Enable dan Start Wireguard Setelah Public Key Client digenerate

    Terminal window
    systemctl enable wg-quick@wg0
    systemctl start wg-quick@wg0
  1. Ping

    Terminal window
    ping6 -I <YOUR_IPV6_INTERFACE_IP> 2001:4860:4860::8888
  2. Curl

    Terminal window
    curl --interface <YOUR_IPV6_INTERFACE_IP> -6 ifconfig.me
  3. mtr

    Terminal window
    mtr -I dummy0 google.com
Terminal window
apt install qrencode
qrencode -t ansiutf8 < /etc/wireguard/wg-client.conf

https://www.cyberciti.biz/faq/how-to-generate-wireguard-qr-code-on-linux-for-mobile/