Skip to content
Client Panel

Blog

OPNsense Performance Tuning for Multi-Gigabit Internet: The Complete Guide

Out of the box, OPNsense caps out at around 2-3 Gbps throughput even on powerful hardware. If you have a multi-gigabit connection, you know the frustration: your ISP provisioned 6 Gbps, your server has Xeon processors and 64 GB of RAM, yet OPNsense barely uses a quarter of your line rate. Worse, a Debian VM on the same Proxmox host easily hits 9.6 Gbps without any tuning.

This guide synthesizes two of the most referenced resources on this topic , Kirk Schnable’s 2022 deep dive on Binary Impulse and Truvis Thornton’s 2024 tunable-focused guide on Medium , cross-checked against the official OPNsense performance documentation and the FreeBSD pf(4) man page, plus real community reports spanning 2022 through 2026.

Kirk’s baseline setup (2022):

ComponentSpec
CPUIntel Xeon E5-2650L v3 (12C/24T)
RAM64 GB DDR4
NICIntel X520-DA2 (10 Gbps SFP+)
HypervisorProxmox VE
OPNsense VMKVM64 CPU type, VirtIO NICs
Connection6 Gbps WAN (7 Gbps aggregate, dual hand-off)
VMNIC TypeThroughput
Debian 11VirtIO9.6 Gbps ✅
OPNsense (default)VirtIO2–3 Gbps ❌
OPNsenseE1000<1 Gbps
OPNsenseRTL8139<1 Gbps
OPNsensevmxnet3<1 Gbps

Debian on the same hardware was 4× faster. This rules out the physical NIC, switch, and host hardware. The bottleneck is in the guest’s network stack — specifically the interaction between FreeBSD’s kernel and the VirtIO (vtnet) driver, a theme that recurs throughout community reports from 2022 through 2026.

Use the default i440fx machine type (q35 offers no measurable benefit here). In the Proxmox NIC settings, two critical tweaks beyond choosing VirtIO:

SettingValueWhy
FirewallDisabledProxmox’s firewall adds a second layer of packet processing, doubling overhead. Let OPNsense handle it.
Multiqueue8 (or match vCPU count)Enables parallel packet processing across multiple vCPU queues. This works hand-in-hand with RSS and netisr thread distribution. Start with 8, or match your vCPU count.

Optionally enable NUMA in the VM CPU settings (Emin from xeome.dev reports no measurable performance boost, but it doesn’t hurt).

Despite FreeBSD’s rocky history with VirtIO drivers (major issues in FreeBSD 11/12, partially fixed in 13), VirtIO remains the best performing virtual NIC type for OPNsense out of the box. Every alternative tested worse.

2026 update: A community member reports that as of OPNsense 25.7.8, the VirtIO net driver has been overhauled with significantly improved hardware offloading. However, FreeBSD 15 still shows vtnet/virtio limitations , maxing out around 4.5 Gbps between FreeBSD VMs on the same vSwitch, compared to 33 Gbps between Linux VMs. If you’re virtualizing at 10 Gbps+, BSD-based routing may still be a fundamental bottleneck.

Counter-intuitively, the KVM64 CPU type performed better than host in Kirk’s testing. If you’re running VPN workloads, add the AES flag:

CPU type: kvm64
Flags: +aes

One commenter flagged an important Proxmox gotcha: if you set 4 sockets in the VM config but only have 1 physical CPU, you’re creating unnecessary NUMA overhead. Use:

  • Sockets: 1
  • Cores: match your actual physical core count (or slightly less)
  • NUMA: disabled (unless you genuinely have multiple physical sockets)

This is the most counter-intuitive finding across both guides. On a firewall, hardware offloading features that help servers actually hurt you.

Offload SettingEffect
Hardware TSONo benefit, sometimes degrades WAN
Hardware LROBoosts LAN speed but nukes WAN to <1 Mbps
Hardware VLAN FilteringBreaks the web UI entirely , had to edit /conf/config.xml from console to recover

The pattern: enabling hardware offload on LAN interfaces would spike LAN iperf to 8 Gbps while simultaneously collapsing WAN throughput to under 1 Mbps. The offload engines appear to starve the WAN interface of processing time.

Final recommendation: disable all three hardware offloading options under Interfaces > Settings. Kirk achieved full 6 Gbps line rate with all offloading disabled. Truvis came to the same conclusion.

Both guides converge on the same root cause: FreeBSD’s conservative default sysctl values are tuned for 1 Gbps era hardware. The fix is a set of tunables applied under System > Settings > Tunables.

These unshackle FreeBSD’s network stack from single-threaded processing:

net.isr.maxthreads = -1
net.isr.bindthreads = 1
net.isr.dispatch = deferred
hw.ibrs_disable = 1
vm.pmap.pti = 0
TunableWhat It Does
net.isr.maxthreads = -1Spawns one netisr thread per CPU core instead of the default single-threaded processing. This is the single most impactful tunable for multi-gigabit throughput.
net.isr.bindthreads = 1Pins each netisr thread to its own core, reducing cache misses and lock contention.
net.isr.dispatch = deferredChanges packet dispatch policy so packets are queued to netisr threads instead of being processed in the interrupt context. This is what the community guides (Kirk, Truvis, xeome) recommend. However, note that per the official OPNsense docs, enabling RSS (Group 2) automatically moves the dispatch policy from direct to hybrid — the docs’ recommended RSS tunable set does not include forcing deferred. If you enable RSS, consider leaving net.isr.dispatch at its default and letting RSS switch it to hybrid; test both and compare with netstat -Q.
hw.ibrs_disable = 1Disables Spectre V2 mitigation (Indirect Branch Restricted Speculation). Both this and vm.pmap.pti disable CPU-level security mitigations; only do this on a dedicated firewall appliance where the performance gain outweighs the risk.
vm.pmap.pti = 0Disables Kernel Page Table Isolation (Meltdown mitigation). Like IBRS, PTI adds per-syscall overhead that hurts network throughput. Only disable if this is a dedicated firewall VM, not a shared host.

RSS distributes packet flows across CPU cores using a hash of the TCP 4-tuple (src IP, src port, dst IP, dst port) — computed in hardware when the NIC supports it, or in software. This keeps flows pinned to the same core and prevents cache-line ping-pong. Note that RSS is disabled by default in OPNsense on purpose because its impact is far-reaching; the official docs frame it as something to test under high load, not a guaranteed win.

net.inet.rss.enabled = 1
net.inet.rss.bits = N

net.inet.rss.bits is the number of binary bits for the RSS bucket table — it produces 2^N buckets, not N buckets. Per the official OPNsense documentation: the default is already the number of bits representing your core count × 2 (intended for future load-balancing that is not yet implemented), and the official recommendation is to set it lower — to the number of bits representing your CPU core count:

vCPUsrss.bits (official recommendation)Buckets (2^N)
212
424
838
12416
16416
24532

The formula: rss.bits = ceil(log2(vCPUs)). If you leave rss.bits unset, the kernel default (cores × 2 in bucket count) still works — it just allocates more buckets than the docs recommend.

Taken from the Calomel FreeBSD Network Tuning Guide, these increase kernel socket buffers beyond their conservative defaults:

kern.ipc.maxsockbuf = 16777216
net.inet.tcp.recvbuf_max = 4194304
net.inet.tcp.recvspace = 65536
net.inet.tcp.sendbuf_inc = 65536
net.inet.tcp.sendbuf_max = 4194304
net.inet.tcp.sendspace = 65536
net.inet.tcp.soreceive_stream = 1
TunableNotes
kern.ipc.maxsockbuf16777216 is appropriate for 10 Gbps. Calomel’s 614400000 figure is their recommendation for 100 Gbps cards — overkill here.
soreceive_stream = 1Enables the optimized kernel socket interface for TCP streams.
net.pf.states_hashsize = 1048576

PF maintains two separate hash tables, and it is important not to confuse them (the original guides only mentioned source_nodes_hashsize, which led many users to tune the wrong one):

TunableDefault (per pf(4))Purpose
net.pf.states_hashsize131072Hash table for the state table — every tracked connection. This is the one that matters for throughput. Under high connection counts, a small hash table causes collisions and lock contention (states are locked per hash row; one or two states per row is ideal).
net.pf.source_nodes_hashsize32768Hash table for source tracking only: sticky-address, max-src-conn, max-src-states, source-based rate limiting. If you have no source tracking rules, increasing it does nothing useful.

Both must be powers of 2 and are loader tunables (reboot required). Size states_hashsize relative to your expected state count — roughly one to two states per hash row is ideal, so 1M rows comfortably covers state tables in the high hundreds of thousands.

Older versions of the community guides recommend these; we list them for reference but do not recommend setting them on a pure firewall:

# Reference only — affects firewall-local TCP connections, not forwarded traffic
# net.inet.tcp.mssdflt = 1240
# net.inet.tcp.abc_l_var = 52
# net.inet.tcp.initcwnd_segments = 52
# net.inet.tcp.minmss = 536

What mssdflt actually does: This sets the default MSS that the firewall’s own TCP stack uses when a peer does not send an MSS option during the TCP handshake. It is not MSS clamping for forwarded traffic. MSS clamping (limiting the MSS of connections passing through the firewall) is configured in the MSS field on each interface in OPNsense, which generates a scrub max-mss rule in pf. These are different mechanisms.

The related abc_l_var and initcwnd_segments tunables control TCP congestion window behavior for connections terminating on the firewall. Like the socket buffer tunables in Group 3, they do not affect forwarded traffic.

kern.random.fortuna.minpoolsize = 128
net.isr.defaultqlimit = 2048

fortuna.minpoolsize raises the minimum entropy pool size threshold used by the Fortuna RNG before (re)seeding — potentially relevant if you run VPN services that consume a lot of randomness. defaultqlimit increases the per-workstream netisr queue depth, preventing drops under bursty traffic.

The Binary Impulse post accumulated 30 comments over 4 years. Here is what the community learned through trial, error, and frustration:

“I manage just under 4.5 Gbps between any FreeBSD host and any other VM on the same vSwitch, a far cry from 33 Gbps I manage between Linux VMs. There is something fundamentally wrong with BSD and/or the vtnet drivers.” , 2026 commenter, FreeBSD 15

If you need >5 Gbps through a virtualized BSD router, the host OS matters more than any tunable. Several community members eventually gave up and switched to Debian-based routing VMs.

“I changed the MTU on my LAN and WAN interface from 1500 to 9000. And like magic, it worked! 3.2 Gbps to 9.9 Gbps.” , Community commenter

Setting MTU 9000 on LAN interfaces can dramatically improve LAN throughput by reducing per-packet processing overhead. The 3.2 → 9.9 Gbps result is almost certainly an internal iperf test between LAN hosts, not WAN throughput.

For WAN: your ISP hand-off almost certainly uses MTU 1500. Setting MTU 9000 on the WAN interface is risky — if every hop between you and your ISP does not support jumbo frames, you will hit Path MTU Discovery black holes (packets silently dropped with no ICMP feedback). Unless your ISP explicitly documents jumbo frame support on their hand-off, leave WAN MTU at 1500.

Kirk himself upgraded to 10 Gbps after writing the guide and found OPNsense couldn’t keep up:

“I ended up abandoning the BSD based router distributions and went back to running a router on a Debian based system, which I was able to virtualize in Proxmox and maintain 10 Gbps easily. FreeBSD’s drivers must just be behind the times for these multi-gigabit use cases.”

Multiple users with Intel i225 (2.5 Gbps) NICs on bare metal report unstable throughput , speeds spike to 2.34 Gbps then collapse to 600 Mbps. This appears to be a lingering FreeBSD driver issue, not a tunable problem.

ChangeStatus
OPNsense 25.7.8 VirtIO overhaulHardware offloading vastly improved per community reports
FreeBSD 15 vtnetStill capped at ~4.5 Gbps VM-to-VM
Linux VM routingStill 7-8× faster than BSD on same vSwitch
RSS supportAvailable since ~21.7, but still disabled by default and officially framed as experimental — enable and test, don’t assume

The gap has narrowed but not closed. For sub-5 Gbps connections on bare metal or with the latest OPNsense 25.x+, the tunables in this guide will get you to line rate. For 10 Gbps+ virtualized routing, Debian or a dedicated Linux-based router distribution may still be the pragmatic choice.

Copy-paste ready list for System > Settings > Tunables:

# CPU & Interrupt Processing
net.isr.maxthreads = -1
net.isr.bindthreads = 1
hw.ibrs_disable = 1
vm.pmap.pti = 0
# Dispatch policy: community guides use 'deferred'. If enabling RSS below,
# consider leaving this unset — RSS moves the policy to 'hybrid' automatically.
# net.isr.dispatch = deferred
# Receive Side Scaling — check driver support first (see Group 2)
net.inet.rss.enabled = 1
# net.inet.rss.bits = 3 # ← ceil(log2(vCPUs)): 4 cores→2, 8→3, 16→4, 24→5
# Socket Buffers & TCP (10 Gbps — only affects firewall-local connections)
kern.ipc.maxsockbuf = 16777216
net.inet.tcp.recvbuf_max = 4194304
net.inet.tcp.recvspace = 65536
net.inet.tcp.sendbuf_inc = 65536
net.inet.tcp.sendbuf_max = 4194304
net.inet.tcp.sendspace = 65536
net.inet.tcp.soreceive_stream = 1
# PF Hash Tables (defaults: states 131072, source_nodes 32768)
net.pf.states_hashsize = 1048576 # the one that matters (~80 MB RAM)
# net.pf.source_nodes_hashsize = 1048576 # only with source tracking rules
# Queues
net.isr.defaultqlimit = 2048
# Entropy (for VPN)
kern.random.fortuna.minpoolsize = 128

After applying tunables and rebooting:

Terminal window
# Verify netisr thread distribution and dispatch policy.
# With RSS enabled, the policy should read 'hybrid' (per official docs).
netstat -Q
# Inspect RSS configuration (bits, buckets, key)
sysctl net.inet.rss
# Check whether your NIC driver exposes RSS and uses multiple queues
sysctl -a | grep rss
dmesg | grep vectors
# Test LAN throughput
iperf3 -c <lan-client-ip>
# Test WAN throughput (from client behind OPNsense)
speedtest-cli

Production-Ready VPS: Multi-Node Edition

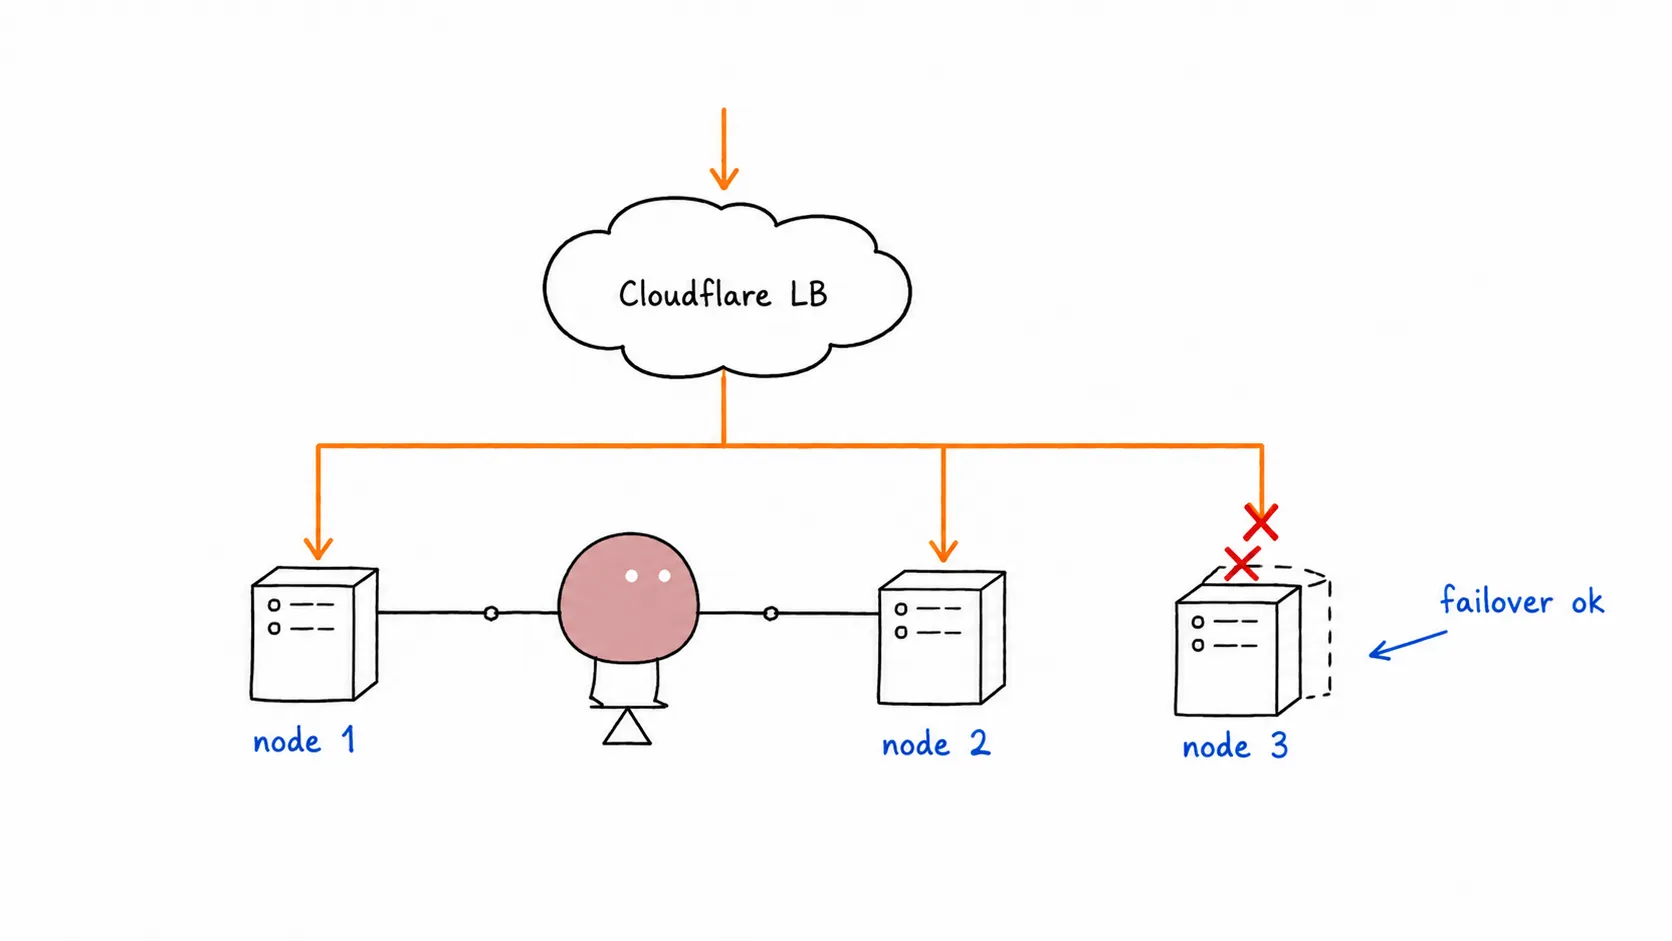
Tomochi balancing traffic from a Cloudflare cloud across multiple VPS nodes

Part 3 of the series. Part 1: Traefik · Part 2: Caddy

A single VPS is great, until it isn’t. Hardware fails. Datacenter has a bad day. Kernel panic at 3 AM. Suddenly your app is down and you’re SSH’ing from bed.

The fix: two VPS nodes. But two nodes means two copies of everything, and two databases writing independently is how you lose data. This post shows the self-hosted way: Postgres replication between nodes and MinIO for shared file storage. No managed services. No vendor lock-in. All yours.


┌─────────────┐
│ Cloudflare │
│ Orange Cloud │
│ (2x A record)│
└──────┬──────┘
┌────────────┴────────────┐
│ │
┌─────▼─────┐ ┌─────▼─────┐
│ VPS-1 │ │ VPS-2 │
│ Caddy │ │ Caddy │
│ App x3 │ │ App x3 │
│ Watchtower│ │ Watchtower│
│ │ │ │
│ Postgres │◇streaming◇│ Postgres │
│ (PRIMARY) │◇replication◇│ (REPLICA) │
│ │ │ │
│ MinIO │◇◀─sync────◇│ MinIO │
└───────────┘ └───────────┘

VPS-1 is the primary: Postgres writes, MinIO writes. VPS-2 replicates both. If VPS-1 goes down, promote VPS-2 to primary. Everything lives on your own metal.


Same as always. Two identical nodes. Same specs, same OS.

Terminal window
# On BOTH VPS-1 and VPS-2, follow Steps 1-6 from Part 1:
# - Create non-root user, add to wheel
# - Harden SSH (no root, no password)
# - Install Docker, add user to docker group
# - Firewall: ports 22, 80, 443 open
# - ALSO open port 5432 between nodes for Postgres replication
# - ALSO open port 9000 between nodes for MinIO sync

Firewall: allow Postgres + MinIO between nodes only:

Terminal window
# On BOTH nodes. Replace 10.0.0.2 with the OTHER node's private IP
sudo firewall-cmd --permanent --add-rich-rule="rule family=ipv4 source address=10.0.0.2 port port=5432 protocol=tcp accept"
sudo firewall-cmd --permanent --add-rich-rule="rule family=ipv4 source address=10.0.0.2 port port=9000 protocol=tcp accept"
sudo firewall-cmd --reload

Most VPS providers give you a private IP for inter-node communication. Use it. Don’t expose Postgres or MinIO to the public internet.


Step 2: Self-Hosted Postgres with Streaming Replication

Section titled “Step 2: Self-Hosted Postgres with Streaming Replication”

VPS-1 runs Postgres as primary (reads + writes). VPS-2 runs Postgres as hot standby (reads only, continuously synced). If VPS-1 dies, promote VPS-2.

Create a compose.yaml for Postgres:

services:
postgres:
image: postgres:17
restart: always
environment:
POSTGRES_PASSWORD: ${PG_PASSWORD}
command: |
-c wal_level=replica
-c max_wal_senders=3
-c wal_keep_size=256
volumes:
- pg-data:/var/lib/postgresql/data
- ./pg-init:/docker-entrypoint-initdb.d
ports:
- "5432:5432"
volumes:
pg-data:

Create pg-init/01-replication-user.sql:

CREATE ROLE replicator WITH LOGIN REPLICATION PASSWORD 'your-replication-password';

Deploy:

Terminal window
mkdir -p pg-init
echo "CREATE ROLE replicator WITH LOGIN REPLICATION PASSWORD 'your-replication-password';" > pg-init/01-replication-user.sql
docker compose up -d

Create a compose.yaml:

services:
postgres:
image: postgres:17
restart: always
environment:
POSTGRES_PASSWORD: ${PG_PASSWORD}
volumes:
- pg-data:/var/lib/postgresql/data
ports:
- "5432:5432"
volumes:
pg-data:

Start it once to generate the data directory, then stop it:

Terminal window
docker compose up -d
docker compose stop postgres

Now wipe the data directory and pull a base backup from the primary:

Terminal window
sudo rm -rf /var/lib/docker/volumes/guestbook_pg-data/_data/*
docker compose run --rm postgres pg_basebackup -h 10.0.0.1 -U replicator -D /var/lib/postgresql/data -P -R

The -R flag creates a standby.signal file and configures the connection string automatically.

Now update compose.yaml for VPS-2 with replication settings:

services:
postgres:
image: postgres:17
restart: always
environment:
POSTGRES_PASSWORD: ${PG_PASSWORD}
command: |
-c primary_conninfo='host=10.0.0.1 port=5432 user=replicator password=your-replication-password'
-c primary_slot_name=replica_slot
volumes:
- pg-data:/var/lib/postgresql/data
ports:
- "5432:5432"
volumes:
pg-data:

Create a replication slot on the primary:

Terminal window
# On VPS-1
docker compose exec postgres psql -U postgres -c "SELECT * FROM pg_create_physical_replication_slot('replica_slot');"

Start the replica:

Terminal window
# On VPS-2
docker compose up -d

Verify replication is working:

Terminal window
# On VPS-1 — should show one replica connected
docker compose exec postgres psql -U postgres -c "SELECT client_addr, state FROM pg_stat_replication;"

Your app needs to know: writes go to VPS-1, reads CAN go to VPS-2:

DATABASE_URL=postgresql://postgres:***@10.0.0.1:5432/mydb # writes (VPS-1)
DATABASE_REPLICA_URL=postgresql://postgres:***@10.0.0.2:5432/mydb # reads (VPS-2)

For most apps, just point everything at the primary. The replica is there for failover, not load distribution.


Step 3: Self-Hosted Object Storage with MinIO

Section titled “Step 3: Self-Hosted Object Storage with MinIO”

MinIO is an S3-compatible object store. Run it on both nodes with bucket replication.

Add to your compose.yaml:

services:
minio:
image: minio/minio:latest
restart: always
command: server /data --console-address ":9001"
environment:
MINIO_ROOT_USER: minioadmin
MINIO_ROOT_PASSWORD: ${MINIO_PASSWORD}
volumes:
- minio-data:/data
ports:
- "9000:9000"
- "9001:9001"
volumes:
minio-data:

Access MinIO Console at http://vps1-ip:9001. Create a bucket (e.g., uploads).

Then on BOTH nodes, configure replication via mc (MinIO Client):

Terminal window
# Install mc
curl https://dl.min.io/client/mc/release/linux-amd64/mc -o /usr/local/bin/mc
chmod +x /usr/local/bin/mc
# Add both MinIO instances
mc alias set vps1 http://10.0.0.1:9000 minioadmin ${MINIO_PASSWORD}
mc alias set vps2 http://10.0.0.2:9000 minioadmin ${MINIO_PASSWORD}
# Create replication rule — VPS-1 → VPS-2
mc replicate add vps1/uploads --remote-bucket vps2/uploads --priority 1
# Create replication rule — VPS-2 → VPS-1 (bidirectional)
mc replicate add vps2/uploads --remote-bucket vps1/uploads --priority 1

Now any file uploaded to VPS-1’s MinIO is automatically replicated to VPS-2, and vice versa. Your app writes to its local MinIO, reads from the same. Both nodes always have the full file set.

Your app uses the local MinIO endpoint. On each node it’s always localhost:9000:

S3_ENDPOINT=http://localhost:9000
S3_BUCKET=uploads
S3_ACCESS_KEY=minioadmin
S3_SECRET_KEY=${MINI...
No code changes needed between single-node and multi-node. MinIO replication handles sync transparently.
> **Don't need file uploads?** Skip MinIO entirely. Your app is already multi-node-ready.
---
## Step 4: Deploy the App on Both Nodes
We use **Caddy** as the reverse proxy, following the simpler setup from [Part 2](/blog/vps-production-ready-caddy/). Build the `caddy-docker-proxy` image on both nodes (or push to ghcr.io and pull):
```dockerfile
FROM caddy:2.9-builder AS builder
RUN xcaddy build --with github.com/lucaslorentz/caddy-docker-proxy/v2
FROM caddy:2.9
COPY --from=builder /usr/bin/caddy /usr/bin/caddy
Terminal window
docker build -t caddy-docker-proxy .

Now the full compose.yaml for VPS-1 (primary):

services:
caddy:
image: caddy-docker-proxy
restart: always
ports:
- "80:80"
- "443:443"
volumes:
- /var/run/docker.sock:/var/run/docker.sock:ro
- caddy-data:/data
postgres:
image: postgres:17
restart: always
environment:
POSTGRES_PASSWORD: ${PG_PASSWORD}
command: |
-c wal_level=replica
-c max_wal_senders=3
-c wal_keep_size=256
volumes:
- pg-data:/var/lib/postgresql/data
ports:
- "5432:5432"
minio:
image: minio/minio:latest
restart: always
command: server /data --console-address ":9001"
environment:
MINIO_ROOT_USER: minioadmin
MINIO_ROOT_PASSWORD: ${MINIO_PASSWORD}
volumes:
- minio-data:/data
ports:
- "9000:9000"
- "9001:9001"
guestbook:
image: ghcr.io/yourusername/guestbook:prod
restart: always
environment:
DATABASE_URL: postgresql://postgres:***@postgres:5432/mydb
S3_ENDPOINT: http://minio:9000
S3_BUCKET: uploads
S3_ACCESS_KEY: minioadmin
S3_SECRET_KEY: ${MINIO_PASSWORD}
S3_USE_SSL: "false"
labels:
caddy: yourdomain.com
caddy.reverse_proxy: "{{upstreams 8080}}"
com.centurylinklabs.watchtower.enable: "true"
deploy:
replicas: 3
depends_on:
- postgres
watchtower:
image: containrrr/watchtower
command:
- "--label-enable"
- "--interval"
- "30"
- "--rolling-restart"
volumes:
- /var/run/docker.sock:/var/run/docker.sock:ro
volumes:
caddy-data:
pg-data:
minio-data:

VPS-2 uses the same compose.yaml but with the replica Postgres config from Step 2 (different command on the postgres service). Everything else is identical.

Deploy on both:

Terminal window
# On VPS-1
cd ~/guestbook && docker compose up -d
# On VPS-2
cd ~/guestbook && docker compose up -d

Step 5: Cloudflare Orange Cloud (Free Load Balancing)

Section titled “Step 5: Cloudflare Orange Cloud (Free Load Balancing)”

Cloudflare Load Balancer costs $10/month. For two nodes, the free alternative works well enough.

  1. In Cloudflare DNS dashboard, add two A records for your domain
  2. Both point to @ (root), one to each VPS public IP
  3. Enable the orange cloud (proxy) on both records
  4. Cloudflare distributes traffic across both origins automatically
Type Name Content Proxy
A @ <VPS-1 IP> 🟧 Proxied
A @ <VPS-2 IP> 🟧 Proxied

Limitations compared to paid LB:

  • No active health checks. If VPS-1 goes hard down (timeout), Cloudflare eventually stops sending traffic there. But if the app returns 500s, Cloudflare won’t know.
  • No weighted routing. Traffic split is roughly 50/50, not configurable.
  • Failover is reactive, not proactive.

For most projects, this is enough. Your uptime monitor (Step 8) will catch the 500s and you can manually pull the dead node’s A record. If you need 99.9% uptime with automatic failover, the $10/month Cloudflare LB is the upgrade path.


Cloudflare detects VPS-1 is unreachable, routes all traffic to VPS-2. Your app on VPS-2 is still running, still serving. But Postgres on VPS-2 is a read-only replica.

To promote it:

Terminal window
# On VPS-2 — promote the replica to primary
docker compose exec postgres psql -U postgres -c "SELECT pg_promote();"

Now VPS-2’s Postgres accepts writes. Update your app’s DATABASE_URL (if it pointed to VPS-1’s IP) or restart the container if using the local postgres hostname.

Also remove VPS-1’s A record from Cloudflare DNS so traffic stops going to the dead node.

When VPS-1 comes back:

  • Rebuild it as a new replica (pg_basebackup from VPS-2)
  • Add its A record back to Cloudflare

This is a manual failover. For automatic failover you’d need Patroni + etcd, which triples the complexity. For a two-node self-hosted setup, manual promotion is pragmatic. You’ll be awake anyway because your monitoring alerted you.


Watchtower on both nodes. Push a new image, both nodes update within 30 seconds.

Terminal window
docker build -t ghcr.io/yourusername/guestbook:prod .
docker push ghcr.io/yourusername/guestbook:prod
# Wait 30s. Both VPS-1 and VPS-2 roll restart.
# Zero downtime — Cloudflare routes away from restarting node.

  • Uptime Robot (free): add http://vps1-ip/health and http://vps2-ip/health
  • Postgres replication lag:
    Terminal window
    docker compose exec postgres psql -U postgres -c "SELECT pg_wal_lsn_diff(pg_current_wal_lsn(), replay_lsn) FROM pg_stat_replication;"
  • Disk usage on both nodes:
    Terminal window
    df -h /var/lib/docker/volumes

What each component actually uses on your nodes:

ComponentvCPURAMDiskNotes
Caddy0.2128 MBNegligible. Single binary, ~20 MB at runtime
App (x3 replicas)1.5512 MBDepends on your app. Go/Rust: 50 MB, Node/Python: 200+ MB per instance
Postgres11 GBscales with dataShared buffers + WAL. 1 GB is minimum for replication
MinIO0.5512 MBscales with filesEach node stores full file set. Plan accordingly
Watchtower0.164 MBBarely a blip
OS overhead0.51 GB20 GBsystemd, Docker daemon, SSH
Buffer11.5 GBHeadroom for spikes, logs, builds

Recommendation per node: 4 vCPU / 8 GB RAM / 80 GB SSD.

For low-traffic apps, 2 vCPU / 4 GB works. For Postgres-heavy workloads, bump to 8 GB RAM and give Postgres 2-4 GB of shared_buffers.


If you followed Part 1 with Traefik and want to keep it, just swap the Caddy service for your Traefik config. The rest — Postgres replication, MinIO sync, Cloudflare DNS — stays exactly the same. The reverse proxy layer is independent of everything else.

That said, Caddy’s 3-line config is especially nice when you’re managing two identical nodes. Less YAML to keep in sync.


  • Two VPS nodes hardened, Docker installed
  • Postgres primary on VPS-1, replica on VPS-2
  • Streaming replication verified
  • MinIO running on both nodes, bucket replication active
  • Caddy built and running on both nodes
  • App deployed on both nodes with identical compose.yaml
  • Cloudflare DNS: two A records, orange cloud enabled
  • Watchtower on both nodes
  • Failover tested (promote replica, verify traffic flows)
  • Uptime monitoring on both nodes

No managed databases. No S3 bills. No load balancer subscription. Just two Linux boxes, Postgres replication, MinIO sync, and Cloudflare’s free proxy tier. Everything you need for a production multi-node setup, running on your own hardware.

VPS Production-Ready with Caddy : The Simpler Alternative

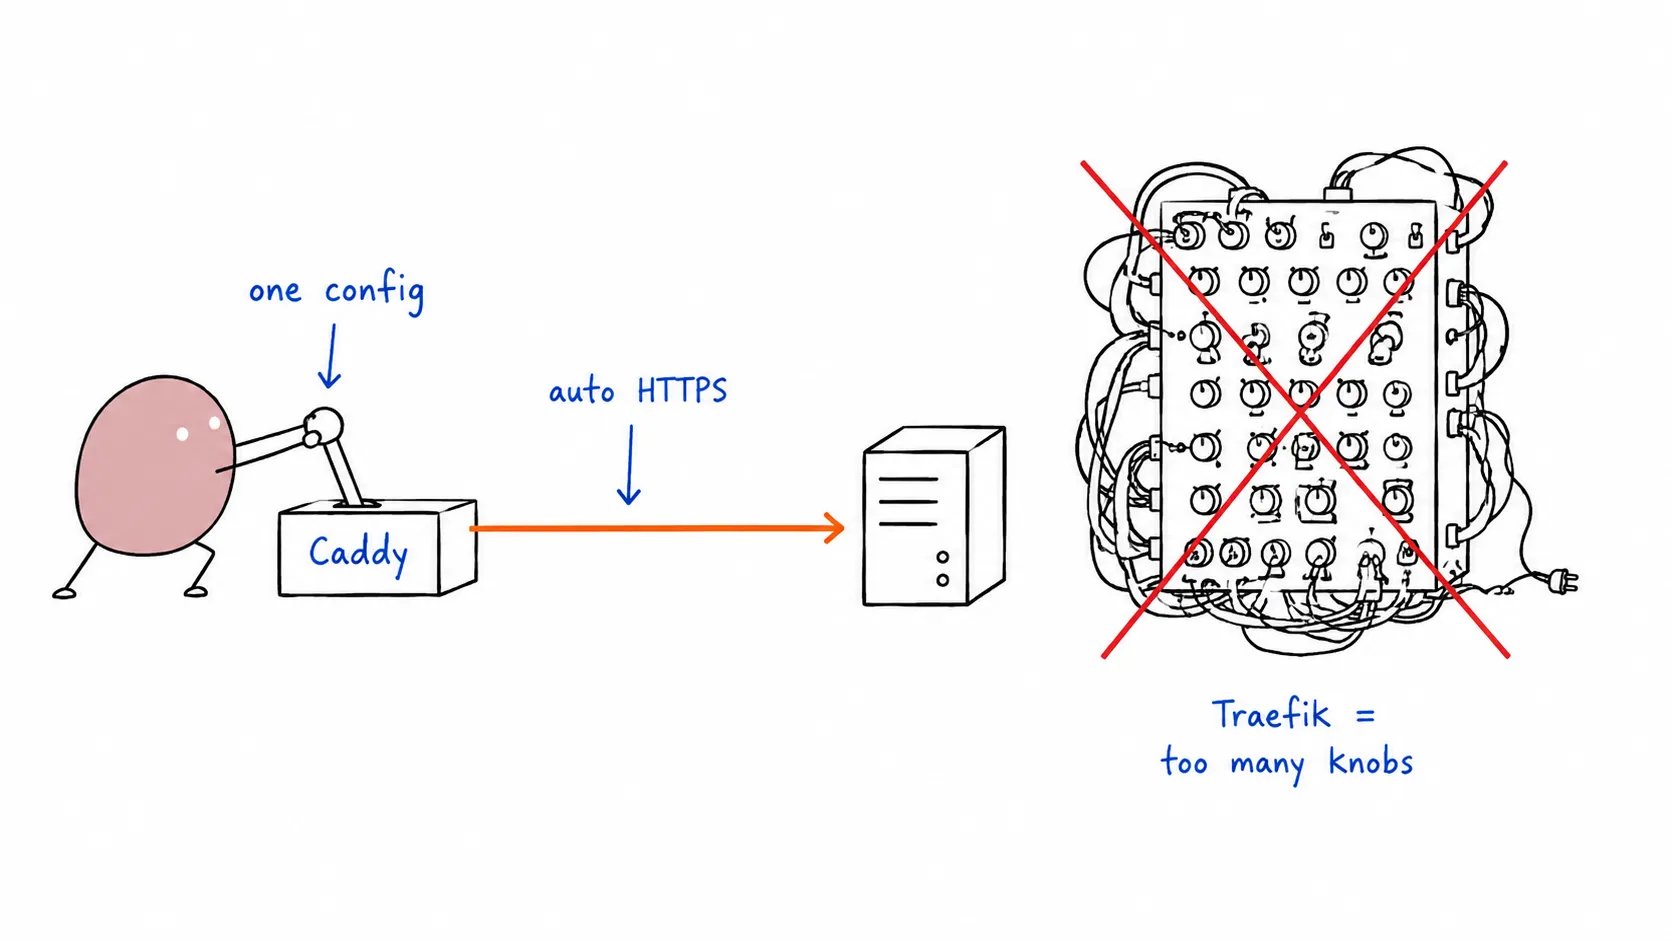
Tomochi pulling one clean Caddy lever while a tangled Traefik panel sits unused

VPS Production-Ready with Caddy : The Simpler Alternative

Section titled “VPS Production-Ready with Caddy : The Simpler Alternative”

Companion to our Traefik-based guide. Same stack, simpler reverse proxy.

In the previous post we set up a production-ready VPS with Traefik : powerful, but heavy. Traefik’s config sprawls across YAML labels, ACME resolvers, entrypoints, and middleware chains. For most projects, it’s overkill.

Caddy does the same job with a fraction of the config. One binary, HTTPS by default, and Docker labels so clean you can read them in one breath.

This post covers the exact same 12-step stack, swapping Traefik for Caddy. All commands cover both Rocky Linux 10 and Ubuntu 26.04.


Steps 1–6: Identical to the Traefik Guide

Section titled “Steps 1–6: Identical to the Traefik Guide”

Provisioning, user creation, DNS, SSH hardening, firewall, and Docker installation are exactly the same. Follow Steps 1–6 from the Traefik guide, then come back here.

Quick recap of where you should be:

  • Non-root user with sudo/wheel
  • SSH hardened (no password, no root login)
  • Firewall: ports 22, 80, 443 open
  • Docker installed, user in docker group

Step 7: Build the Caddy + Docker Proxy Image

Section titled “Step 7: Build the Caddy + Docker Proxy Image”

Caddy doesn’t natively discover Docker containers. We need the caddy-docker-proxy plugin : a lightweight module that watches Docker labels and generates routes automatically, just like Traefik.

Create a Dockerfile:

FROM caddy:2.9-builder AS builder
RUN xcaddy build \
--with github.com/lucaslorentz/caddy-docker-proxy/v2
FROM caddy:2.9
COPY --from=builder /usr/bin/caddy /usr/bin/caddy

Build it:

Terminal window
docker build -t caddy-docker-proxy .

💡 Tip: Push this image to ghcr.io/yourusername/caddy-docker-proxy so you don’t rebuild on every deploy. CI can handle it.


Create ~/guestbook/ just like before, then write the compose.yaml:

services:
caddy:
image: caddy-docker-proxy
restart: always
ports:
- "80:80"
- "443:443"
volumes:
- /var/run/docker.sock:/var/run/docker.sock:ro
- caddy-data:/data
- ./Caddyfile:/etc/caddy/Caddyfile
db:
image: postgres:17
restart: always
environment:
POSTGRES_PASSWORD_FILE: /run/secrets/postgres-password
volumes:
- postgres-data:/var/lib/postgresql/data
secrets:
- postgres-password
guestbook:
image: ghcr.io/yourusername/guestbook:prod
restart: always
environment:
DATABASE_URL: postgres://postgres:${POSTGRES_PASSWORD}@db:5432/postgres?sslmode=disable
labels:
caddy: yourdomain.com
caddy.reverse_proxy: "{{upstreams 8080}}"
deploy:
replicas: 3
depends_on:
- db
secrets:
postgres-password:
file: ./db/postgres-password.txt
volumes:
postgres-data:
caddy-data:

That’s it. Three labels replace Traefik’s 8-label configuration.

The Caddyfile is minimal : caddy-docker-proxy handles routing from Docker labels:

{
debug
}

If you need custom middleware (rate limiting, IP filtering, header manipulation), add it here. For most apps, the empty Caddyfile above is sufficient.

Deploy:

Terminal window
export POSTGRES_PASSWORD=$(cat db/postgres-password.txt)
docker compose up -d

Caddy + caddy-docker-proxy automatically discovers all containers for a service. With replicas: 3, Caddy round-robins across all three guestbook instances. No extra config.

Terminal window
docker compose up -d --scale guestbook=3

Unlike Traefik, Caddy doesn’t track container health mid-request. If a container dies between discovery ticks, the next request may hit a dead backend for a few seconds. For most projects this is fine : the health check interval is configurable.


Step 10: HTTPS : Literally Nothing to Configure

Section titled “Step 10: HTTPS : Literally Nothing to Configure”

This is where Caddy shines. HTTPS works out of the box. No ACME email, no challenge type, no certificate resolver, no storage volume for acme.json.

How? Caddy sees yourdomain.com in the Docker label, obtains a Let’s Encrypt certificate automatically, and renews it 30 days before expiry. The certificates live in the caddy-data volume.

Zero config. Not kidding.

Compare:

# No ACME config at all.
# HTTPS just works.
labels:
caddy: yourdomain.com
caddy.reverse_proxy: "{{upstreams 8080}}"

HTTP → HTTPS redirect is also automatic with Caddy. No middleware labels needed.


Step 11: Automated Deployments (Watchtower)

Section titled “Step 11: Automated Deployments (Watchtower)”

Identical to the Traefik setup:

services:
watchtower:
image: containrrr/watchtower
command:
- "--label-enable"
- "--interval"
- "30"
- "--rolling-restart"
volumes:
- /var/run/docker.sock:/var/run/docker.sock:ro
guestbook:
labels:
# ... existing Caddy labels
- "com.centurylinklabs.watchtower.enable=true"

Same as Traefik guide : Uptime Robot, Better Uptime, or self-hosted Uptime Kuma.


services:
caddy:
image: caddy-docker-proxy
restart: always
ports:
- "80:80"
- "443:443"
volumes:
- /var/run/docker.sock:/var/run/docker.sock:ro
- caddy-data:/data
db:
image: postgres:17
restart: always
environment:
POSTGRES_PASSWORD_FILE: /run/secrets/postgres-password
volumes:
- postgres-data:/var/lib/postgresql/data
secrets:
- postgres-password
guestbook:
image: ghcr.io/yourusername/guestbook:prod
restart: always
environment:
DATABASE_URL: postgres://postgres:${POSTGRES_PASSWORD}@db:5432/postgres?sslmode=disable
labels:
caddy: yourdomain.com
caddy.reverse_proxy: "{{upstreams 8080}}"
com.centurylinklabs.watchtower.enable: "true"
deploy:
replicas: 3
depends_on:
- db
watchtower:
image: containrrr/watchtower
command:
- "--label-enable"
- "--interval"
- "30"
- "--rolling-restart"
volumes:
- /var/run/docker.sock:/var/run/docker.sock:ro
secrets:
postgres-password:
file: ./db/postgres-password.txt
volumes:
postgres-data:
caddy-data:

TraefikCaddy
Config lines (HTTPS + routing)~15 lines3 labels
HTTPS setupACME resolver, email, storageZero config
Docker discoveryBuilt-inPlugin needed
Custom image requiredNoYes (build step)
DashboardBuilt-in (:8080)None
MiddlewareRich chain systemCaddyfile directives
Health-aware LBYesBasic (DNS-based)
Resource usage~40 MB RAM~20 MB RAM
Best forComplex routing, multiple services, API gatewaysSimple apps, static sites, quick deploys

Verdict: If you’re deploying a single app or a small handful of services, Caddy wins on simplicity. If you’re building a multi-service platform with complex routing rules, rate limiting, and circuit breakers : Traefik is the better tool.

Both are excellent. Pick the one that matches your complexity budget.


  • Non-root user with sudo/wheel
  • SSH hardened
  • Firewall: 22, 80, 443 open
  • Docker + user in docker group
  • Custom Caddy image built (caddy-docker-proxy)
  • App deployed with Caddy labels
  • HTTPS active (auto)
  • Multiple replicas running
  • Watchtower handling rolling updates
  • Uptime monitor configured

Caddy strips the ceremony out of reverse-proxying. Three labels, zero HTTPS config, and a single binary. For most projects shipping to a VPS, that’s exactly the right amount of complexity.

Already set up with Traefik? The migration is swapping the reverse proxy service and updating labels. Everything else : Docker, Postgres, Watchtower, firewall : stays the same.

Setting Up a Production-Ready VPS from Scratch: Rocky Linux 10 & Ubuntu 26.04

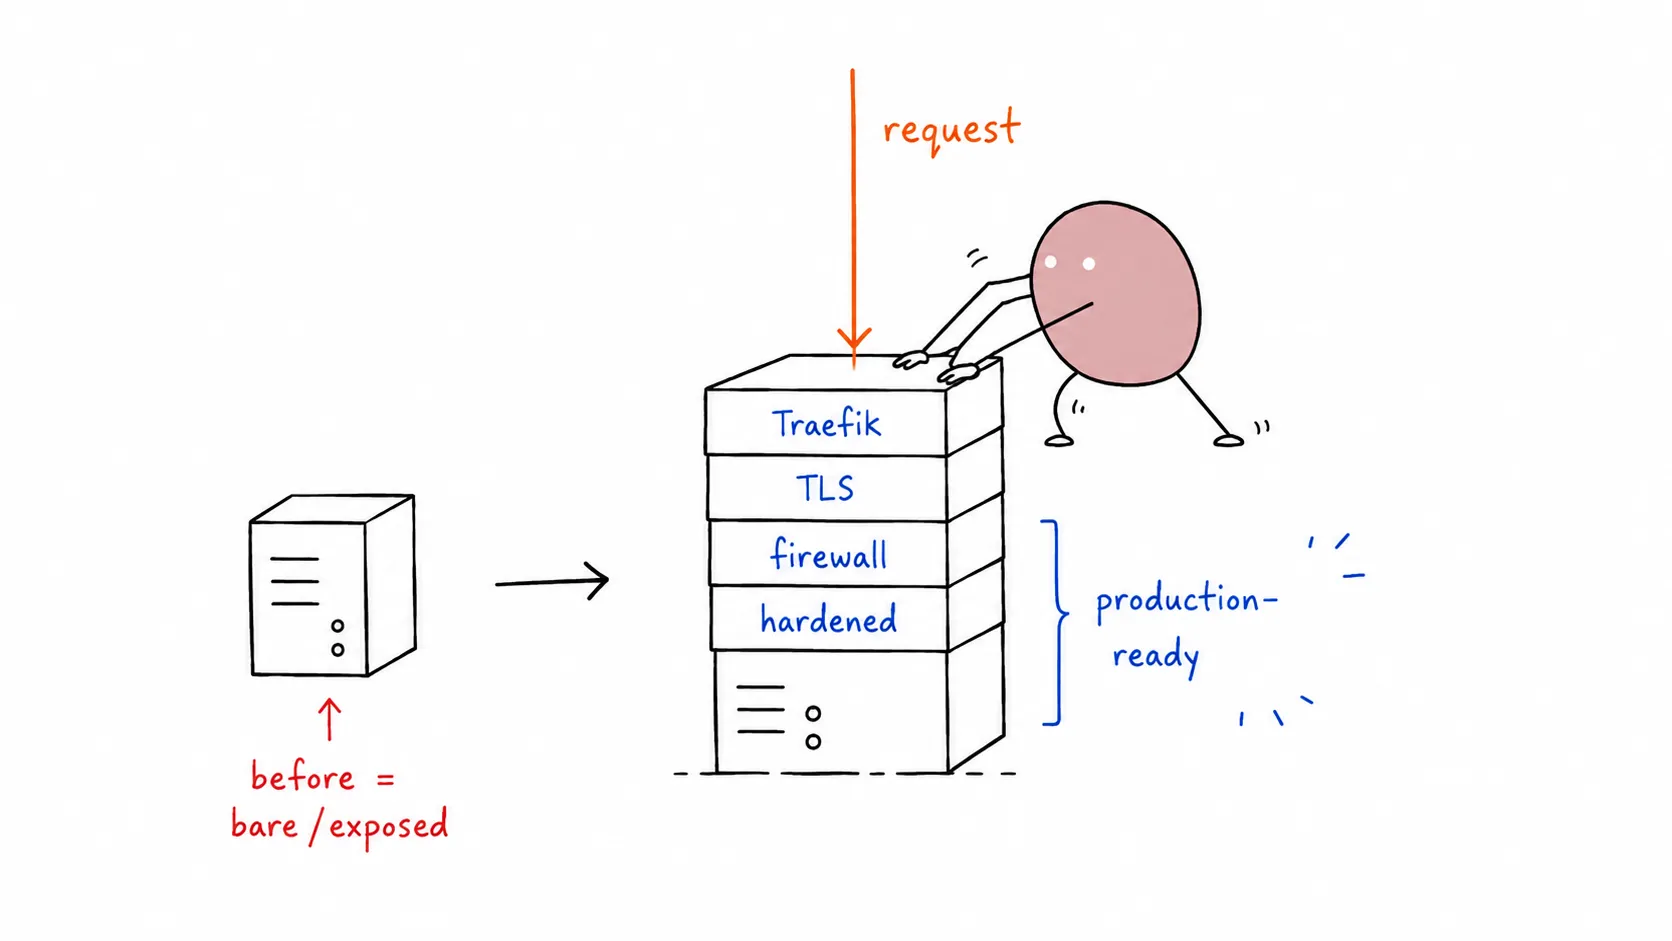
Tomochi stacking Traefik, TLS, firewall and hardening layers onto a bare VPS

Setting Up a Production-Ready VPS from Scratch: Rocky Linux 10 & Ubuntu 26.04

Section titled “Setting Up a Production-Ready VPS from Scratch: Rocky Linux 10 & Ubuntu 26.04”

Adapted from Dreams of Code, a dual-OS guide covering both RHEL-family and Debian-family setups.


Deploying to the cloud has never been easier. Platform-as-a-Service (PaaS) options like Railway, Fly.io, and Render make going live a breeze. But PaaS isn’t perfect for every use case: long-running tasks, heavy data transfer, and predictable billing often push teams toward a VPS (Virtual Private Server).

The perceived difficulty of hardening and configuring a raw VPS scares people off. But is it actually hard? We set out to prove it isn’t. Here’s a production-ready stack on both Rocky Linux 10 and Ubuntu 26.04 LTS.

  • DNS pointing to the server
  • Application deployed and running (Docker)
  • HTTPS/TLS with automatic cert provisioning & renewal (Let’s Encrypt)
  • Hardened SSH: no root login, no password auth
  • Firewall blocking unnecessary ports
  • High availability: multiple app instances
  • Load balancing via reverse proxy
  • Automated rolling deployments
  • Uptime monitoring with alerts

Constraints: No Kubernetes. No Coolify. No Terraform. Simple tooling, minimal domain expertise.


Pick a provider (Hetzner, Hostinger, DigitalOcean, Vultr). We used a 2 vCPU / 8 GB RAM instance.

💡 Hosting with a side of nasi goreng? 🇮🇩 8labs offers VirtualLabs and ElasticLabs : VPS and scalable infrastructure, straight out of Indonesia. 🤙

During setup via your provider’s panel:

  1. Select Rocky Linux 10 or Ubuntu 26.04 LTS
  2. Set a strong root password
  3. Add your SSH public key
  4. Disable any “malware scanner” or monitoring agent if you don’t need it

Once deployed, test SSH:

Terminal window
ssh root@<your-server-ip>

Working as root is a bad habit. Create a regular user with sudo/wheel privileges.

Terminal window
# Create user
useradd -m -s /bin/bash deployer
passwd deployer
# Add to wheel group (Rocky's sudo equivalent)
usermod -aG wheel deployer
# Test
su - deployer
sudo echo "sudo works"

Tip: Install tmux on the VPS. If your SSH drops, reattach with tmux attach, no lost progress.

Terminal window
sudo dnf install -y tmux # Rocky
sudo apt install -y tmux # Ubuntu

Point your domain to the VPS:

  1. Clear any existing A/AAAA/CNAME records at your registrar
  2. Add an A record for @ (root domain) pointing to your server’s IPv4
  3. Optionally add a www CNAME pointing to @

Find your server IP:

Terminal window
ip -4 addr show | grep inet
# or
curl -4 ifconfig.me

DNS propagation takes minutes to hours. Move on to security while waiting.


SSH is your front door. Lock it down.

If you don’t already have an SSH key pair, generate one on your local machine:

Terminal window
ssh-keygen -t ed25519 -C "your-email@example.com"
# Press Enter to accept the default path (~/.ssh/id_ed25519)
# Set a passphrase (recommended) or leave empty

Ed25519 vs RSA: Ed25519 is faster, more compact, and just as secure as RSA 4096. It is supported by OpenSSH 6.5+ (released 2014), so it works on every modern server. Only use RSA 4096 if you need to connect to legacy servers running pre-2014 OpenSSH:

Terminal window
ssh-keygen -t rsa -b 4096 -C "your-email@example.com"

Then copy the public key to your server:

Terminal window
ssh-copy-id deployer@<server-ip>

If you already have an SSH key, skip the generation step and jump straight to ssh-copy-id.

Test key-based login before proceeding:

Terminal window
ssh deployer@<server-ip>

Typing ssh deployer@203.0.113.42 every time gets old. Add an entry to your local ~/.ssh/config:

Host prod-server
HostName 203.0.113.42
User deployer
IdentityFile ~/.ssh/id_ed25519
Host myapp.com
HostName myapp.com
User deployer
IdentityFile ~/.ssh/id_ed25519

Now you can connect with just:

Terminal window
ssh prod-server
ssh myapp.com

Tip: Use short, memorable Host aliases. The HostName can be either an IP address or a domain name. If you’re managing multiple servers, add an entry for each one — your fingers will thank you.

Terminal window
sudo vim /etc/ssh/sshd_config

Set or uncomment these lines:

PasswordAuthentication no
PermitRootLogin no
PubkeyAuthentication yes
# Rocky: also check /etc/ssh/sshd_config.d/*.conf for overrides
# Ubuntu: also check /etc/ssh/sshd_config.d/50-cloud-init.conf

Cloud images often ship a drop-in that re-enables password auth. Check and fix:

Terminal window
sudo grep -r "PasswordAuthentication" /etc/ssh/sshd_config.d/
Terminal window
sudo systemctl reload sshd
# This MUST fail:
ssh root@<server-ip>
# Permission denied (publickey) ← good
# This MUST work:
ssh deployer@<server-ip>

⚠️ Do not close your current SSH session until you’ve verified a new session works. Open a second terminal for testing.


Rocky uses firewalld by default (not ufw).

Terminal window
# Check status
sudo systemctl status firewalld
# If not running, install and start:
sudo dnf install -y firewalld
sudo systemctl enable --now firewalld
# Default zones
sudo firewall-cmd --get-default-zone # usually 'public'
# Allow SSH (CRITICAL: do this first)
sudo firewall-cmd --permanent --add-service=ssh
# Reload to apply
sudo firewall-cmd --reload
# Verify
sudo firewall-cmd --list-all

Docker bypass warning: Docker manipulates iptables directly, which can bypass both firewalld and ufw rules for published ports. The solution: don’t publish container ports directly. Use a reverse proxy (Step 7) and only expose ports 80/443 on the host.

Terminal window
# Remove old Docker packages if any
sudo dnf remove -y docker docker-client docker-client-latest docker-common \
docker-latest docker-latest-logrotate docker-logrotate docker-engine
# Add Docker repo
sudo dnf config-manager --add-repo https://download.docker.com/linux/rhel/docker-ce.repo
# Install Docker
sudo dnf install -y docker-ce docker-ce-cli containerd.io docker-buildx-plugin docker-compose-plugin
# Start and enable
sudo systemctl enable --now docker
# Add user to docker group
sudo usermod -aG docker deployer
# Verify
docker --version
docker compose version

If dnf config-manager isn’t available:

Terminal window
sudo dnf install -y 'dnf-command(config-manager)'

Log out and back in (or newgrp docker) for the group change to take effect.

We’ll use Docker Compose with a Go guestbook app + PostgreSQL, just like the original.

Create the project directory:

Terminal window
mkdir -p ~/guestbook/db
cd ~/guestbook

Create a secure Postgres password:

Terminal window
echo "your-strong-random-password-here" > db/postgres-password.txt
chmod 600 db/postgres-password.txt
services:
db:
image: postgres:17
restart: always
environment:
POSTGRES_PASSWORD_FILE: /run/secrets/postgres-password
volumes:
- postgres-data:/var/lib/postgresql/data
secrets:
- postgres-password
guestbook:
image: ghcr.io/yourusername/guestbook:prod
restart: always
environment:
DATABASE_URL: postgres://postgres:${POSTGRES_PASSWORD}@db:5432/postgres?sslmode=disable
ports:
- "8080:8080"
depends_on:
- db
secrets:
postgres-password:
file: ./db/postgres-password.txt
volumes:
postgres-data:

Deploy:

Terminal window
export POSTGRES_PASSWORD=$(cat db/postgres-password.txt)
docker compose up -d

Verify:

Terminal window
docker compose ps
curl http://localhost:8080

Don’t expose port 8080 on the host permanently. We’ll remove it after setting up the reverse proxy.


Traefik handles routing, TLS termination, and load balancing, all via Docker labels.

Update compose.yaml:

services:
reverse-proxy:
image: traefik:v3.3
command:
- "--providers.docker=true"
- "--providers.docker.exposedbydefault=false"
- "--entrypoints.web.address=:80"
ports:
- "80:80"
volumes:
- /var/run/docker.sock:/var/run/docker.sock:ro
db:
# ... unchanged
guestbook:
# ... unchanged except:
ports: [] # ← remove the host port mapping
labels:
- "traefik.enable=true"
- "traefik.http.routers.guestbook.rule=Host(`yourdomain.com`)"
# ... secrets and volumes unchanged

Open port 80 on the firewall:

Terminal window
sudo firewall-cmd --permanent --add-service=http
sudo firewall-cmd --reload

Redeploy:

Terminal window
docker compose up -d

Now visit http://yourdomain.com. Traefik routes traffic to the guestbook container.


Step 9: Load Balancing: Run Multiple Instances

Section titled “Step 9: Load Balancing: Run Multiple Instances”

Traefik automatically load-balances across containers with the same service name.

Terminal window
docker compose up -d --scale guestbook=3

To make it permanent, add to compose.yaml:

services:
guestbook:
# ...
deploy:
replicas: 3

Traefik round-robins by default. No extra config needed.


Step 10: HTTPS with Let’s Encrypt (Automatic TLS)

Section titled “Step 10: HTTPS with Let’s Encrypt (Automatic TLS)”

Update Traefik service in compose.yaml:

services:
reverse-proxy:
image: traefik:v3.3
command:
- "--providers.docker=true"
- "--providers.docker.exposedbydefault=false"
- "--entrypoints.web.address=:80"
- "--entrypoints.websecure.address=:443"
- "--certificatesresolvers.letsencrypt.acme.tlschallenge=true"
- "--certificatesresolvers.letsencrypt.acme.email=you@example.com"
- "--certificatesresolvers.letsencrypt.acme.storage=/letsencrypt/acme.json"
ports:
- "80:80"
- "443:443"
volumes:
- /var/run/docker.sock:/var/run/docker.sock:ro
- letsencrypt:/letsencrypt

Update guestbook labels:

services:
guestbook:
labels:
- "traefik.enable=true"
- "traefik.http.routers.guestbook.rule=Host(`yourdomain.com`)"
- "traefik.http.routers.guestbook.entrypoints=websecure"
- "traefik.http.routers.guestbook.tls.certresolver=letsencrypt"
# HTTP → HTTPS redirect
- "traefik.http.routers.guestbook-http.rule=Host(`yourdomain.com`)"
- "traefik.http.routers.guestbook-http.entrypoints=web"
- "traefik.http.middlewares.redirect-to-https.redirectscheme.scheme=https"
- "traefik.http.routers.guestbook-http.middlewares=redirect-to-https"

Open port 443:

Terminal window
sudo firewall-cmd --permanent --add-service=https
sudo firewall-cmd --reload

Redeploy:

Terminal window
docker compose up -d

Traefik automatically obtains and renews Let’s Encrypt certificates. The acme.json file stores them. Keep it safe (600 permissions, handled by Docker volume).


Step 11: Automated Deployments with Watchtower

Section titled “Step 11: Automated Deployments with Watchtower”

Watchtower monitors Docker image registries and updates running containers when new images appear.

Add to compose.yaml:

services:
watchtower:
image: containrrr/watchtower
command:
- "--label-enable" # Only update containers with the label
- "--interval"
- "30" # Check every 30 seconds
- "--rolling-restart" # One container at a time (for multi-replica)
volumes:
- /var/run/docker.sock:/var/run/docker.sock:ro

Add the label to guestbook:

services:
guestbook:
labels:
# ... existing Traefik labels
- "com.centurylinklabs.watchtower.enable=true"

Now when you push a new image to ghcr.io/yourusername/guestbook:prod, Watchtower picks it up within 30 seconds and performs a rolling restart, zero downtime.


Free uptime monitoring options:

  • Uptime Robot: 50 monitors, 5-minute checks, email alerts. Free tier.
  • Better Uptime : 3-minute checks, heartbeat, status page. 10 monitors free.
  • Uptime Kuma: Self-hosted. Run it in Docker on the same VPS or a separate tiny instance.

Set up a monitor for https://yourdomain.com and configure alerting (email, Telegram, Discord, Slack).


The complete, production-ready stack:

services:
reverse-proxy:
image: traefik:v3.3
command:
- "--providers.docker=true"
- "--providers.docker.exposedbydefault=false"
- "--entrypoints.web.address=:80"
- "--entrypoints.websecure.address=:443"
- "--certificatesresolvers.letsencrypt.acme.tlschallenge=true"
- "--certificatesresolvers.letsencrypt.acme.email=you@example.com"
- "--certificatesresolvers.letsencrypt.acme.storage=/letsencrypt/acme.json"
ports:
- "80:80"
- "443:443"
volumes:
- /var/run/docker.sock:/var/run/docker.sock:ro
- letsencrypt:/letsencrypt
db:
image: postgres:17
restart: always
environment:
POSTGRES_PASSWORD_FILE: /run/secrets/postgres-password
volumes:
- postgres-data:/var/lib/postgresql/data
secrets:
- postgres-password
guestbook:
image: ghcr.io/yourusername/guestbook:prod
restart: always
environment:
DATABASE_URL: postgres://postgres:${POSTGRES_PASSWORD}@db:5432/postgres?sslmode=disable
deploy:
replicas: 3
labels:
- "traefik.enable=true"
- "traefik.http.routers.guestbook.rule=Host(`yourdomain.com`)"
- "traefik.http.routers.guestbook.entrypoints=websecure"
- "traefik.http.routers.guestbook.tls.certresolver=letsencrypt"
- "traefik.http.routers.guestbook-http.rule=Host(`yourdomain.com`)"
- "traefik.http.routers.guestbook-http.entrypoints=web"
- "traefik.http.middlewares.redirect-to-https.redirectscheme.scheme=https"
- "traefik.http.routers.guestbook-http.middlewares=redirect-to-https"
- "com.centurylinklabs.watchtower.enable=true"
depends_on:
- db
watchtower:
image: containrrr/watchtower
command:
- "--label-enable"
- "--interval"
- "30"
- "--rolling-restart"
volumes:
- /var/run/docker.sock:/var/run/docker.sock:ro
secrets:
postgres-password:
file: ./db/postgres-password.txt
volumes:
postgres-data:
letsencrypt:

Deploy:

Terminal window
export POSTGRES_PASSWORD=$(cat db/postgres-password.txt)
docker compose up -d

TaskRocky Linux 10Ubuntu 26.04
Package installdnf install -y <pkg>apt install -y <pkg>
Package searchdnf search <pkg>apt search <pkg>
Add repodnf config-manager --add-repo <url>add-apt-repository or manual .list
User createuseradd -m <user>adduser <user>
Sudo groupwheelsudo
Firewallfirewalld (firewall-cmd)ufw
Service mgmtsystemctlsystemctl
SELinuxEnforcing by default (getenforce)AppArmor by default
Logsjournalctl -u <unit>journalctl -u <unit>
Croncrondcron
EPEL (extra pkgs)dnf install -y epel-releaseN/A

If SELinux blocks Docker operations (socket access, volume mounts):

Step 1: Find the blocked path. Run ausearch to see recent SELinux denials:

Terminal window
sudo ausearch -m avc -ts recent

Look for the name= field in the output. Example denial and what to look for:

type=AVC msg=audit(1718123456.789:1234): avc: denied { write } for
pid=5678 comm="dockerd" name="postgres-data" dev="sda1" ino=12345
scontext=system_u:system_r:container_t:s0
tcontext=system_u:object_r:default_t:s0 tclass=dir

The blocked path is in the name= field — here it’s postgres-data. You can also find the full path with:

Terminal window
sudo ausearch -m avc -ts recent | grep -oP 'name="?\K[^"\s]+'

Step 2: Apply the fix. Set the SELinux context for the blocked path(s):

Terminal window
# Replace /path/to/mount with the actual path from ausearch output
sudo semanage fcontext -a -t container_file_t "/path/to/mount(/.*)?"
sudo restorecon -Rv /path/to/mount

For Docker named volumes, the path is typically under /var/lib/docker/volumes/<volume-name>/. For bind mounts, use the host path from your docker-compose.yml volumes: section.

Usually Docker and SELinux coexist fine on Rocky 10 with default policies. Only intervene if you see Permission denied in container logs despite correct file permissions.


  • Non-root user created with sudo/wheel
  • SSH: PasswordAuthentication no, PermitRootLogin no
  • Firewall: only 22, 80, 443 open
  • Docker installed, user in docker group
  • App running as docker compose up -d
  • Traefik reverse proxy routing traffic
  • HTTPS active with Let’s Encrypt auto-renewal
  • Multiple app replicas running
  • Watchtower handling rolling updates
  • Uptime monitor configured with alerts

Setting up a production-ready VPS is less intimidating than it looks. Traefik + Watchtower + Docker Compose gives you 90% of what a PaaS offers : with more control, predictable billing, and no vendor lock-in. Both Rocky Linux 10 and Ubuntu 26.04 make excellent foundations; pick the ecosystem you’re most comfortable with.

OpenCode Workflow TL;DR - From One Giant Setup to Daily System

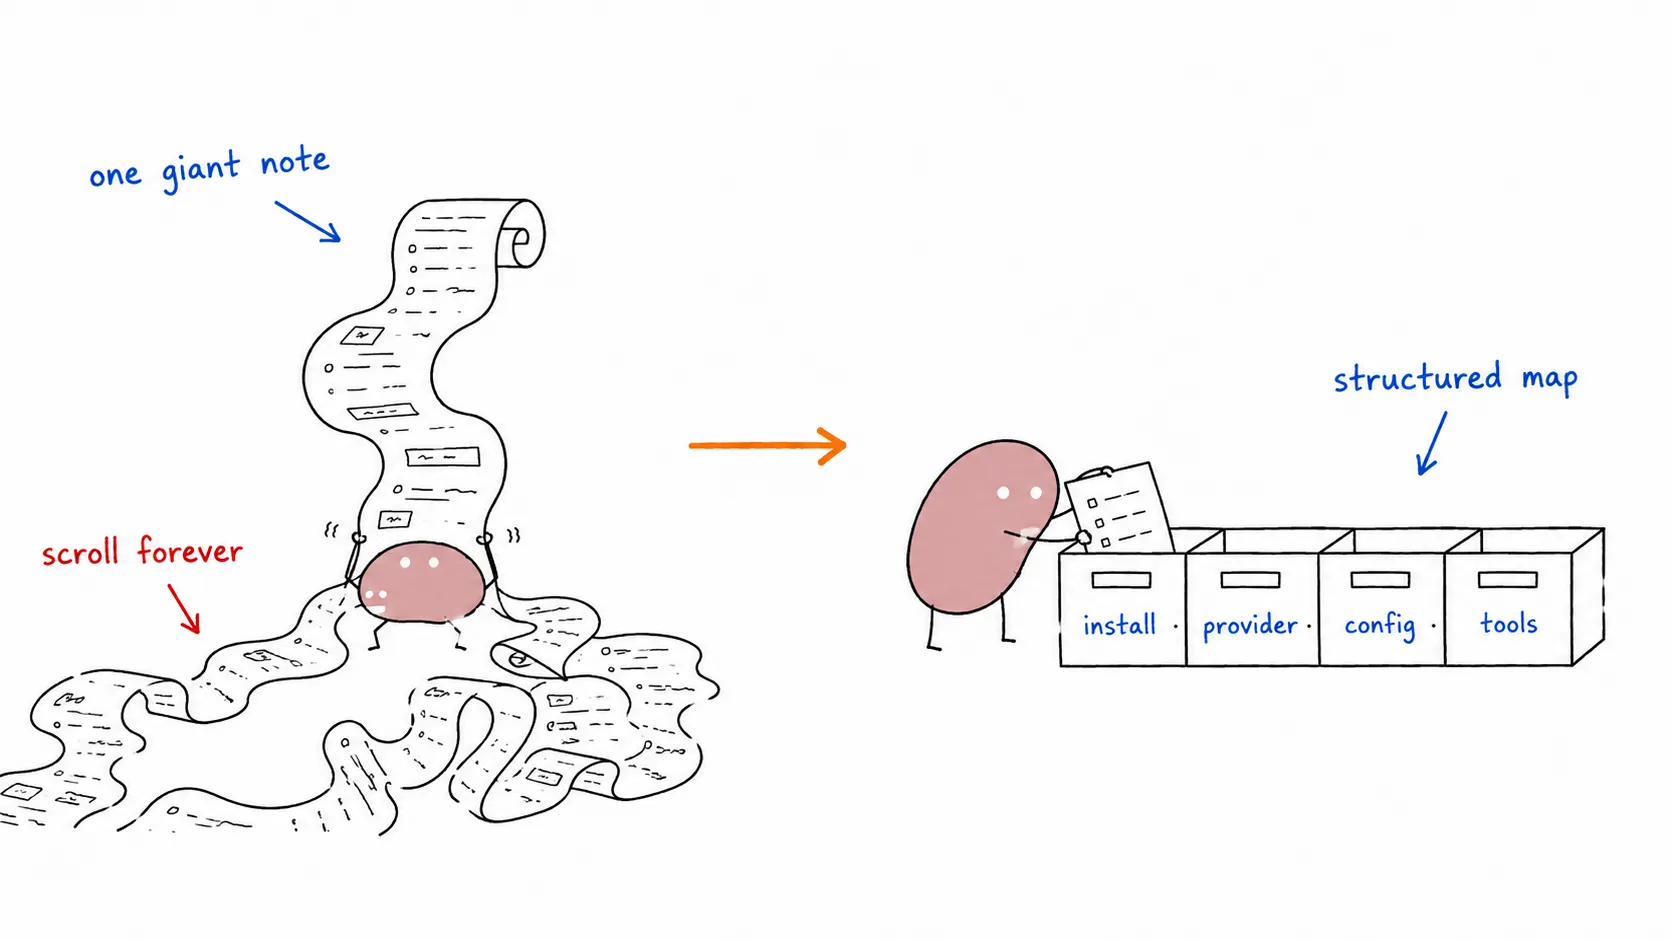
Tomochi filing one giant messy scroll into neat labeled drawers

I used to keep everything in one giant setup note, but in real life it was hard to use as a daily reference. Every time I needed one specific thing (provider setup, MCP, model choice, troubleshooting), I had to scroll through a giant wall of text.

So I turned it into a structured workflow map in the OpenCode Overview: install, provider strategy, configuration, tools, operation mode, and troubleshooting.

Instead of one massive guide, it is now split into practical pages:

The main goal was simple: make this usable when actually working, not just “complete on paper.”

The guides section has been trimmed and expanded:

  • Narrative content (provider strategy philosophy, agent personalities, tool philosophy) has been distilled — the guides now focus on concrete HOWTO steps
  • ECC — Everything Claude Code: 64 agents, 262 skills, 84 commands. Production-ready agent harness across Claude Code, OpenCode, Codex, and more
  • Caveman — Token compression that cuts ~75% output tokens with zero accuracy loss. One-line install, works across 30+ agents
  1. Pick provider path first (opencode, opencode-go, or cliproxyapi)
  2. Lock config once (providers, models, variants, MCP)
  3. Operate with roles (planner, worker, reviewer)
  4. Use focused references for model decisions and troubleshooting

That alone reduced context switching a lot.

One key clarification in the docs:

  • cliproxyapi is not the only path.
  • For this repo, cliproxyapi is mainly useful when I want multiple Codex-capable accounts behind one stable OpenAI-compatible endpoint, with retry/routing behavior centralized.

If I don’t need account pooling/load balancing, direct provider paths stay simpler.

Besides MCP tools and agent harnesses, two local CLI tools are worth installing:

Terminal window
brew install ripgrep ast-grep
  • rg for fast text search
  • sg for syntax-aware structural search

For advanced workflows, ECC adds 64 specialized subagents (planner, architect, tdd-guide, code-reviewer, security-reviewer) and Caveman cuts token costs by ~75% with a one-line install.

Another important thing I had to document clearly:

  • Project branding now points to oh-my-openagent
  • But many practical examples still use legacy names like oh-my-opencode in plugin/config keys

So the docs explain both without pretending one side doesn’t exist.

This wasn’t just a docs cleanup. It changed how I work with OpenCode day to day:

  • faster onboarding
  • clearer operational flow
  • less re-reading giant setup notes
  • better model/provider decisions during real tasks

If you’re still running from one giant setup markdown, split it into workflow pages. It’s one of those “small docs changes” that gives a big productivity return.